Table Of Contents
Are you interested in learning more about plastering and the tools used in this essential construction technique?
We will explore the different types of plastering, including traditional, gypsum, cement, lime, and polymer-modified plastering.
Discover the essential tools needed for plastering such as trowels, hawks, darbies, and more, along with optional tools that can make your plastering project easier!

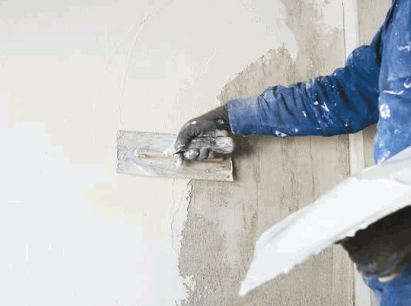
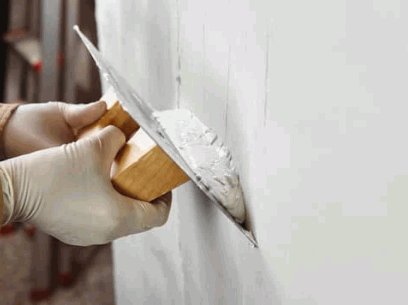
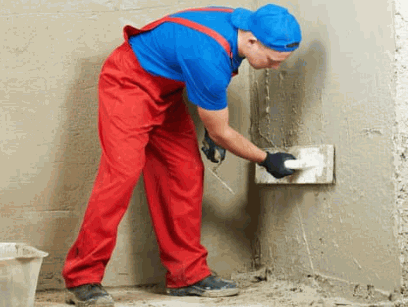
Plastering is a skilled craft that involves applying a smooth, durable finish to walls and ceilings using materials such as plaster and tools like trowels and floats.
Plastering is an ancient art that dates back to civilizations like ancient Egypt and Greece, where it was used not only for aesthetic purposes but also for practical reasons.
One of the primary purposes of plastering
is to protect walls and ceilings from moisture damage, cracks, and other wear and tear. It provides a smooth surface for painting or wallpapering and contributes to the overall aesthetic appeal of a space. Various techniques such as skim coating, floating, and stucco application are employed in the plastering process, each serving a specific purpose in achieving the desired finish. Plastering plays a significant role in the construction industry, ensuring the structural integrity and visual appeal of buildings.
Gain insights: Can You Paint New Plaster
There are several types of plastering methods, including traditional, gypsum, cement, lime, and polymer-modified plastering, each with unique characteristics and applications.
Traditional plastering, also known as mud plastering, is the oldest form of plastering dating back to ancient civilizations. It involves using a mixture of clay, sand, and straw that is applied to the walls in layers. This type of plastering is known for its durability but requires skill and experience to apply correctly.
Gypsum plastering, on the other hand, is a modern method that uses gypsum powder and water to create a smooth finish. It is commonly used in indoor spaces due to its quick drying time and fire-resistant properties.
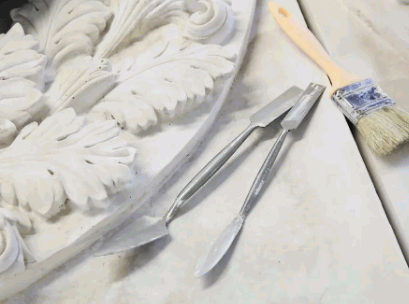
Traditional plastering is a time-honored technique used for creating smooth and durable surfaces on walls and ceilings, often involving hand tools like hammers and spackle knives.
This method typically begins with applying a base coat of lime plaster to the surface, followed by a finish coat for a polished appearance. The materials used in traditional plastering often include sand, water, and lime, which are mixed to the desired consistency. This process allows for intricate detailing and custom designs to be added to the surface, enhancing the overall aesthetic of the space. Common applications of traditional plastering can be seen in historical buildings, churches, and traditional homes where the craftsmanship and durability of plaster are highly valued.
Gypsum plastering is a popular method that utilizes gypsum-based materials mixed with water to create a smooth finish, requiring tools like buckets, utility knives, and paddle mixers for application.
Once the gypsum plaster mix is prepared, it is applied to walls, ceilings, and other surfaces to provide a durable and aesthetic coating. The material sets quickly, making it a time-efficient option for projects. Plus its quick setting time, gypsum plaster offers excellent fire resistance, sound insulation, and moisture control properties, making it ideal for use in buildings where these features are essential. Interior spaces such as homes, offices, and commercial establishments benefit greatly from the versatility and quality finish that gypsum plastering provides.
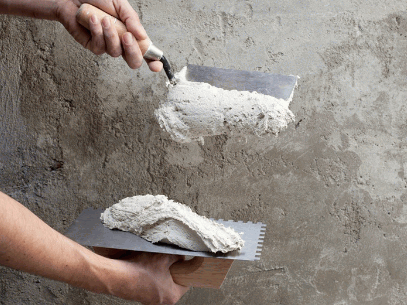
Cement plastering involves the application of a cement-based mix to create a strong, durable surface, utilizing tools like bucket trowels, hawks, and traditional trowels for precise finishing.
One of the key advantages of using cement plaster is its high durability and strength, making it an ideal choice for both interior and exterior surfaces. The process begins with preparing the surface by cleaning it thoroughly and applying a bonding agent to ensure proper adhesion.
Once the surface is ready, the cement mix is prepared by mixing cement, sand, and water in the correct ratios to achieve the desired consistency. The mix is then applied using a hawk and trowel, with skilled workers ensuring an even and smooth finish.
Efficiency is crucial in cement plastering, and using the right tools such as corner trowels, float blades, and darbies can significantly improve the application process, resulting in a professional-looking finish.
Lime plastering involves the use of lime-based materials to create a breathable and flexible finish, often requiring specialized tools like window trowels, corner trowels, and mortar stands.
One of the key characteristics of lime plastering is its ability to regulate moisture levels within a building, preventing issues such as dampness and mold growth.
The use of lime plaster is a preferred choice for historic buildings due to its compatibility with traditional construction methods and its natural aesthetic appeal that enhances the authenticity of the structure.
Tools like window trowels and corner trowels play a crucial role in achieving a smooth and uniform finish on curved surfaces and corners, ensuring precision in the application of lime plaster.
Polymer-modified plastering involves the use of polymer-enhanced materials for increased strength and flexibility, often requiring tools like sponge/sandpaper, plasterers' floats, jointing knives, and scarifiers for optimal application.
One of the key advantages of using polymer-modified plastering techniques is the ability to create a more durable and resilient finish compared to traditional methods. The polymer additives improve adhesion, reduce cracking, and enhance overall performance over time, making the plaster more resistant to weathering and wear. This results in a longer-lasting and low-maintenance surface, ideal for both indoor and outdoor applications.
The essential tools used in plastering include trowels, hawks, darbies, floats, jointing knives, brushes, buckets, mixing paddles, machines, and levels, each serving a specific purpose in the plastering process.
Trowels, for instance, are used for applying and smoothing plaster onto surfaces with precision, while hawks provide a convenient platform for holding the plaster mixture. Darbies are essential for achieving a straight and smooth finish, ensuring an even distribution of plaster. Floats, on the other hand, help in compacting and smoothing the plaster surface, creating an even texture. Jointing knives aid in shaping and detailing corners and edges, enhancing the overall aesthetics of the plastered area.
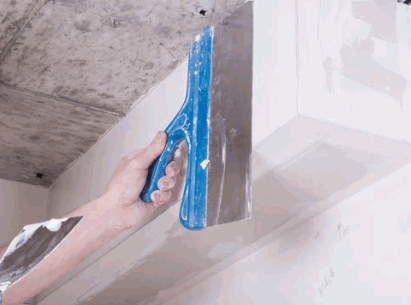
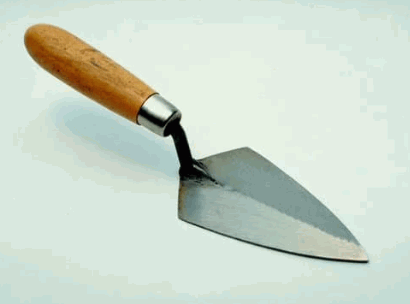
A trowel is a handheld tool with a flat, pointed blade used for spreading and smoothing plaster or other materials on surfaces, making it essential for achieving a uniform finish in plastering projects.
There are various types of trowels available, each designed for specific plastering techniques. The most common types include pointing trowels, margin trowels, and gauging trowels, each with their unique blade shapes and sizes.
Depending on the project requirements, selecting the right trowel size and type is crucial for achieving a seamless and professional finish.
A plasterer's hawk is a flat, square board with a handle underneath that allows plasterers to hold and transport plaster conveniently while working on walls or ceilings, providing a portable platform for easy access to the plaster.
Plasterers use the hawk to scoop up plaster from a larger bucket or tray, placing it on the board for quick application. The design of the hawk ensures that the plaster remains flat and accessible, preventing it from drying out too quickly. This tool enhances efficiency by eliminating the need to constantly return to the main source of plaster. The flat surface of the hawk enables precise spreading and smoothing of the plaster onto the surface being worked on, resulting in a more even and professional finish.

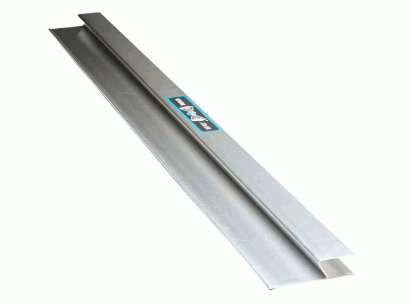
A plasterer's darby is a straight-edged tool used to level and straighten plaster or render surfaces, ensuring a smooth and even finish across walls or ceilings in plastering projects.
When applying plaster or render, it's crucial to achieve a flat and uniform surface for a professional result. This is where the plasterer's darby comes into play. By running the darby over the freshly applied material, excess material is scraped off, while simultaneously leveling the surface. This technique helps in removing imperfections, creating a seamless finish. The straight edge of the darby ensures that the surface is nice and level, ready for further finishing touches. Its use is essential for achieving that desired smoothness and consistency in plastering work.
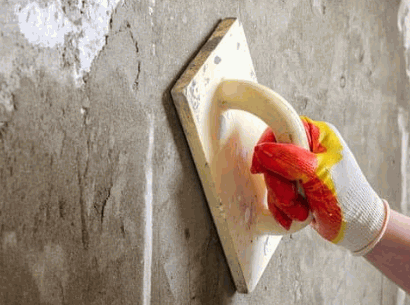
A float is a rectangular tool with a flat base and handle, used for smoothing and finishing plaster or stucco surfaces by pressing and leveling the material evenly, contributing to a polished and professional look in plastering applications.
Floats come in various sizes and shapes to cater to different needs and surface areas. A wooden float is commonly used for initial applications, while a steel float provides a smoother finish. Hawk is used to hold the plaster or stucco mix for easy access during application. Mastering the technique of floating is essential for achieving a seamless and flawless surface, avoiding uneven patches or rough textures in the final result.
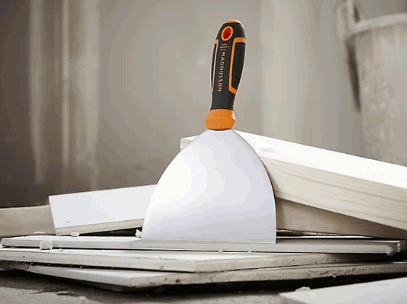
A jointing knife is a flexible blade tool used for applying and smoothing joint compound or plaster along joints, corners, or edges, allowing for precise and clean finishes in plastering and drywall applications.
One of the primary functions of a jointing knife is to help achieve seamless joints and polished edges by spreading the compound evenly and smoothing it out for a professional-looking finish. The flexibility of the blade makes it easy to work with various angles and curves, ensuring that every joint is properly filled and leveled. This tool plays a crucial role in ensuring that the final surface is smooth and ready for painting or wallpapering, saving time and effort in the overall plastering process.
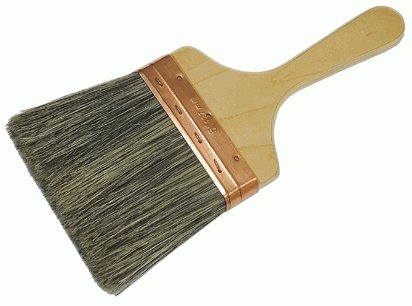
A plasterer's brush is a specialized tool with soft bristles used for smoothing and blending plaster or stucco surfaces, allowing for delicate and precise finishing touches in plastering projects.
When applying plaster or stucco to walls or ceilings, the plasterer's brush comes in handy by providing the perfect tool for achieving a seamless and uniform texture. The soft bristles enable a smooth application, ensuring that the surface is free from any unevenness or imperfections. This brush plays a crucial role in refining the plaster surface, allowing the plasterer to create unique and visually appealing textures that enhance the overall aesthetics of the space.
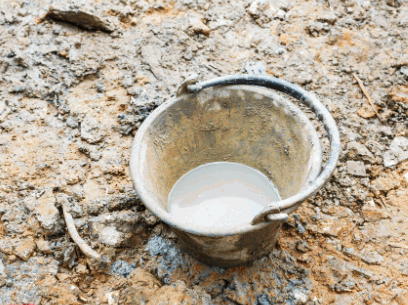
A bucket is a versatile container used for mixing, carrying, and storing plaster, water, or other materials in plastering projects, providing a convenient and portable solution for preparing and transporting materials on-site.
For plastering tasks, having buckets on hand is essential for ensuring a smooth workflow. These unassuming containers play a crucial role in material management, allowing workers to neatly organize different components required for the job. Buckets contribute to the efficiency of the project by providing a designated space for mixing the plaster to the required consistency. With their sturdy handles and durable construction, buckets make it easier to move materials around the job site, minimizing disruptions and delays, and enabling a more streamlined plastering process.
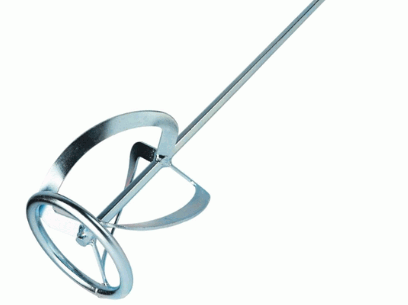
A mixing paddle is a specialized tool attached to a drill or mixer for blending plaster, mortar, or other construction materials quickly and efficiently, ensuring uniform consistency and smooth application in plastering projects.
When using a mixing paddle, the rotating motion created by the attached drill or mixer helps in breaking down lumps and evenly distributing the ingredients, resulting in a homogenous mixture. This process not only saves time by speeding up the blending process but also ensures that the materials are properly mixed for optimal performance on the project. Consistency in the mixture is crucial for achieving a professional finish, and reducing the risk of cracks, unevenness, or other application issues.
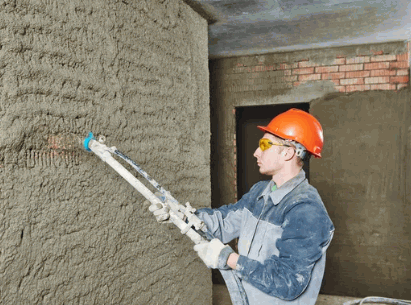
A plastering machine is a mechanical device that automates the process of applying plaster or render to surfaces, increasing efficiency and productivity in large-scale plastering projects by reducing manual labor and ensuring consistent results.
These machines are equipped with advanced technology, such as adjustable nozzle settings, which allow for precise application of plaster on various surfaces.
The use of plastering machines significantly speeds up the construction process, enabling builders to complete projects in a shorter timeframe while maintaining high-quality standards.
Plastering machines are versatile tools that can handle different types of plasters and finishes, offering flexibility in construction projects of varying complexities.
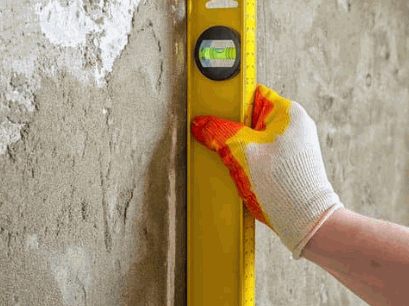
A plastering level is a tool used to check and maintain the horizontal and vertical alignment of plastered surfaces, ensuring uniform thickness and smooth finishes in plastering applications, and aiding in achieving professional results.
These levels are essential in the construction industry, especially for projects that demand precision and high-quality finishes. By using a plastering level correctly, contractors can ensure that walls and ceilings are perfectly straight and level, without any bumps or imperfections.
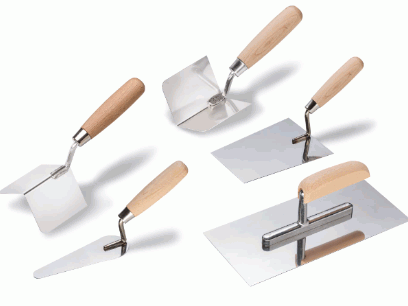
Plus essential tools, optional tools like trowel sets, corner trowels, feather edges, rasps, and straightedges are used in plastering projects to enhance precision, detailing, and specialized finishes based on specific requirements.
One of the versatile optional tools used in plastering projects is the trowel set, which includes different types of trowels for various purposes such as smoothing, shaping, and spreading plaster efficiently. Corner trowels are specifically designed to create crisp, sharp corners with ease, ensuring clean and professional-looking edges. Feather edges help in feathering out plaster edges seamlessly, while rasps are handy for refining and shaping rough surfaces before the final finish. Straightedges play a crucial role in achieving flat and even surfaces by guiding the plaster application uniformly across the area.
A plastering trowel set includes a variety of trowels with different shapes and sizes, offering versatility and precision in applying, shaping, and finishing plaster on surfaces in complex or detailed areas of a project.
These sets typically consist of pointed trowels for intricate detailing, margin trowels for tight corners, and gauging trowels for mixing and measuring the plaster mixture accurately. Additionally, trowel sets may include finishing trowels for achieving a smooth surface and plastering hawks for convenient plaster transportation. The specialized designs cater to specific needs in plastering work, like textured finishes or fine detailing on ornate surfaces.
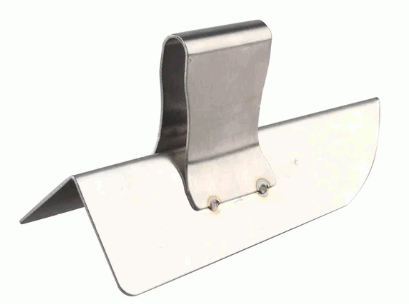
A plastering corner trowel is a specialized tool designed to facilitate the precise application and smoothing of plaster in tight corners, edges, or junctions, ensuring seamless and professional finishes in challenging areas of a project.
This tool plays a crucial role in achieving sharp angles and clean lines, ensuring that corners are perfectly formed without any plaster buildup. Plastering corner trowels are particularly useful when working on intricate work such as coving, and skirting, or when finishing off around window frames. They help in keeping the plaster level and consistent within corners, preventing any unevenness or rough edges.
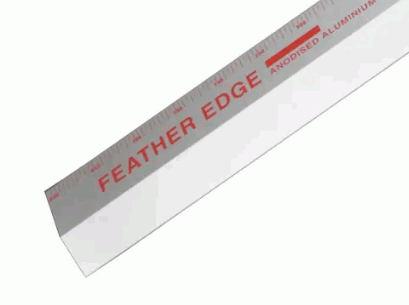
A plastering feather edge is a thin, straight tool used for creating sharp and clean edges on plastered surfaces, allowing for precise shaping, leveling, and smoothing of edges in plastering applications.
It is an essential instrument in the toolkit of skilled plasterers, enabling them to achieve professional-quality finishes on walls and ceilings. When using a plastering feather edge, craftsmen can ensure that corners and edges are perfectly straight and uniform, giving a polished look to the overall surface. This tool is particularly handy for achieving crisp corners and defined edges, which are crucial for a visually appealing plastered surface.
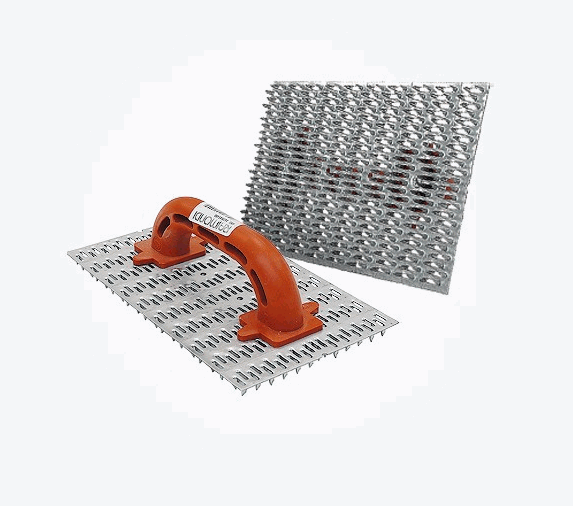
A plastering rasp is a rough, abrasive tool used for shaping, sculpting, or texturing plaster surfaces by removing excess material, smoothing rough areas, or adding texture for decorative effects in plastering designs.
Plastering rasps are versatile instruments commonly utilized by skilled craftsmen to achieve intricate and customized plaster finishes. These rasps come in various shapes and sizes, offering a wide range of possibilities for creating unique textures and patterns. Using a plastering rasp allows artisans to unleash their creativity, transforming plain plaster surfaces into works of art with depth and visual interest. The precision and control provided by the rasp enable artisans to achieve smooth, seamless finishes or add interesting contours and details to their plaster creations.
A plastering straightedge is a long, flat tool used for checking and leveling plaster surfaces, ensuring uniform thickness, straight lines, and smooth finishes in large-scale plastering projects for consistent and professional results.
This essential tool is meticulously designed to provide accuracy and efficiency throughout the plastering process. By utilizing a plastering straightedge, craftsmen can verify the flatness of walls and ceilings, guaranteeing optimal adhesion of the plaster for a flawless application.
The straightedge aids in identifying imperfections and deviations in the surface, allowing for timely corrections to maintain the desired quality standards. Its versatility enables contractors to achieve a seamless transition between different sections, ensuring a cohesive and polished outcome.
Table Of Contents
Are you considering adding a touch of elegance and safety to your pool area with glass pool fencing? In this article, we'll explore the benefits of glass pool fencing, including its aesthetic appeal, safety features, durability, and low maintenance.
We'll also discuss the different types of glass pool fencing available, such as frameless, semi-frameless, and framed options. We'll dive into the cost of glass pool fencing, factors affecting pricing, average costs, and maintenance expenses.
Stay tuned to learn how to choose the right glass pool fencing for your budget and whether DIY installation can save you money.
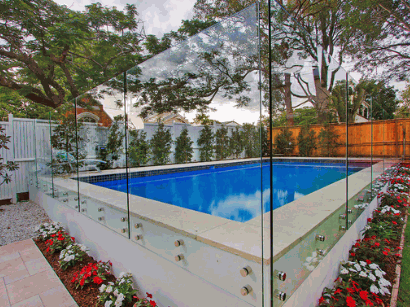
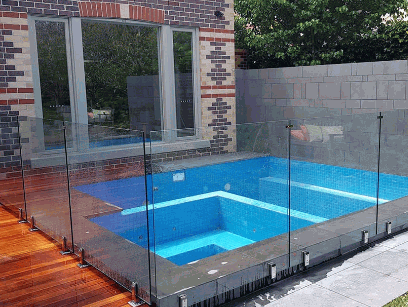
Glass pool fencing is a transparent and stylish barrier designed to enhance the safety and aesthetics of residential or commercial pools, meeting strict safety regulations and providing a secure boundary around the pool area.
It offers an unobstructed view of the pool area while effectively preventing unauthorized access, making it an ideal choice for individuals seeking a modern and sleek fencing solution. Glass pool fencing not only enhances the visual appeal of the pool but also ensures the safety of children and pets by creating a secure perimeter.
Compliance with existing safety standards and regulations is crucial to prevent accidents and maintain a safe environment. Professional installation of glass pool fencing is recommended to ensure proper alignment, stability, and durability, enhancing the overall security measures.
Check out: What Is Composite Fencing

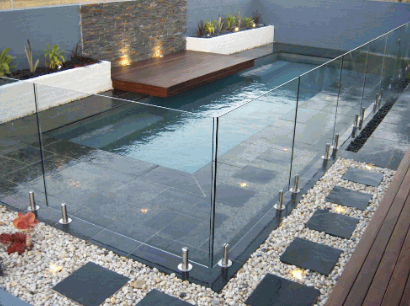
Glass pool fencing offers a blend of modern aesthetics, safety, durability, and low maintenance requirements, making it a popular choice for enhancing the overall appeal and security of pool areas.
The transparency of glass fencing creates an unobtrusive barrier that allows for uninterrupted views of the surrounding landscape, maintaining a spacious and open feeling around the pool area.
Safety features such as tempered glass panels and self-closing gates provide peace of mind for families with children or pets.
The durability of glass fencing ensures long-term protection against harsh weather conditions and wear, without the need for frequent repairs or replacements.
Its smooth surface makes cleaning a breeze, requiring only occasional wiping down to maintain its pristine appearance.
One of the key advantages of glass pool fencing is its ability to provide a contemporary and sleek look to the pool area, offering an unobstructed view of the surroundings and creating a visually appealing space.
This transparency of glass fencing not only adds a sense of openness and lightness but also blends seamlessly with various architectural styles. The clean lines and minimalistic structure of glass panels contribute to a modern aesthetic, making the pool area appear more spacious and stylish. By allowing natural light to penetrate through, glass fencing can enhance the colors of the pool water, surrounding landscapes, and outdoor decor elements, elevating the overall visual charm of the space.
Glass pool fencing prioritizes safety by providing a secure barrier around the pool, meeting strict regulations, and incorporating advanced security features to prevent accidents and ensure a safe pool environment.
The tempered glass panels used in these fences are toughened to enhance durability and shatter resistance, adding an extra layer of protection. In addition, the smooth, frameless design not only enhances the aesthetic appeal of the pool area but also eliminates potential climbing points for children, further enhancing safety measures. The self-closing and self-latching gates, equipped with child-proof locks, ensure that the entry points to the pool are always secure, meeting the highest safety standards.
Glass pool fencing is known for its durability and longevity, with high-quality materials and weather-resistant properties that ensure minimal maintenance and long-term performance in various weather conditions.
The robust nature of glass pool fencing makes it a popular choice for pool owners looking for a stylish yet long-lasting solution. Unlike other fencing materials, such as wood or metal, glass requires little upkeep to maintain its pristine appearance. It is resistant to rust, corrosion, and fading, ensuring that it retains its clarity and structural integrity over many years. This low-maintenance aspect of glass fencing not only saves time and effort for homeowners but also provides a lasting investment that adds value to the property.
Glass pool fencing requires minimal maintenance due to its easy-to-clean surface and weather-resistant properties, reducing the need for frequent upkeep while retaining its aesthetic appeal and functionality.
Dirt and grime can be easily wiped off the smooth glass panels using mild detergent and water, keeping the fencing looking pristine with minimal effort. The weather-resistant nature of the glass ensures that it can withstand harsh climatic conditions without deteriorating, making it a durable choice for outdoor spaces. These low maintenance requirements not only contribute to the longevity of the glass pool fencing but also help enhance the overall visual appeal of the pool area, creating a sleek and modern look.
There are several types of glass pool fencing available, including frameless, semi-frameless, and framed options, each offering unique design characteristics and installation requirements to suit different preferences and budgets.
Frameless glass pool fencing is a popular choice for those seeking a seamless and unobstructed view of their pool area, providing a modern and elegant aesthetic. This type of fencing typically utilizes thicker glass panels that are installed using spigots or channel fixings, creating a sleek and minimalist look.
On the other hand, semi-frameless glass fencing combines the benefits of both frameless and framed styles, incorporating some framing elements for added sturdiness while still maintaining a contemporary appeal.
Framed glass pool fencing, with its visible metal or timber frames surrounding the glass panels, offers a more traditional and cost-effective option that can blend well with various architectural styles.
Frameless glass pool fencing offers a seamless and transparent barrier around the pool, providing a modern and customizable design that enhances the visual appeal and openness of the pool area.
Its transparency allows for unobstructed views of the pool, creating a sense of space and elegance. The customization options in frameless glass pool fencing enable homeowners to choose the perfect style and dimensions that suit their outdoor space seamlessly. This type of fencing blends harmoniously with various architectural styles, making it a versatile choice for those seeking a sleek and contemporary look. The sleek lines and clean edges of frameless glass fencing add a touch of sophistication while maintaining safety and security around the pool area.
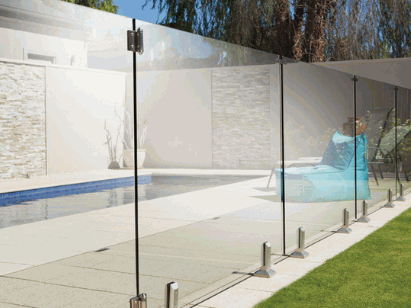
Semi-frameless glass pool fencing combines style and security by featuring a sleek design with fewer posts, offering a balance between aesthetics and safety to create an elegant pool enclosure.
The transparent panels of semi-frameless glass fencing provide an unobstructed view of the pool area, enhancing the overall visual appeal of the space. The minimalistic structure of this type of fencing creates a modern and sophisticated look that complements various architectural styles.
In addition to its stylish appearance, the tempered glass panels used in semi-frameless fencing are highly durable and provide a secure barrier around the pool, ensuring the safety of both children and pets. The combination of these design elements makes semi-frameless glass pool fencing a popular choice for homeowners looking to enhance the beauty and security of their outdoor living spaces.

Framed glass pool fencing provides a cost-effective solution that utilizes sturdy frames and glass panels, offering a durable and budget-friendly option for property owners seeking a balance between affordability and functionality.
The use of materials such as aluminum or stainless steel in the frames ensures strength and longevity, making it a sensible choice for those looking to invest in a reliable pool fencing solution without breaking the bank. This type of fencing not only enhances the aesthetic appeal of the pool area but also provides a secure barrier for families with children or pets, adding an extra layer of safety without compromising on style.

The cost of glass pool fencing varies depending on factors such as materials, installation, customization, and panel sizes, with average prices ranging from a few hundred to several thousand dollars, making it essential to obtain accurate estimates and compare quotes from different contractors.
Factors that can influence the pricing of glass pool fencing include the type of glass used, the complexity of the design, additional features like gates or self-closing mechanisms, and whether the installation requires any special tools or techniques.
It's crucial to get a detailed breakdown of costs to avoid any unexpected expenses later on. By obtaining multiple quotes, you can not only ensure that you find a fencing solution that fits your budget but also potentially negotiate for better deals or discounts with different providers.

Several factors impact the cost of glass pool fencing, including the type of glass, customization options, gate features, installation complexity, and any additional enhancements or security measures required for the specific property.
Ultimately, the cost of glass pool fencing is a result of balancing these variables to suit both budget and design preferences.
In addition to the initial cost of glass pool fencing, property owners should consider budgeting for permits, ongoing maintenance, cleaning supplies, repairs, and any landscaping enhancements needed to complement the fencing and ensure its long-term durability.
Permits are crucial as they regulate the installation of the fencing and may be required by local authorities. Without the proper permits, property owners could face fines or delays in their projects.
When it comes to maintenance, regular cleaning and upkeep are necessary to prevent issues like glass deterioration. Repair costs should also be factored in, as accidents or wear and tear may occur.
Landscaping improvements around the fencing can enhance the overall aesthetic appeal of the area and contribute to a cohesive design.
The maintenance costs for glass pool fencing typically involve routine cleaning with mild detergent and water, occasional inspections for damage or wear, and potential repairs covered under warranty agreements, ensuring that the fencing retains its quality and appearance over time.
Regular cleaning of the glass panels is essential to prevent the build-up of dirt and grime, which can impact both the aesthetics and structural integrity of the fencing.
Homeowners should schedule periodic inspections to check for any chips, cracks, or loose fittings that may arise. These inspections not only ensure the safety of the pool area but also help in identifying any issues that can be addressed under the warranty.
Adhering to these maintenance practices not only extends the lifespan of the glass pool fencing but also safeguards the investment made in enhancing the property's appeal.
When selecting glass pool fencing within a specific budget, consider factors such as material quality, customization options, installation costs, and warranty coverage, ensuring that the chosen fencing meets both aesthetic preferences and financial constraints.
It is essential to strike a balance between quality and cost-effectiveness. Opt for durable glass panels that offer a blend of safety and elegance without exceeding your budgetary limits. Explore various customization features like frameless designs or tinted glass that can enhance the overall appearance of your pool area. Inquire about installation expenses upfront to avoid any unexpected charges. Don't overlook the importance of warranty benefits, as they provide added peace of mind regarding the longevity and maintenance of your glass pool fencing.
While DIY installation of glass pool fencing may seem cost-effective initially, it can pose safety risks, installation challenges, and potential compliance issues with local regulations, making it advisable to enlist the expertise of professional contractors for a secure and compliant installation process.
When considering DIY projects, especially those involving safety features like pool fencing, one must take into account the specialized skills and tools required for proper installation.
Glass pool fencing, in particular, demands precision and knowledge to ensure it meets safety standards and complies with local codes.
Without the expertise of professional contractors, there is a higher likelihood of installation errors, which could compromise the effectiveness of the fencing and pose risks to users.
Investing in professional installation not only provides peace of mind but also adds value to your property by ensuring a secure and aesthetically pleasing pool area.
Table Of Contents
Are you considering installing a new fence around your property but unsure of which material to choose? Composite fencing may be the perfect option for you. In this article, we will explore what composite fencing is, the materials used in its construction, the numerous benefits it offers, the installation process, and how it compares to other fencing materials such as wood, vinyl, and metal. We will also discuss the cost considerations associated with composite fencing. Whether you are looking for durability, low maintenance, or eco-friendliness, composite fencing may be the ideal choice for your property.
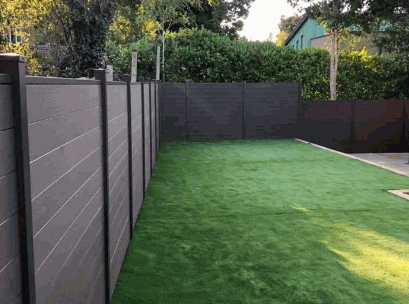
Composite fencing is a sustainable and eco-friendly alternative to traditional wood fencing materials.
It is designed to mimic the look and feel of natural wood but with the added benefits of being extremely durable and resistant to rotting, warping, and insect damage. By utilizing recycled materials, composite fencing helps reduce the demand for virgin timber and minimizes the impact on forests.
The low maintenance requirements of composite fencing make it a practical choice for homeowners looking to enhance their property with a long-lasting and environmentally conscious fencing solution.
Composite fencing utilizes a blend of composite wood and recycled materials to create durable fencing panels and structures.
These innovative fencing materials often consist of a mixture of wood fibers, plastic, and sometimes even bamboo, all of which are sustainable resources. The recycled components, such as reclaimed wood fibers and plastic, are combined with binding agents to produce strong and weather-resistant composite boards. Through advanced manufacturing techniques, these composite boards can be molded and textured to mimic the look and feel of natural wood, offering a more environmentally friendly alternative to traditional wood fencing. The result is a sturdy and long-lasting fencing solution that requires minimal maintenance and contributes to a greener planet.
Composite fencing offers a range of benefits, including exceptional durability, low maintenance requirements, eco-friendly attributes, and a wide selection of styles and colors.
The durability of composite fencing makes it a long-lasting investment for homeowners, as it is resistant to rotting, warping, and insect damage. Its eco-conscious design is appealing to those seeking sustainable options, as it is often made from recycled materials. Its aesthetic versatility allows for customization to complement various architectural styles and landscaping designs, enhancing the overall look of a property. With its low-maintenance nature, composite fencing saves both time and money for property owners, requiring minimal upkeep while maintaining its visual appeal.

Composite fencing is renowned for its exceptional durability, weather-resistant properties, and long-lasting construction that ensures enduring quality.
Its resilience to various weather conditions makes it a popular choice for outdoor use, able to withstand harsh sunlight, heavy rain, and even snow without warping or rotting. The composite construction techniques used in manufacturing these fences contribute to their remarkable longevity, as they are designed to resist fading, cracking, and peeling over time. This long-term structural integrity helps maintain the fence's appearance and functionality, providing homeowners with a reliable and low-maintenance fencing solution for years to come.
One of the key benefits of composite fencing is its low maintenance requirements, thanks to the durable nature of composite materials that require minimal upkeep for long-lasting performance.
This makes composite fencing an ideal choice for homeowners looking to add aesthetic appeal to their property without the hassle of frequent maintenance.
Unlike traditional wood fencing, composite fencing does not require staining, painting, or sealing to keep it looking pristine. Regular cleaning with mild soap and water is usually all that's needed to maintain its appearance, saving both time and money in the long run.
The longevity of composite materials ensures that your fence will remain structurally sound and visually appealing for many years to come.
Composite fencing stands out as an eco-friendly fencing option due to its sustainable manufacturing processes, use of recycled materials, and minimal environmental impact compared to traditional fencing materials.
By utilizing recycled components such as plastic and wood fibers, composite fencing reduces the demand for natural resources. The production of composite fencing involves innovative manufacturing techniques that significantly decrease energy consumption and emissions, contributing to a lower carbon footprint. The durability and longevity of composite fencing contribute to its sustainability by reducing the need for frequent replacements, thus further reducing waste in landfills. These aspects showcase how composite fencing exemplifies a greener alternative in the fencing industry.
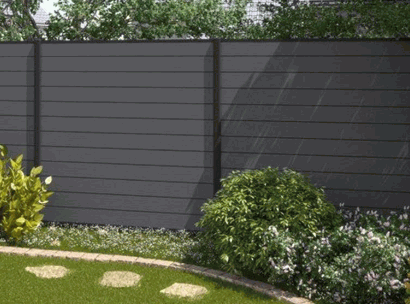
Composite fencing offers a diverse range of styles and colors, allowing homeowners to choose contemporary designs that perfectly complement their outdoor spaces and preferences.
With modern composite fencing options, individuals can explore sleek and clean lines for a sophisticated look or opt for more intricate patterns for added visual interest. The customization possibilities in composite fencing are endless, enabling one to create a unique and personalized outdoor oasis.
From earthy tones like brown and grey to vibrant hues like red and blue, the array of colors offered in composite fencing opens up a world of possibilities for creating a modern and stylish outdoor environment.
The installation process of composite fencing involves setting up fence posts, installing panels, and adding finishing touches with the help of specialized composite hardware for ease of assembly.
Prior to installing composite fencing, thorough preparation is essential, including assessing the layout, dimensions, and design considerations to ensure a successful installation process.
Setting sturdy fence posts is a crucial step in the installation of composite fencing, leveraging advanced composite technology for secure and long-lasting post placements.
Using composite materials for fence posts offers numerous benefits, such as resistance to rot, decay, and insect damage, ensuring that the posts maintain their structural integrity over time. The process of setting composite fence posts involves digging deep holes, inserting the posts, and securing them with concrete or gravel for added stability.
Composite technology also provides the flexibility to customize the posts to desired shapes and sizes, making it easier to achieve a seamless and visually appealing fencing installation.
Installing the fencing panels is a pivotal stage in composite fencing installation, where composite slats are securely attached to create a cohesive and visually appealing fence structure.
Adding finishing touches to the composite fencing involves refining the appearance, texture, and overall finish of the fence to achieve a polished and aesthetically pleasing outcome.
This finalization process plays a crucial role in elevating the visual appeal of the fencing, making it more attractive and durable. One key step is to apply a protective sealant or coating to enhance the longevity of the composite material and maintain its color vibrancy over time. Adjusting the texture can involve sanding rough areas or adding a weathered effect for a more natural look. Incorporating decorative elements like post caps, lattice panels, or engraved designs can further personalize the fence and complement the surrounding landscape.
Uncover more: What Fence For Landscaping
When compared to traditional fencing materials like wood and metal, composite fencing stands out for its security features, durability, and eco-conscious benefits, making it a compelling alternative for residential and commercial properties.
Composite fencing offers enhanced security advantages such as its resistance to rot, insects, and weathering, which are common issues faced by wood and metal fencing. This durability not only ensures a longer lifespan but also reduces maintenance costs over time.
Composite fencing is eco-friendly, as it is often made from recycled materials, contributing to sustainability efforts. Compared to wood, composite fencing requires minimal upkeep, avoiding issues of warping, splintering, or painting. The versatility and modern aesthetic of composite fencing further add to its appeal in the fencing market.
In comparison to wood fencing, composite fencing boasts a longer lifespan and minimal maintenance requirements and often comes with extended warranties for added peace of mind.
These advantages make composite fencing a highly attractive option for homeowners looking to invest in a fencing solution that offers both durability and longevity. With composite materials, there is no need for regular staining or painting, saving homeowners time and money on maintenance costs in the long run. The extended warranties provided by many composite fencing manufacturers give consumers the assurance that their investment is protected for years to come, offering a level of security and confidence that traditional wood fencing may not provide.

When compared to vinyl fencing, composite fencing offers a compelling blend of benefits, including enhanced durability, eco-conscious features, and a more natural appearance, while overcoming certain drawbacks associated with vinyl materials.
Composite fencing is renowned for its long-lasting nature, ensuring a sturdy barrier that requires minimal maintenance over time. Composite materials are created using a mix of recycled plastics and wood fibers, making them a more sustainable and eco-friendly option compared to vinyl. The aesthetic appeal of composite fencing is another key advantage, as it can mimic the look of natural wood without the maintenance requirements. On the other hand, vinyl fencing is prone to cracking and fading over time, diminishing its overall lifespan and visual appeal.

In contrast to metal fencing, composite fencing offers lower maintenance requirements, minimal repair needs, and a cost-effective solution for long-lasting and visually appealing fencing solutions.
Composite fencing stands out due to its remarkable durability and resistance to rot, decay, and insect damage, ensuring a longer lifespan without the need for frequent repairs or replacements. These low-maintenance features make composite fencing a popular choice for homeowners looking to enhance their outdoor spaces without the ongoing upkeep associated with traditional fencing materials.
The initial investment in composite fencing may be higher than metal options, but the long-term cost savings from reduced maintenance and repair expenses often make it a more economical choice over time.

The cost of composite fencing includes both the initial investment and long-term maintenance expenses, with composite fencing often considered a cost-effective solution due to its durability and minimal upkeep requirements.
Homeowners choosing composite fencing can benefit from its longevity and resistance to rotting, warping, and insect damage, which can contribute to significant savings over time compared to traditional wood fencing. While initial costs may be higher for composite fencing materials, the reduced need for staining, painting, or repairs can lead to lower overall expenses in the long run. Composite fencing's superior durability means fewer replacements and repairs, making it a financially sound choice for those looking for a sturdy and cost-effective fencing option.
The initial cost of composite fencing installation varies based on factors such as fence height, design complexity, and the selected composite brand, with composite fencing generally offering a cost-effective solution in the long run.
When considering different composite brands, it's essential to evaluate not only the upfront costs but also the quality and durability offered, as higher-quality composites may result in lower maintenance expenses over time.
The maintenance costs of composite fencing are significantly lower compared to traditional wood fencing, as composite materials require minimal cleaning and upkeep for long-lasting performance and aesthetic appeal.
Composite fencing stands out for its durability and resistance to weathering, eliminating the need for frequent staining or painting. With composite materials, you won't have to worry about issues like rotting, warping, or insect damage that are common with wood fences.
This leads to substantial long-term cost savings as you avoid the expenses associated with regular maintenance tasks. Simplifying your maintenance routine, composite fencing can be easily cleaned with just soap and water, helping you maintain its pristine appearance effortlessly.
In a long-term cost comparison, composite fencing proves to be a cost-effective option due to its exceptional durability, reduced maintenance costs, and longevity, offering a compelling value proposition for property owners seeking sustainable fencing solutions.
The durability of composite fencing sets it apart from traditional materials like wood or vinyl, as it is resistant to rot, decay, and insect damage, thereby reducing the need for costly repairs and replacements over time. This translates into significant savings for homeowners in terms of both material expenses and labor costs. When considering the overall value proposition, composite fencing emerges as a smart investment that not only enhances the aesthetics of a property but also pays off in terms of long-lasting performance and cost efficiency.
Table Of Contents
Are you considering adding a fence to your landscaping but unsure where to start?
In this guide, Usual House explores the reasons why using fences in landscaping is beneficial, such as providing privacy, security, and protection from wildlife.
We also discuss different types of fences to consider, including wooden, vinyl, metal, and wire options.
We cover important factors to consider when choosing a fence, installation tips, and maintenance and care advice to keep your landscaping fences looking their best. Whether you're looking to enhance your property's aesthetics or create a safe and secure outdoor space, this article has got you covered.

Fences play a pivotal role in landscaping, offering a blend of privacy, security, and aesthetic enhancement to outdoor spaces like backyards and gardens.
They serve as physical barriers that not only keep unwanted intruders out but also provide a sense of seclusion and peace within the outdoor sanctuary.
By defining the property boundaries, fences help create a structured layout for landscaping while adding a layer of elegance to the overall decor.
The sight of lush greenery intertwined with the backdrop of a well-designed fence can evoke a feeling of harmony and relaxation, making the outdoor area a true haven for unwinding and enjoying nature's beauty.
Fences are essential for ensuring privacy, security, and safety by clearly delineating property boundaries, containing pets, and creating a secure environment.
By establishing physical boundaries, fences play a crucial role in defining personal space and preventing unauthorized access to one's property. In addition to keeping pets safely contained within the confines of the yard, fences act as a barrier to deter intruders and trespassers, thereby boosting the overall safety of the premises. For families with children, fences serve as a protective shield, granting parents peace of mind by creating a secure outdoor space where kids can play freely without the risk of wandering off or encountering potential hazards.
Fences significantly enhance the aesthetics and curb appeal of a property, serving as decorative features that blend seamlessly with outdoor decor and natural elements.
They not only provide a sense of structure and privacy but also contribute to the overall design harmony of the outdoor space. By choosing the right style and material for a fence, homeowners can create a unified look that complements the existing landscaping and exterior features. Incorporating elements like climbing vines or colorful flowers along the fence can further elevate the visual appeal of the property, adding a touch of natural beauty and charm to the surroundings. Well-designed fences can define boundaries while also enhancing the overall ambiance of the outdoor area.
Fences act as protective barriers, safeguarding gardens and outdoor spaces from wildlife intrusion, and ensuring the safety of plants and landscapes such as hedges, shrubs, and flowers.
These structures play a crucial role in deterring animals like rabbits, deer, and rodents from causing extensive damage to cherished plantings. By creating a physical boundary, fences help maintain the integrity of outdoor areas, providing a sense of security and peace of mind for garden enthusiasts. They serve as a visual boundary, enhancing the aesthetic appeal of the landscape by defining distinct areas and highlighting the beauty of the surrounding greenery.

Various types of fences are available for landscaping, including wooden fences, vinyl fences, metal fences, and wire fences, each offering unique benefits and design options.
Wooden fences are favored for their classic and natural appearance, enhancing the rustic charm of a garden or property. They can be stained or painted to match different styles, offering versatility in design.
Vinyl fences, on the other hand, are low maintenance and durable, available in various colors and styles to complement modern or traditional settings.
Metal fences are known for their strength and security, coming in ornate designs for a sophisticated look.
Wire fences, such as chain-link or mesh, provide a cost-effective option for boundary marking and are easily customizable.
Wooden fences are popular for their durability and natural appeal, complementing outdoor spaces with a classic look that can be enhanced through staining and regular maintenance.
Their longevity is one of the key features that make them a preferred choice for many homeowners who seek a fence that can withstand the test of time. With proper care, such as regular staining to protect against weathering and repairs to address any damage, wooden fences can last for decades. Beyond their practicality, these fences also offer a timeless aesthetic that effortlessly blends with various outdoor landscapes, adding a touch of warmth and traditional charm to any property.

Vinyl fences are a popular choice for landscaping due to their easy installation, maintenance-free nature, and eco-friendly composition that offers a sustainable fencing solution.
Their low maintenance requirements make them an ideal solution for homeowners looking to enhance their outdoor space without the hassle of constant upkeep. Vinyl fences are known for their durability, ability to withstand harsh weather conditions and resist fading, rotting, or warping. Their environmental friendliness makes them a standout choice for those wanting to prioritize sustainability in their landscaping projects.
What sets vinyl fences apart is the ease of installation, allowing for a quick and efficient set-up that minimizes disruptions. Replacement options for vinyl fences are also readily available, providing flexibility for homeowners to refresh or change their fencing without significant hassle, contributing to sustainable landscaping practices.

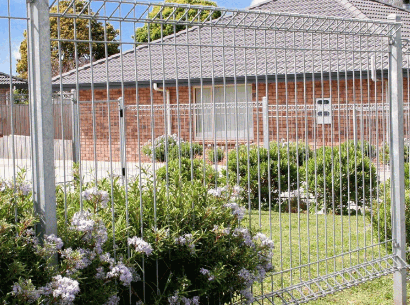
Metal fences provide a blend of style and functionality, offering weather-resistant properties, security features, and customizable design options such as gates for enhanced accessibility.
In landscaping, the versatility of metal fences shines through, their durability and strength making them a popular choice for homeowners and commercial properties alike. With various styles available, from classic wrought iron to modern sleek designs, these fences can complement any architectural style.
One of the key benefits is the low maintenance required, as metal fences only need occasional cleaning to maintain their appearance. The inclusion of gates not only adds a decorative element but also serves a practical purpose, providing added security and privacy to the property."

Wire fences offer practical solutions for landscaping, serving as effective barriers that can provide privacy, windbreak, noise reduction, and customizable height options based on the desired functionality.
These versatile wire fences are commonly used to create privacy screens in outdoor spaces, such as garden boundaries or around swimming pools, allowing individuals to enjoy their personal spaces without unwanted intrusion. Wire fences can serve as efficient windbreaks, helping to protect plants and structures from strong winds, thereby promoting a healthier and more stable environment. By carefully selecting the appropriate fence heights, these structures can effectively block unwanted views, reduce noise levels, and enhance the overall aesthetics of a landscape.
Several critical factors should be considered when selecting a fence for landscaping, including budget constraints, intended purpose, maintenance needs, and compliance with local regulations and restrictions.
Budget constraints play a significant role in choosing the right fence for your landscaping needs. It's essential to determine how much you are willing to invest in your fence project, as this will guide your options.
From there, you must evaluate the intended purpose of the fence - whether it is for security, privacy, aesthetic appeal, or a combination of these. Maintenance preferences also matter; some materials may require more upkeep than others.
Local regulations regarding fence height, material, and location should not be overlooked to avoid any future issues.
Budget considerations play a crucial role in selecting a fence for landscaping, as they impact the overall cost, long-term maintenance, and the choice of budget-friendly yet durable solutions.
It is essential to find a balance between initial expenses and future upkeep when deciding on a fence that fits within your financial constraints.
Opting for cost-effective materials like vinyl or chain-link fences can offer a durable and low-maintenance solution that is both affordable and long-lasting.
By carefully evaluating the upfront investment against the potential savings in maintenance and repair costs over time, homeowners can make a smart choice that not only enhances their property but also aligns with their budgetary considerations.
Discover: How Much Does Glass Pool Fencing Cost
Determining the purpose of the fence is essential when landscaping, as it can add value to the property, enhance aesthetics, improve safety, and serve functional roles like pet containment.
When strategically aligned with landscaping goals, a fence can truly transform the outdoor space. A well-designed fence not only delineates boundaries but also complements the overall design of the landscape. By integrating the right materials and style, a fence can become a focal point, enhancing the visual appeal of the property. Fences provide a sense of security and privacy, creating a safe environment for families and pets to enjoy.
For pet owners, a properly installed fence offers peace of mind by containing their furry companions within the designated area.
Understanding the maintenance needs of a fence is crucial for its longevity and appearance, involving tasks like staining, painting, and protection against weather elements and pests.
Investing time and effort in proper maintenance can significantly prolong the lifespan and enhance the curb appeal of your fencing.
Compliance with local regulations and restrictions is paramount when installing a fence for landscaping, necessitating adherence to fence permit requirements, height regulations, and neighborhood guidelines.
This approach ensures that your fence project not only aligns with legal standards but also respects the aesthetics and rules of your community. Obtaining the necessary permits helps streamline the process, avoiding potential fines, delays, or issues in the future. By following height restrictions, you maintain the safety and privacy aspects of the fence while blending harmoniously with the surroundings. Conforming to neighborhood guidelines fosters good relationships with neighbors and upholds the overall visual appeal of the area.
Proper installation is key to the success of landscaping fences, requiring careful consideration of DIY options, professional installation services, and adherence to a systematic installation process.
Professionals say that one of the primary benefits of opting for a professional installation service for your landscaping fence is the expertise and precision that professionals bring to the project. Professional installers have the knowledge and experience to assess the specific needs of your landscape, recommend the most suitable fence materials, and ensure that the fence is erected with structural stability.
On the other hand, DIY installations can be a cost-effective option, allowing homeowners to save on labor costs. It's important to note that DIY installations may require more time and effort, as well as a steep learning curve for those unfamiliar with fence construction.
Regardless of the approach chosen, ensuring proper measurements, secure anchoring, and regular maintenance are essential to the long-term success of your landscaping fence.
Accurate measurement and marking of the fence line are crucial steps in landscaping projects, ensuring precise alignment with the property boundary and customization based on landscaping needs.
Selecting the right materials and tools is essential for landscaping fences, ensuring durability, customization options, and a personalized touch that enhances the overall design.
Durability is a key factor to consider when constructing a fence as it directly impacts the longevity of the structure. Choosing sturdy materials such as treated wood, vinyl, or metal can ensure that the fence withstands environmental elements and regular wear and tear.
The customization features available with different materials allow homeowners to tailor the fence to their specific needs and style preferences, whether opting for a traditional look or a more modern aesthetic. By selecting the appropriate materials, individuals can create a fence that not only serves its practical function but also adds to the overall beauty and curb appeal of their property.
Prioritizing safety precautions during fence installations is paramount, especially in DIY projects, where adherence to safety measures and the use of protective gear are crucial for injury prevention.
One of the key safety hazards to be mindful of when embarking on a fence installation project is the risk of cuts and punctures from sharp tools and materials. Wearing appropriate protective gear such as heavy-duty gloves, safety goggles, and sturdy footwear can significantly reduce the likelihood of such injuries.
Ensuring that the work area is clear of obstacles and debris can help prevent trips and falls, which are common risks during construction projects. Taking the time to plan out the installation process step by step and double-checking measurements can also minimize errors and the need for risky improvisations.
Routine maintenance and care are essential for preserving the integrity and appearance of landscaping fences, involving regular cleaning, inspections, and timely repairs to combat weather-related wear and tear.
Ongoing maintenance practices play a crucial role in not only enhancing the aesthetics of your outdoor space but also in ensuring the longevity and functionality of your fencing.
By conducting regular cleaning sessions, you can prevent the buildup of dirt, mold, and grime that can damage the material and compromise its strength.
Inspections help in identifying any weak spots or signs of deterioration early on, allowing you to take immediate action to address them before they escalate.
Timely repairs are imperative to combat weather-related damage, such as rotting due to excessive moisture or warping caused by prolonged exposure to the sun.
Regular cleaning and inspection routines are crucial for maintaining the appearance and functionality of landscaping fences, promoting a well-kept outdoor space and optimal performance with low maintenance options.
By incorporating regular cleaning and inspections into your routine, you can prevent the build-up of dirt, grime, and other debris that can detract from the beauty of your landscaping. These tasks are not solely about aesthetics; they play a vital role in ensuring that your fence remains structurally sound over time. Opting for low-maintenance solutions such as using durable materials or applying protective coatings can simplify upkeep tasks and enhance the longevity of your fence. Consistent care will not only preserve the charm of your outdoor area but also contribute to the overall value of your property.
Timely repairs and replacements are essential for addressing wear and tear issues in landscaping fences, requiring attention to fence repair techniques and the selection of durable materials for long-lasting solutions.
Safeguarding landscaping fences against weather elements and pests is essential for their longevity and performance, involving protective measures like staining for weather resistance and garden protection against pests.
Applying weather-resistant treatments such as sealants can create a barrier against moisture infiltration, preventing rot and decay in the fence materials.
Regular inspections and maintenance, including replacing damaged boards promptly, can deter pest nesting and infestations that may compromise the structural integrity of the fence.
Employing natural pest control methods like planting pest-repelling plants around the perimeter of the garden can act as a preventive measure, reducing the likelihood of invasive insects damaging the fence or surrounding greenery.
Table Of Contents
Leather car seats are a luxurious and stylish addition to any vehicle, but they require regular maintenance to keep them looking their best. Proper cleaning not only enhances the appearance of your car's interior but also helps to prolong the life of the leather.
In this comprehensive guide, we will cover everything you need to know about cleaning and maintaining leather car seats, including the tools and materials required, the best cleaning products to use, and step-by-step instructions for deep cleaning. We'll discuss how often you should clean your leather car seats and provide valuable tips for maintaining their pristine condition. Whether you're a car enthusiast or simply want to preserve the investment in your vehicle, this article will equip you with the knowledge to effectively care for your leather car seats.
Regular cleaning of leather car seats is crucial to maintain their quality and prolong their lifespan. Proper maintenance and care help protect the leather from stains, dirt, and grime, ensuring that the interior upholstery remains in top condition.
It also contributes to the overall aesthetics of the car's interior, enhancing its appeal and value. Regular cleaning prevents the accumulation of debris and oils that can lead to deterioration and cracking of the leather over time.
By investing a little time and effort into cleaning and conditioning leather car seats, you can significantly extend their longevity and keep them looking fresh and inviting for years to come.

Cleaning leather car seats requires a specific set of tools and materials to ensure effective maintenance and care. Key items include a vacuum, soft brush, mild soap, water, and a quality leather conditioner or protectant.
Selecting the right leather cleaner for car seats is essential to protect the interior upholstery and ensure effective maintenance. Professional cleaning products or recommended conditioners can provide optimal care for different types of leather.
They help in preserving the natural suppleness and luster of the leather, preventing it from drying out and cracking. Regular cleaning with suitable products also removes dirt, grime, and oils from the seats, thus maintaining a fresh and inviting interior.
The right cleaner can protect against UV damage and other environmental factors, prolonging the lifespan of the leather upholstery. Investing in the appropriate leather cleaner not only enhances the appearance of car seats but also ensures their durability and longevity.
Delve into: How To Clean Leather Stains On Purse
In addition to dedicated leather cleaners, mild soap, water, and specialized protectants can also be used for cleaning and maintaining leather car seats. These products are effective in addressing stains, dirt, and grime while providing essential care and protection.
Mild soap and water are gentle yet effective for removing surface dirt and light stains on leather car seats. They offer a budget-friendly alternative to dedicated leather cleaners.
Specialized protectants, such as leather conditioners and UV protectants, play a crucial role in maintaining the suppleness and appearance of the leather while safeguarding it from sun damage and aging. When used in combination, these alternative cleaning products can extend the lifespan and luster of leather upholstery in cars.
Deep cleaning of leather car seats requires specialized tools such as a vacuum, soft brush, and quality conditioner or protectant. These tools ensure thorough removal of dirt and grime while providing essential care to maintain the leather's quality.
A vacuum with a soft brush attachment effectively sucks up dirt and debris from the leather's crevices, ensuring a meticulous clean. Applying a quality conditioner or protectant not only restores moisture and suppleness to the leather but also forms a protective barrier against stains and UV damage. This comprehensive approach not only cleans the seats but also safeguards the leather, prolonging its lifespan and maintaining its luxurious appearance.

Cleaning leather car seats involves a systematic process that includes specific steps and techniques to ensure optimal care. Utilizing quality conditioner and protectant, while adhering to practical tips and do's and don'ts, is essential for effective leather maintenance.
This starts with gently vacuuming the seats to remove any surface dirt and debris. Then, a mild leather cleaner should be applied using a soft-bristled brush to prevent scratching. After wiping away the cleaner with a damp cloth, it's crucial to thoroughly dry the seats. Once the leather is dry, applying a high-quality conditioner helps to keep it supple and prevent cracking. Regularly using a protectant can safeguard the leather from UV damage and stains, prolonging its lifespan. By following these steps and integrating effective techniques, one can maintain pristine leather car seats for years to come.
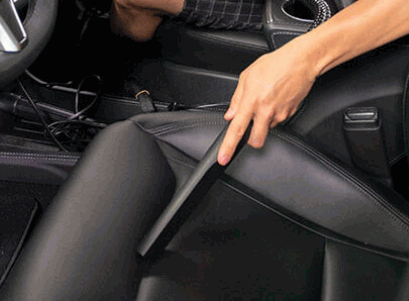
The initial step in cleaning leather car seats involves thorough vacuuming to remove any surface debris, stains, dirt, or grime. This process is essential for effective maintenance and care of the upholstery.
Vacuuming is crucial as it helps in getting rid of loose particles that can scratch and damage the leather surface over time. By removing these particles, you not only improve the appearance of the seats but also prevent potential wear and tear. Vacuuming prepares the leather for deeper cleaning and conditioning, ensuring that any further cleaning products can penetrate the material effectively. It sets the stage for a more thorough and successful cleaning process, ultimately extending the lifespan of your leather car seats.
Before proceeding with cleaning, it is important to test the selected cleaner on a small, inconspicuous area of the leather car seats. This precaution ensures that the cleaner is suitable for maintaining the upholstery and effectively addressing stains, dirt, and grime.
It is crucial to understand that different cleaners and products may have varying effects on leather upholstery. By conducting a small area test, you can assess the cleaner's impact on colorfastness and texture. This process also enables you to confirm that the cleaner does not cause any adverse reactions such as discoloration or damage. Ultimately, this simple step can prevent potential mishaps and ensure that the chosen cleaner is compatible with the car seats, promoting effective care, protection, and maintenance of the upholstery.
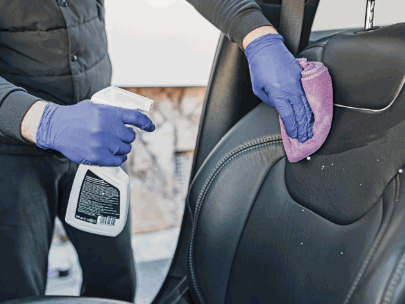
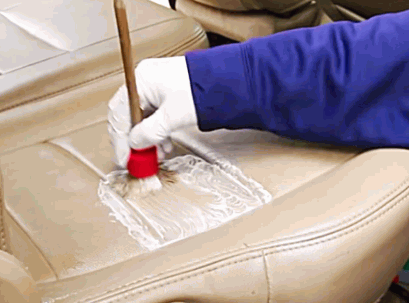
Applying the selected cleaner to the leather car seats is a critical step in addressing stains, dirt, and grime while ensuring essential care and protection for the upholstery. Proper application techniques contribute to maintaining the quality of the leather.
This process not only removes surface dirt but also penetrates the leather to eliminate embedded particles. Regular cleaning prevents the buildup of oils and debris, preserving the supple texture of the leather and extending its lifespan.
Beyond aesthetics, a clean and well-maintained interior also contributes to a more hygienic driving environment, reducing the risk of allergens and bacteria accumulation. Using specialized leather conditioners after cleaning helps to keep the upholstery supple and prevents cracking or drying out over time.
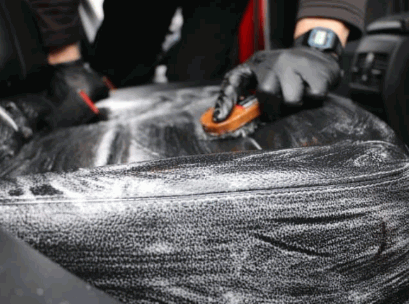
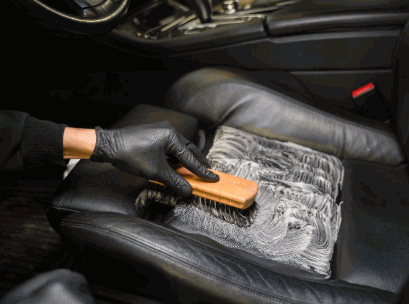
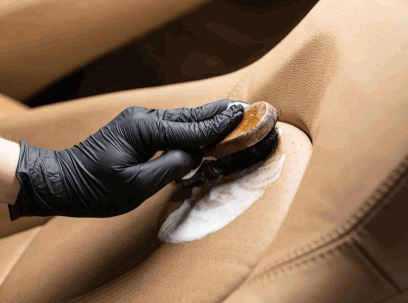
Gently scrubbing the seats with the appropriate tools and products is essential for effectively removing stains, dirt, and grime from the leather. This process contributes to maintaining the upholstery's quality and applying essential care and protection.
Regularly cleaning and treating the leather seats can help prevent premature wear and tear while preserving their luxurious appearance. By gently removing accumulated debris and stains, you not only restore the luster of the leather but also ensure that it remains supple and resistant to cracking. Using specialized leather conditioners and protectants after cleaning can further shield the seats from damage caused by sunlight, spills, and natural oils on the skin, thereby prolonging their lifespan and enhancing your driving experience.
Using a damp cloth to wipe down the leather car seats is crucial for removing excess cleaner and residual stains, dirt, or grime. This step contributes to providing essential care and protection for the upholstery.
The damp cloth not only helps in lifting off any remaining cleaning product but also ensures that any stubborn stains or dirt are properly addressed. Regularly wiping down the seats with a damp cloth can also prevent the buildup of grime and protect the leather from premature wear and tear. This process not only cleans the seats but also helps in maintaining the natural shine and texture of the leather, ultimately extending the life of your car's upholstery.

Thoroughly drying the leather car seats after cleaning is essential to ensure that the upholstery remains in optimal condition. Proper drying techniques contribute to providing essential care and protection for the leather.
Without proper drying, residual moisture can lead to the growth of mold and mildew, causing damage to the leather. Dampness can weaken the material, leading to cracks and discoloration over time. By ensuring thorough drying, the leather can maintain its softness, suppleness, and luxurious appearance, prolonging the lifespan of the car seats.
Proper drying helps to prevent water stains and water spots, preserving the aesthetic appeal of the upholstery. This crucial step in car seat maintenance is often overlooked, but it plays a significant role in upholding the quality of the leather and ensuring its longevity.

Establishing a regular maintenance schedule for cleaning leather car seats is crucial to prolong their lifespan, preserve quality, and ensure optimal care. The frequency of cleaning depends on usage and environmental factors.
Regular cleaning helps to prevent dirt, oils, and debris from accumulating and causing damage to the leather. For cars used daily or in dusty or humid environments, cleaning every two weeks is advisable. For lighter usage or more controlled environments, a monthly cleaning routine might suffice.
Using specialized leather cleaners and conditioners as recommended by the manufacturer can help maintain the leather's natural oils and prevent drying and cracking. Regularly vacuuming the seats and wiping them down with a damp microfiber cloth can remove surface dust and grime, contributing to the longevity of the upholstery."
Implementing practical tips and best practices is essential for maintaining clean leather car seats and ensuring their longevity. From avoiding food and drink spills to using quality conditioners, incorporating effective techniques contributes to preserving the upholstery.
Regularly vacuuming the seats and using a soft brush attachment on the leather can help remove dust and debris, preventing them from settling into the creases. It's also important to promptly address any spills or stains by blotting them with a clean, dry cloth to prevent them from setting into the leather.
Using a specialized leather conditioner designed for automotive use can help keep the seats supple and prevent cracking or fading over time.
A key best practice for maintaining clean leather car seats is to avoid eating or drinking in the car to prevent spills and stains on the upholstery. This proactive measure contributes to preserving the seats' quality.
It's important to be mindful of what is brought into the car and consumed to prevent potential accidents and damage to the leather. Even the smallest spills or stains can detract from the overall appearance and longevity of the upholstery. By refraining from eating and drinking in the car, you can ensure that your leather seats remain in pristine condition, ultimately extending their lifespan and enhancing the overall aesthetic of your vehicle interior.
Protecting leather car seats from direct sunlight is essential for preventing fading, aging, and potential cracking. Implementing this best practice contributes to maintaining the upholstery's quality and appearance.
This preventive measure not only safeguards the seats from sun-induced damage but also prolongs their lifespan. By using UV-protective products and regularly conditioning the leather, you can strengthen its resistance to sunlight exposure. Parking in shaded areas or utilizing car window sunshades can significantly reduce the harmful effects of UV rays. Consistently following these protective measures is crucial for preserving the luxurious look and feel of your leather car seats.
Regularly using a quality leather conditioner is crucial for protecting and maintaining car seats, as it helps prevent cracking, fading, and aging. This maintenance practice contributes to preserving the upholstery's integrity.
It's important to understand that car seats are subject to various environmental factors and regular use, which can lead to wear and tear over time. By applying a leather conditioner, you create a protective barrier that shields the material from harmful UV rays, moisture, and other sources of damage. In addition to protection, the conditioner moisturizes the leather, keeping it supple and preventing it from becoming brittle. This consistent care not only maintains the aesthetic appeal of the seats but also extends their lifespan, ultimately saving you from expensive repairs or replacements.
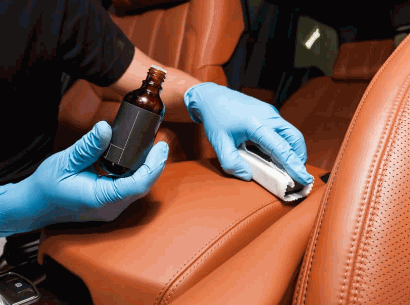
Table Of Contents
In this article, we will explore the possibility of steam-cleaning leather, a material known for its luxurious feel and durability. From understanding the different types of leather and how it is made to the benefits and potential risks of steam cleaning, we will delve into the intricacies of maintaining and cleaning the leather using steam.
We will provide essential tips and techniques for properly steam cleaning leather to ensure its longevity and pristine condition. Whether you are a leather enthusiast or seeking effective cleaning solutions, this article aims to provide comprehensive insights into the world of steam-cleaning leather.

When it comes to cleaning leather, one common query is whether steam cleaning is a suitable method for this delicate material.
Steam cleaning can be an effective option for removing dirt and grime from leather without the use of harsh chemicals. The high-temperature steam helps to break down and dissolve the dirt and oil buildup, leaving the leather clean and refreshed. It's important to consider the risks associated with steam cleaning, such as the potential for water damage if not performed correctly.
Professional cleaning services often have the expertise and equipment to safely steam clean leather, minimizing the risks and ensuring thorough cleaning results. Such professional services can help maintain the quality and longevity of leather items by using the appropriate steam cleaning techniques and processes.

Leather is a durable and versatile material known for its unique fabric and exceptional durability, making it a popular choice for various maintenance and care needs.
With its natural flexibility and strength, leather is resistant to tearing, puncturing, and abrasion, making it suitable for a wide range of products, including shoes, bags, and furniture. Its fabric structure consists of intertwined fibers that give it a distinctive texture and grain, adding to its appeal.
Proper maintenance and care are essential to prolong its lifespan and retain its luster, requiring regular cleaning, conditioning, and protection from moisture and heat.

The process of creating leather involves a meticulous technique that transforms raw material into a refined fabric through specialized treatments and methods.
The initial step is tanning, which typically uses chromium salts, vegetable extracts, or other tanning agents to preserve the leather and prevent it from decaying. Following this, the leather is then conditioned, where it undergoes softening and color enhancement processes.
Subsequently, the leather may be dyed to achieve the desired color before undergoing finishing treatments to enhance its durability, texture, and appearance. Throughout the entire process, skilled artisans carefully monitor each stage to ensure the creation of high-quality leather.
Leather comes in various types, each with its unique characteristics and uses, including full-grain, top-grain, corrected-grain, split, and bonded leather, showcasing the diversity of this material.
Among these, full-grain leather is known for its natural and rugged appearance, as it retains the complete grain of the hide, making it durable and suitable for high-end products like luxury furniture and high-quality accessories. On the other hand, top-grain leather is slightly more processed, offering a smoother surface while maintaining strength, often used in upscale leather goods.
Corrected-grain leather undergoes additional treatment to remove imperfections, resulting in a consistent and affordable option. Split leather, created from the fibrous part of the hide, is utilized in suede production, prized for its soft texture and versatility. Bonded leather, composed of leftover leather fibers, is an economical alternative for furniture upholstery and accessories.
Full-grain leather stands out for its exceptional durability, natural fabric, and the care and maintenance it demands to retain its pristine condition over time.
This type of leather is treasured for its unique fabric structure featuring the outermost layer of the hide, which showcases the natural grain, imperfections, and distinct markings. The rugged texture and rich patina of full-grain leather develop character over time, adding to its appeal.
Unlike other leather types, full-grain leather ages beautifully, and with proper care, it can last for generations. To maintain its luxurious appearance, regular conditioning with high-quality leather care products is essential, as it helps prevent drying and cracking, ensuring the leather remains supple and lustrous.
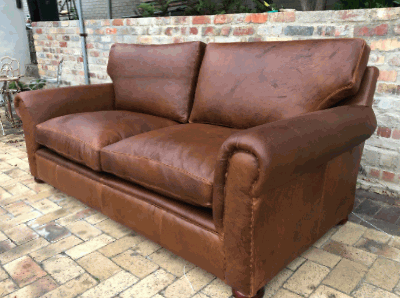
Top-grain leather is prized for its versatile fabric, making it a popular choice for upholstery and furniture, requiring regular maintenance to preserve its quality and appearance.
It is renowned for its durability and natural characteristics, such as the soft, supple feel and appealing patina that develops over time. Oils and waxes are used to treat the leather, enhancing its resistance to moisture and wear. This type of leather is often used in high-end furniture, luxury car interiors, and premium accessories due to its timeless appeal and ability to age gracefully.
Regular cleaning and conditioning are essential to keep the leather in top condition, ensuring it remains an elegant and enduring choice for upholstery and furniture applications.
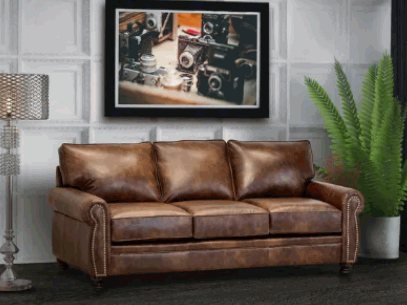
Corrected-grain leather undergoes a specialized treatment process to address imperfections, making it a suitable choice for sensitive materials that demand a refined fabric structure.
During the treatment process, the leather is sanded to remove any blemishes, and an artificial grain is embossed onto the surface to create a uniform appearance. This results in a smooth and consistent texture, ideal for sensitive materials such as high-quality furniture, luxury car interiors, and designer handbags.
The leather's durability and resistance to wear and tear make it a popular choice for items that require both elegance and longevity.

Split leather, known for its versatility, requires controlled moisture levels and proper air drying, along with conditioning treatments to maintain its optimal fabric condition.
This type of leather, often used for a variety of products including footwear, bags, and upholstery, needs to be protected from excessive exposure to moisture to prevent damage and maintain its strength and durability.
Air drying is a crucial step in the care of split leather, as it helps to retain the material's integrity and prevent it from becoming brittle. Conditioning treatments are essential to replenish natural oils and maintain the suppleness of the leather, ensuring that it remains soft and pliable over time.

Bonded leather, with its composite fabric, demands specialized cleaning and protective measures to ensure effective restoration and preservation of its surface integrity.
Experts recommend using a gentle, pH-balanced cleaner designed specifically for bonded leather to remove dirt and stains without causing damage. It is vital to avoid harsh chemicals or abrasives that could compromise the material's structure.
Regular conditioning with a suitable leather conditioner helps to maintain its suppleness and prevent cracking. Implementing these practices can significantly extend the lifespan of bonded leather furniture and accessories, keeping them looking pristine for years to come.

Steam cleaning leather offers a range of benefits, including its gentle yet effective process, particularly suitable for upholstery, furniture, and professional treatment to protect and restore the material.
This method utilizes water vapor to gently penetrate the leather, effectively lifting dirt, grime, and impurities without the need for harsh chemicals. It is especially advantageous for delicate leather surfaces, as it helps preserve the material's natural oils and softness.
Steam cleaning is an ideal solution for removing stubborn stains and odors, leaving your upholstery and furniture looking revitalized and smelling fresh. Its professional treatment ensures thorough cleaning and helps prolong the lifespan of your leather items.

Steam cleaning ensures gentle and effective cleaning for leather, particularly benefiting upholstery and furniture with its non-abrasive yet thorough approach.
The non-abrasive nature of steam cleaning makes it ideal for delicate materials such as leather, as it effectively removes dirt and grime without causing damage. It penetrates deep into the fibers, lifting away dirt and stains without the need for harsh chemicals or abrasive scrubbing. This method is particularly suitable for maintaining the beauty and integrity of upholstered furniture, as it gently revitalizes the fabric without causing any harm.
The steam cleaning process is adept at removing deep-down dirt and stubborn stains from leather, making it an ideal choice for professional cleaning treatments.
This method uses high-temperature steam to penetrate deep into the pores of the leather, effectively dissolving and lifting away dirt, grime, and tough stains. The heat not only cleans the surface but also sanitizes it, eliminating bacteria and allergens. Its gentle nature makes it suitable for various types of leather, ensuring that the cleaning process does not damage or degrade the material.
Professional cleaners often rely on steam cleaning to restore the luster and cleanliness of leather surfaces with impressive results.
Steam cleaning not only cleans but also effectively kills bacteria and allergens, providing a protective treatment for the leather fabric.
This method works by using high-temperature steam to penetrate the pores of the leather, effectively eliminating any hidden bacteria and allergens. The thermal energy of the steam also helps to break down dirt and grime, ensuring a thorough cleaning process without the use of harsh chemicals.
Steam cleaning can help preserve the natural oils and texture of the leather, maintaining its softness and luster while providing a protective barrier against future contaminants.
One of the key benefits of steam cleaning is the absence of harsh chemicals, offering gentle yet professional treatment for the leather surface without causing any harm.
The use of steam ensures that the natural fibers of the leather remain intact, maintaining its softness and luster. This method effectively removes dirt, grime, and bacteria without compromising the structural integrity of the material.
Steam cleaning also helps to prevent the leather from drying out or developing cracks, making it a safe and reliable option for maintaining the beauty and longevity of leather surfaces.
While steam cleaning offers numerous benefits, there are potential risks such as damage, discoloration, and fading, especially if excessive moisture, heat, water, or conditioner is involved.
Excessive moisture can weaken the fibers of the upholstery, leading to structural damage and compromising its integrity. Intense heat from the steam cleaning process can cause colors to fade or bleed, altering the appearance of the fabric. In some cases, the use of improper cleaning products or excessive water can result in permanent discoloration.
The conditioner used during the process may also leave behind residues, attracting dirt and causing further damage. Therefore, it is crucial to consider these risks and ensure proper precautions are taken when steam cleaning upholstery.
Excessive moisture or incorrect cleaning techniques during steam cleaning can lead to severe damage to the leather, necessitating professional treatments for restoration.
The high heat and moisture from steam cleaning can cause the leather to become warped, hardened, or discolored. If not dried properly, mold and mildew may develop, further compromising the material.
Professional leather treatments involve specialized cleaning solutions and techniques to gently remove stains and moisture without harming the leather's natural qualities. Trusting experts ensure that the leather is carefully restored to its original condition, preserving its longevity and aesthetic appeal.
Improper use of conditioners or protectants during steam cleaning can result in discoloration or fading of the leather, impacting its overall appearance and texture.
This is particularly important because the use of unsuitable products can lead to the formation of unsightly stains or patches on the leather surface, detracting from its aesthetic appeal. The texture of the leather may become compromised, leading to a loss of its supple and luxurious feel.
It's essential to choose conditioners and protectants specifically formulated for use with steam cleaning methods to ensure the leather maintains its natural luster and resilience.

Inappropriate steam cleaning practices can lead to the loss of natural oils and moisture in the leather, necessitating air drying and conditioning, and in some cases, professional cleaning for restoration.
When natural oils and moisture are stripped from leather during steam cleaning, the material becomes susceptible to drying out, cracking, and losing its suppleness. It is crucial to allow the leather to air dry thoroughly to prevent further damage. Regular conditioning is essential to replenish lost oils and maintain the leather's softness and luster.
For extensive damage, seeking professional cleaning services is recommended to effectively restore the leather's natural properties and prolong its lifespan.
Properly steam cleaning leather involves precise preparation, selecting the right steam cleaner, conducting small area tests, and ensuring thorough drying and conditioning for optimal results.
Preparing the leather surface is crucial before starting the steam cleaning process. Begin by removing any surface dust or dirt with a soft brush or vacuum attachment. Then, select a steam cleaner specifically designed for use on leather.
Prior to full cleaning, it's essential to conduct a small area test to ensure the leather reacts well to the steam and that there are no adverse effects. Once cleaning is complete, allow the leather to dry thoroughly before conditioning it to maintain its softness and suppleness.
Explore: How Do You Clean Leather Car Seats
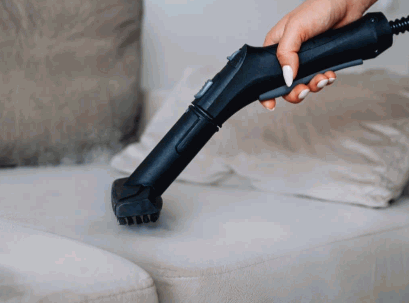
Before steam cleaning, proper preparation of the leather is crucial, involving gentle maintenance practices to ensure its suitability for the cleaning process.
This includes regular conditioning to keep the leather supple and to prevent it from drying out. Gentle cleaning with a soft cloth or sponge to remove any surface dirt or debris is necessary. It's important to test any cleaning products on a small, inconspicuous area to ensure they won't damage the leather. Preparing the leather in this way will help to maintain its natural properties during the steam cleaning process and ensure a successful outcome.
Selecting the appropriate steam cleaner is vital for the cleaning process, ensuring its suitability for professional treatments and gentle fabric protection.
A high-quality steam cleaner designed specifically for leather not only effectively removes dirt and grime but also ensures that the delicate material is not damaged during the cleaning process.
Professional-grade steam cleaners offer the right combination of steam temperature and pressure to effectively clean leather surfaces without causing any harm. A suitable steam cleaner provides a thorough and efficient cleaning process, saving time and effort while ensuring the leather is protected and maintains its natural beauty.
Prior to full-scale steam cleaning, conducting a test on a small area of the leather fabric is essential to assess the impact and effectiveness of the process and any applied protectants or conditioners.
This small area testing provides valuable insights into how the leather fabric will react to the steam cleaning process and any protective treatments. It allows for adjustments to be made if needed, ensuring that the cleaning procedure will not cause any adverse effects on the leather.
Testing the protectants or conditioners on a small area helps in determining their suitability and effectiveness in preserving the leather's quality and extending its lifespan. Proper evaluation during this testing phase can prevent potential damage and ensure optimal cleaning results for the entire fabric.
The actual steam cleaning process involves meticulous attention to detail, ensuring gentle yet effective treatment to protect the leather fabric's integrity.
The process begins by carefully vacuuming the leather to remove any loose dirt or debris. Then, a specialized leather cleaning solution is applied to the fabric, followed by gentle steam cleaning using a low-pressure setting to avoid damaging the material. After the cleaning, the leather is thoroughly dried to prevent any moisture damage.
A quality leather conditioner is applied to restore moisture and nourish the fabric, leaving it supple and rejuvenated.

After steam cleaning, proper drying and conditioning are essential maintenance steps to safeguard the leather from potential moisture-related issues, often requiring professional cleaning for comprehensive treatment.
This process is crucial as inadequate drying can lead to mildew or mold growth, causing irreversible damage to the leather. Conditioning is equally important to restore natural oils and maintain the leather's suppleness.
In cases of excessive moisture exposure, seeking professional cleaning services becomes necessary to address any lingering issues and prevent long-term damage. Therefore, following these post-steam cleaning care requirements is vital to ensure the longevity and durability of your leather goods."
Table Of Contents
Leather purses are not only stylish and durable, but they also require proper care to maintain their appearance. Knowing the different types of leather used in purses, common types of stains that can affect them, and how to effectively clean and maintain your leather purse can help you keep it looking its best for years to come.
In this article, we will explore the various types of leather used in purses, and common types of stains that can occur, and provide practical tips for cleaning and maintaining leather stains on your purse. Whether you're dealing with water stains, ink stains, oil and grease stains, or other types of stains, we've got you covered with helpful advice to keep your leather purse looking as good as new. So, let's dive into the world of leather purse care and learn how to keep your favorite accessory in top condition.
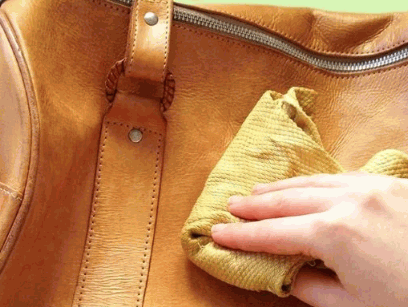
Understanding the different types of leather used in purses is essential for proper maintenance and care.
Genuine leather is renowned for its durability and natural beauty, making it a popular choice for high-quality purses. Faux leather, on the other hand, provides an affordable and cruelty-free alternative with its synthetic composition.
Full-grain leather, known for its unaltered grain and luxurious feel, is often favored for luxury designer purses. Top grain leather, with its smooth and consistent surface, offers a sleek and refined look for modern purse designs. Bonded leather, made from scraps and fibers bonded together, is a cost-effective option suitable for everyday use purses.
Full-grain leather, commonly used in purses, is renowned for its natural and gentle characteristics, making it an effective choice for durable and high-quality products.
Its inherent durability and authentic texture set it apart from other leather types, providing a rich and organic feel that improves with age, developing a unique patina over time. These unique properties make full-grain leather an ideal material for crafting timeless and elegant purses that can withstand daily wear and tear, maintaining their beauty and functionality for years to come.
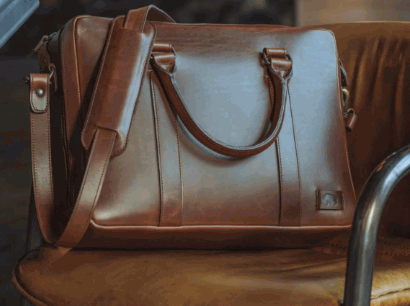
Top-grain leather, a common material for purses, requires regular maintenance and care to protect its quality and appearance.
It is essential to keep leather purses away from direct sunlight and extreme heat as they can cause the leather to dry out and crack. Regularly dusting off the purse with a soft cloth and storing it in a cool, dry place can prevent unwanted damage.
Using a leather conditioner designed specifically for top-grain leather can help maintain its suppleness and prevent it from drying out. Adhering to these protective measures and suitable conditioning methods is crucial for prolonging the lifespan and aesthetic appeal of your top-grain leather purse.

Genuine leather purses, crafted from authentic material, demand careful cleaning techniques to remove stains effectively without causing damage.
Applying a leather cleaner specifically formulated for genuine leather is crucial for maintaining its quality. Begin by wiping the purse with a soft, damp cloth to remove surface dirt and dust. For tougher stains, a mild soap solution can be used, but it's important to test it on a small, inconspicuous area first.
Always air dry the purse at room temperature and avoid using heat, which can cause the leather to crack or fade. Regular conditioning with leather cream or conditioner helps to keep the material soft and supple, preserving its natural sheen and texture.

Bonded leather purses, known for their affordability, may require repair and rejuvenation to enhance their appearance and durability over time.
This can be achieved through various methods and techniques. For instance, using a leather repair kit specifically designed for bonded leather can help address minor scratches and scuffs. Applying leather conditioner and protector can nourish and protect the material, restoring its suppleness and sheen.
For more extensive damage, seeking professional repair services from experienced leather artisans is advisable. By integrating these strategies, bonded leather purses can be revived, ensuring their prolonged use and aesthetic appeal.

Faux leather purses, offering a vegan-friendly alternative, benefit from regular conditioning to maintain a natural and effective appearance.
This can be achieved by using specialized faux leather conditioners that help to keep the material supple and prevent cracking or peeling. Gentle cleaning with a damp cloth and mild soap can remove surface dirt without causing damage. It's important to avoid harsh chemical cleaners or excessive heat exposure, as these can degrade the faux leather's natural appeal.
By following these maintenance practices, faux leather purses can maintain their quality and ensure a longer lifespan.
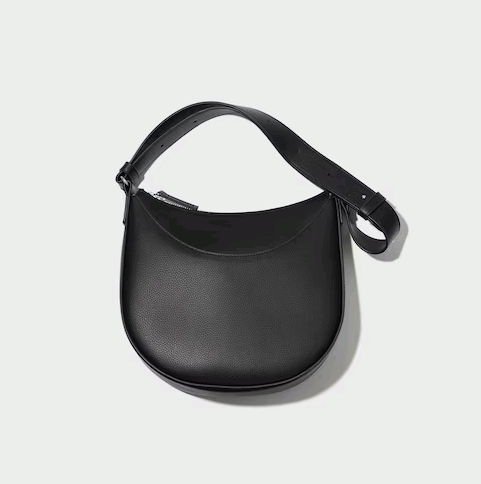
Leather purses are susceptible to various types of stains, including:
Each requires specific treatment methods.
Water stains on leather purses can often be treated by gently dabbing the affected area with a clean, soft cloth and allowing it to air dry.
Ink stains may require specialized leather cleaning products to gently remove the ink without damaging the material, while oil and grease stains may be addressed by applying a cleaning solution and gently rubbing the stained area.
Food and beverage stains can often be addressed using a mild soap and water solution, while mold and mildew stains may require the use of a specialized leather cleaner and mold remover to thoroughly eliminate the stains.
Water stains on leather purses can be effectively addressed through gentle cleaning using vinegar and a soft cloth, ensuring the preservation of the material's quality.
Using a mixture of white vinegar and water in equal parts, ensure that the cloth is damp but not soaked. Gently dab at the water stains, being careful not to rub too hard and potentially damage the leather surface. After applying the vinegar solution, allow the purse to air dry, but keep it away from direct sunlight or heat sources. This method not only effectively removes water stains, but also helps to maintain the leather's natural suppleness and shine.
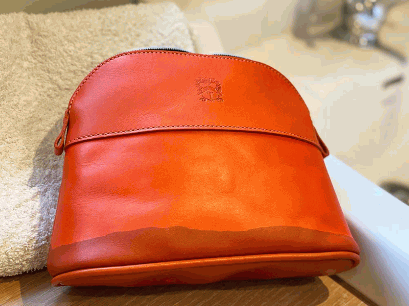
Ink stains on leather purses necessitate a gentle approach using alcohol and specialized techniques to effectively remove the blemishes without causing damage.
This delicate process requires the use of isopropyl alcohol for its ability to dissolve ink without harming the leather. To start, dab a small amount of the alcohol onto a clean cloth and gently blot the stained area. Avoid rubbing vigorously as this can spread the ink and damage the leather. Using a mild leather cleaner or a mixture of water and mild soap can further aid in lifting the ink stains.
It is crucial to test any cleaning solution on a small, inconspicuous area of the purse first to ensure it does not cause discoloration or damage. Once the stains are removed, it is essential to condition the leather to restore its natural moisture and sheen.
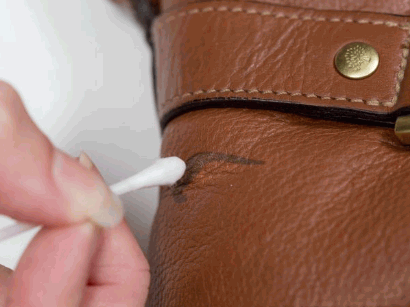
Addressing oil and grease stains on leather purses requires careful cleaning with soap to avoid causing damage to the material and effectively eliminate the stains.
Using a gentle soap and a soft, clean cloth, start by gently dabbing at the stain to remove any excess oil or grease. Avoid rubbing vigorously as it can push the stain further into the leather.
Once you have removed as much of the stain as possible, create a solution of mild soap and water and lightly dab it onto the affected area. Follow this by wiping the area with a damp cloth to remove any soap residue.
Ensure that the leather dries naturally, away from direct sunlight or heat, to prevent any potential damage. This careful approach can help maintain the integrity of the leather while effectively removing oil and grease stains.
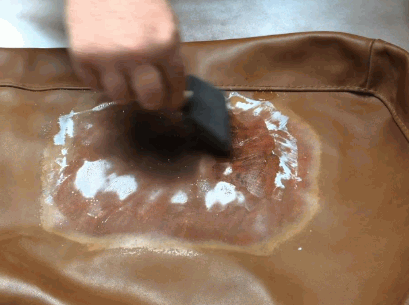
Spot cleaning and regular maintenance are crucial for addressing food and beverage stains on leather purses, preserving their quality and appearance.
Ensuring that any spills or stains are promptly treated is key to preventing them from setting in and causing permanent damage. Using a leather cleaner specifically designed for spot cleaning can effectively remove stains without damaging the material.
Applying a leather conditioner regularly can help maintain the softness and luster of the purse, prolonging its lifespan. By incorporating these specific spot-cleaning techniques and ongoing maintenance, leather purse owners can enjoy their elegant accessories for years to come.
Natural and effective cleaning methods are essential for treating mold and mildew stains on leather purses to restore their quality and prevent further damage.
These stains can be especially challenging to remove from leather, but there are several gentle yet impactful cleaning treatments that can be used.
For mold and mildew stains on leather purses, a mixture of white vinegar and water can be effective in cleaning the affected areas. Gentle brushing with a soft-bristled brush can help to remove the stains without causing any harm to the leather.
It's also crucial to regularly apply leather conditioners to prevent future mold and mildew growth and maintain the leather's quality.
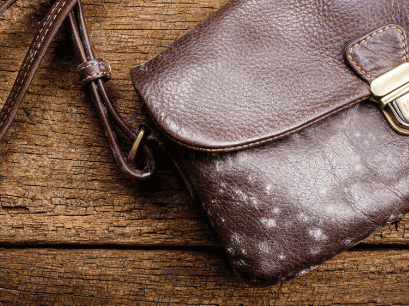
Cleaning leather stains on purses involves a series of steps, including the use of homemade solutions or professional cleaning methods to effectively remove blemishes and restore the material's appearance.
Begin by examining the extent of the stain to determine the appropriate cleaning approach. For minor blemishes, a homemade solution using mild soap and water can be gently applied with a soft cloth. For tougher stains, it may be advisable to seek professional cleaning assistance.
Prior to using any cleaning product, it's crucial to test it on a small, inconspicuous area to ensure it won't cause damage or discoloration to the leather. Conditioning the leather after cleaning is vital to maintain its suppleness and prevent it from drying out.
Discover: Can Leather Be Steam Cleaned
Gathering the necessary supplies, such as a soft cloth, gentle brush, appropriate cleaning solution, and treatment method, is the initial step in preparing to clean leather stains on purses.
A soft, lint-free cloth is essential for gentle wiping and buffing, helping to prevent further damage to the leather. Using a gentle brush, such as a soft-bristled one, can help remove surface stains without causing any scratches.
When choosing a cleaning solution, ensure it is formulated specifically for leather to avoid any adverse effects. The appropriate treatment method depends on the type of stain and leather, such as using a conditioner for dry stains or a mild soap for oil-based stains.
Prior to stain removal, testing the cleaning solution on a hidden area of the purse is crucial to avoid potential discoloration or damage, especially when using products like vinegar or alcohol.
This preventative step allows the user to assess the solution’s compatibility with the leather and observe any adverse reactions before applying it to a visible surface. By conducting a patch test, one can mitigate the risk of ruining the overall aesthetic appeal of the purse. It’s particularly important when dealing with substances such as vinegar or alcohol, which have the potential to interact with the leather in unexpected ways. Taking these precautions can ultimately preserve the purse’s quality and extend its lifespan.
Utilizing a gentle and effective leather cleaner is a recommended process for removing stains on purses, requiring suitable tools and a methodical approach for optimal results.
As stains on leather purses vary in nature, it is crucial to choose a suitable cleaning tool, such as a soft-bristled brush, to gently work the cleaner into the affected area. Approach the stain removal methodically by starting with a small amount of cleaner and gradually increasing as needed. This ensures that the leather is not overwhelmed by the cleaning solution.
It's important to allow the cleaner to sit on the stain for a brief period before gently blotting it away with a clean cloth. This systematic approach ensures that the leather is effectively cleaned without causing damage.
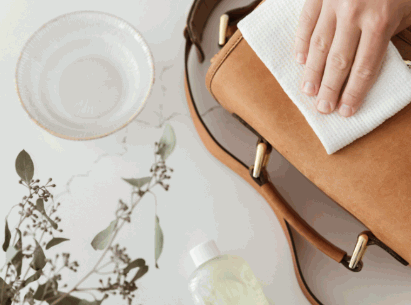
Homemade solutions provide a DIY approach to effectively removing stains on leather purses, offering gentle and effective advice for maintaining the material's quality.
These DIY solutions are not only cost-effective but also environmentally friendly. By using common household ingredients like vinegar, baking soda, or dish soap, you can easily tackle tough stains without causing damage to the leather. Regular maintenance with homemade solutions also helps preserve the natural oils in the leather, preventing it from drying out and cracking. This approach ensures that your leather purse stays in great condition for years to come, saving you money on professional cleaning services and extending the life of your favorite accessory.
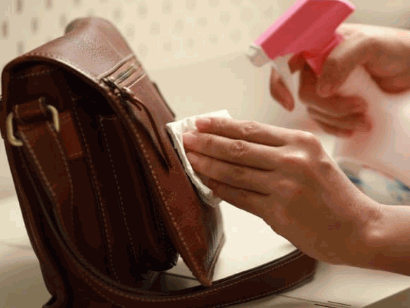
Implementing proper maintenance practices is crucial for preventing stains on leather purses, encompassing cleaning, conditioning, and protective measures to preserve the material's quality.
Regularly wiping down your leather purse with a soft, damp cloth can help remove daily grime and dirt, while using a leather conditioner every few months can prevent the material from drying out and developing cracks.
Investing in a quality leather protector spray can help create a barrier against stains, particularly from liquids and oils. Proactive care and timely treatments can significantly extend the lifespan of your leather purse and keep it looking beautiful for years to come.
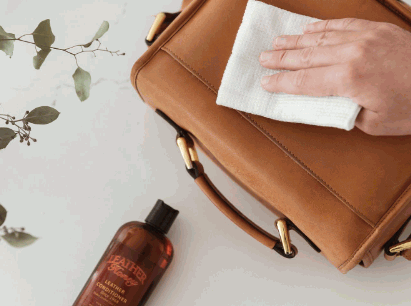
Regularly cleaning and conditioning your leather purse is an effective way to protect its quality, restore its appearance, and ensure long-term care.
By using gentle, specialized leather cleaning solutions and soft microfiber cloths, you can remove dirt, stains, and grime without damaging the material. Conditioning with a high-quality leather conditioner not only moisturizes the leather, preventing dryness and cracking but also helps to maintain its suppleness and sheen. These practices can help extend the lifespan of your leather purse and keep it looking its best, ensuring that it remains an elegant and timeless accessory in your collection.
Avoiding the use of harsh chemicals on your leather purse is essential to prevent potential damage, discoloration, and unsightly marks that may compromise its appearance.
Using gentle and natural cleaning solutions can help maintain the integrity and beauty of your leather purse. Harsh chemicals such as bleach, ammonia, or alcohol can strip away the natural oils and dyes, leading to fading, cracking, and irreversible damage. Instead, opt for specialized leather cleaners or a mild soap and water solution. Regular conditioning with suitable leather creams or oils can also help protect the material and ensure its longevity without risking any adverse effects.
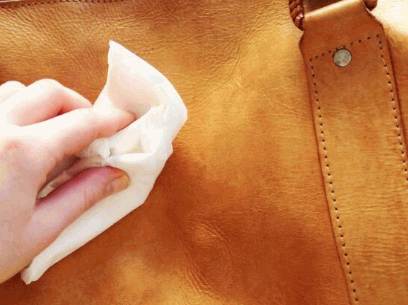
Properly storing your leather purse is vital for its maintenance and protection, ensuring the preservation of its appearance and quality over time.
To maintain the luster and suppleness of your leather purse, it's essential to store it in a cool, dry place away from direct sunlight and heat sources. Avoid storing it in plastic bags, as they can trap moisture and lead to mold or mildew. Instead, use a breathable dust bag or wrap it in a soft, natural fiber cloth. Stuffing the purse with acid-free tissue paper can help retain its shape and structure while in storage.
Treating stains on your leather purse immediately is crucial for proper care, whether through professional services or effective home remedies to prevent long-term damage.
Professional leather cleaning services are equipped to handle various types of stains, employing specialized techniques to ensure the preservation of your purse's quality. On the other hand, home remedies like using a mild soap and water solution or applying a leather conditioner can be effective for tackling minor stains.
Prompt action is essential to mitigate the risk of permanent discoloration or damage to the leather, highlighting the significance of immediate stain treatment for preserving the beauty and longevity of your purse.
Table Of Contents
Are you tired of smudges and streaks on your windows, no matter how much you clean them? You're not alone. Many people struggle with finding the right window cleaning equipment to achieve a streak-free shine. But don't worry, in this article, we'll explore the best equipment options to make your window cleaning experience effortless and effective.
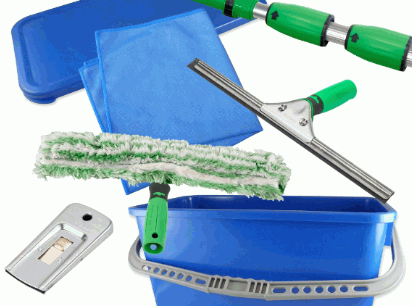
Window cleaning is vital for maintaining a clean and inviting environment, increasing natural light intake, and extending the lifespan of windows.
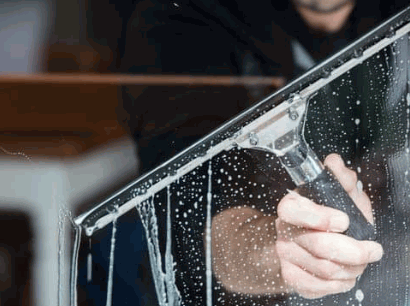
When it comes to keeping our windows clean and clear, having the right equipment is essential. In this section, we will discuss the various types of window cleaning equipment that are commonly used. From the classic squeegees and window cleaning solutions to the more specialized tools such as extension poles and scrapers, each piece of equipment serves a unique purpose in achieving spotless windows. So let’s dive in and explore the different types of window cleaning equipment that can help you achieve sparkling results.
Squeegees are versatile tools for achieving streak-free windows. Follow these steps for effective use:
For optimal results, choose a high-quality squeegee with a durable rubber blade and an ergonomic handle.


Pro-tip: It is always a good idea to have someone support the base of the ladder for extra stability and safety.

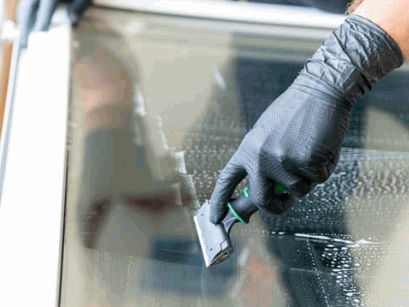
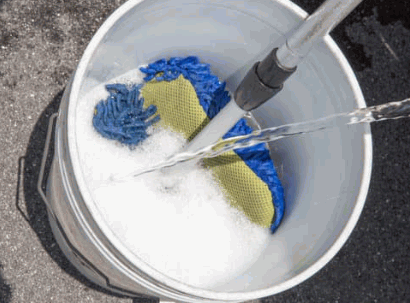
When it comes to window cleaning, having the right equipment is crucial for achieving a streak-free, spotless finish. But with so many options available, how do you know which equipment is the best fit for your needs? In this section, we will discuss the key factors to consider when choosing window cleaning equipment. From the type of windows you have to the frequency of use, each factor plays a role in determining the most suitable equipment for your specific situation. So let's dive in and learn about the important considerations to keep in mind before making your purchase.
Uncover more: How To Clean Window Sills
Pro-tip: When cleaning tall windows, always make sure to properly secure the ladder and have a spotter for added safety.
It's crucial to evaluate the frequency of use to select the most suitable window cleaning equipment for efficient and effective maintenance.
When it comes to cleaning windows, having the right equipment is essential. However, it is equally important to prioritize safety while using these tools. In this section, we will discuss the top safety precautions to keep in mind when using window cleaning equipment. From proper ladder techniques to appropriate protective gear and checking weather conditions, we will cover all the necessary measures to ensure a safe and successful window cleaning experience. You won't want to miss this valuable information before your next window-cleaning task.
Always prioritize safety by wearing the necessary protective gear to prevent accidents and injuries.
When checking the weather conditions, always prioritize safety and the effectiveness of the cleaning process. It's crucial to choose the right weather conditions to ensure optimal results and safety.
When it comes to cleaning windows, having the right equipment can make all the difference. Different types of windows require different tools to achieve a streak-free and sparkling finish. In this section, we will discuss the best window-cleaning equipment for various types of windows. From large windows to hard-to-reach ones, we'll cover the most effective tools and techniques to keep your windows looking crystal clear.
For large windows, follow these steps:
Pro-tip: Work on cloudy days to prevent the cleaning solution from drying too quickly, causing streaks.
Pro-tip: When cleaning small windows, always start from the top to prevent drips and streaks on the already cleaned areas.
Table Of Contents
Are dusty, grimy window sills making your home feel less than clean and inviting? You're not alone. Neglected window sills can harbor allergens and reduce the overall appearance of your space. But don't worry - in this article, we'll show you simple and effective ways to clean your window sills and breathe new life into your home. Say goodbye to dust and hello to sparkling windows with these tips!

Maintaining a hygienic indoor environment requires regular cleaning of window sills. Neglecting this task can result in the build-up of dust, dirt, and grime, which can harbor allergens, mold spores, and pests. By regularly cleaning window sills, not only will the appearance of windows be enhanced, but it will also contribute to a healthier living space by reducing potential health hazards caused by unclean surfaces.
Dig Deeper: How To Clean Window Glass

Pro-tip: Before cleaning, use a duster to remove loose dirt and debris to make the cleaning process more efficient.

Cleaning window sills may seem like a daunting task, but with the right approach, it can be a simple and rewarding chore. In this section, we will provide a step-by-step guide on how to clean window sills effectively. From removing debris to drying them off, we will cover each essential step in detail to help you achieve sparkling clean window sills. So, let's get started and make your windows shine with our easy-to-follow cleaning process.
Fun fact: Regularly clearing debris from window sills not only prevents dirt buildup but also helps to prevent potential pest infestations.
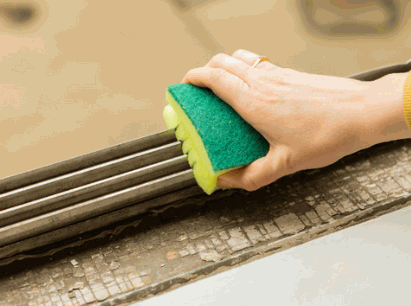
For deeper cleaning, use a damp cloth to wipe the sills after vacuuming.
Pro-tip: For added freshness, consider adding a few drops of essential oil to the cleaning solution before using it on your window sills.
Fact: Regular cleaning of window sills prevents the buildup of dirt and mold, promoting a healthier indoor environment.
In ancient Rome, wealthy citizens would use soft linen cloths to dry their window sills to maintain cleanliness and elegance.
In 1984, a group of window cleaners in New York set a record by cleaning 65,000 windows in 11 days, demonstrating remarkable dedication to their craft.
While traditional window cleaning methods involve using soap and water, there are alternative methods for cleaning window sills that can be just as effective. In this section, we will discuss two methods that utilize common household items: vinegar and baking soda. We will also explore the option of using commercial window cleaning products for those who prefer a more convenient approach. By the end, you will have a variety of options to choose from for keeping your window sills sparkling clean.
Using vinegar and baking soda as a natural cleaning solution not only effectively cleans window sills but also helps minimize environmental impact.

To simplify the cleaning process, consider using commercial window cleaning products. Look for reputable brands that offer non-toxic, streak-free solutions for the best results.
When using these products, always follow the provided instructions to achieve optimal cleanliness without causing damage to the window sills or surrounding surfaces.
Pro-tip: Before using any commercial cleaning product, test it on a small, inconspicuous area of the window sills to ensure compatibility and prevent potential damage.
Table Of Contents
Are you tired of streaks and smudges marring the beauty of your windows? Look no further, as this article will provide simple and effective methods to clean window glass. Say goodbye to the frustration and hello to sparkling windows with these easy-to-follow tips. Don't let dirty windows dampen your mood, read on to learn more.

Cleaning window glass is important for multiple reasons, including maintaining a hygienic environment, enhancing the aesthetics of your space, and allowing natural light to brighten interiors.
There are multiple benefits to cleaning window glass, including enhancing the aesthetic appeal of your home or workplace, allowing more natural light to enter the space, and providing clearer outside views.
Pro-tip: For streak-free and sparkling windows, add a dash of vinegar to your cleaning solution.

Cleaning window glass may seem like a daunting task, but with the right tools, it can be a breeze. In this section, we will discuss the essential tools you need to effectively clean your windows. From the basic window cleaner to the specialized scraper, each tool plays a crucial role in achieving sparkling, streak-free windows. So, let's dive in and discover what tools you'll need to add to your cleaning arsenal.

A microfiber cloth is a necessary tool for effectively cleaning window glass. Its fine fibers are designed to attract and trap dirt, dust, and grime without leaving behind any lint or streaks. It is important to make sure the microfiber cloth is clean and free of any debris before use to avoid scratching the glass surface.

Pro-tip: Use a squeegee with a flexible blade to adapt to different window shapes, ensuring a thorough clean.

Learn more: What Is The Best Window Cleaning Equipment
Cleaning window glass may seem like a daunting task, but with the right steps, it can be a quick and easy process. In this section, we will discuss the step-by-step process of cleaning window glass. From preparing the cleaning solution to drying the glass, we will cover all the necessary steps to achieve sparkling, streak-free windows. So let's dive in and learn the best techniques for achieving crystal clear windows.
Fact: It is highly recommended to use an environmentally friendly cleaning solution to minimize its impact on the surroundings.


When applying the cleaning solution to window glass, follow these steps:
In 1968, the invention of the modern aerosol can revolutionized cleaning by introducing convenient spray-on solutions.


For optimal results, make sure the squeegee blade is in good condition and replace it if it is damaged. Practice using the squeegee to perfect the technique and achieve a streak-free shine.
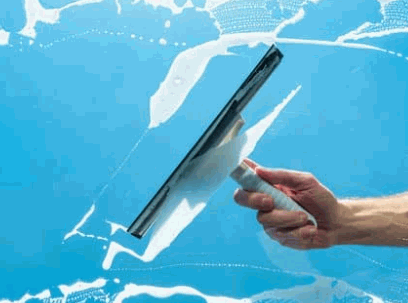
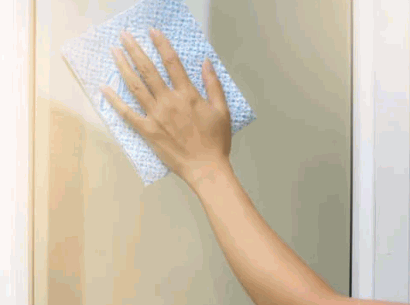
When it comes to cleaning window glass, there are a few key tips that can make the process much more effective and efficient. In this section, we will discuss the best techniques for achieving sparkling clean windows. From choosing the right weather conditions to using the right tools, we'll cover everything you need to know for a streak-free shine. So let's get started and learn how to make your windows shine like new!
Pro-tip: Overcast days are ideal for achieving streak-free windows.