Table Of Contents
External cladding serves a vital function in safeguarding a residence while simultaneously enhancing its aesthetic appeal. It is essential to maintain its cleanliness to ensure its longevity and prevent potential damage. This guide delves into the definition of external cladding, the importance of regular cleaning, and the various types available in the market. Additionally, it offers a comprehensive overview of the tools and materials required for effective cleaning, along with detailed step-by-step instructions. By following this guide, homeowners can learn how to maintain their cladding in optimal condition, ensuring that their home retains its visual appeal for years to come.
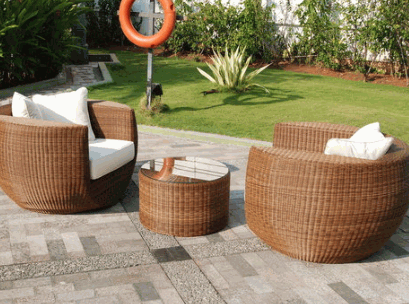
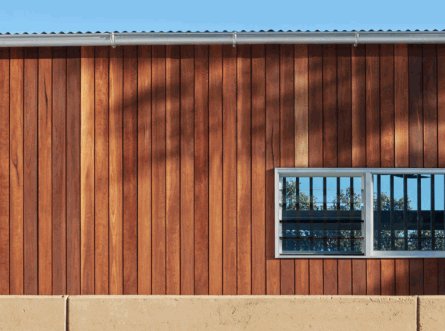
External cladding constitutes an essential element of contemporary architecture, functioning not only as an aesthetic enhancement for commercial buildings but also as delivering critical thermal insulation and energy efficiency.
This cladding can be made from a variety of materials, including wood, vinyl, aluminum, and composite materials, each presenting distinct advantages and applications.
The proper installation of external cladding is imperative, as it serves to protect against environmental elements such as moisture, which can result in mold growth, mildew, and water damage. This protection is vital for ensuring the longevity and safety of the structures it envelops.
Regular cleaning cladding practices are essential for maintaining the health and safety of building occupants and maximizing the lifespan of the building's exterior.
Cleaning external cladding is crucial for preserving the integrity and appearance of commercial buildings. Neglecting this process can lead to serious issues, such as mold growth, water damage, and potential health risks, including asthma and allergies, for occupants.
Regular cleaning not only enhances the aesthetic appeal of the property but also ensures that cladding materials—whether wood, vinyl, or metal—remain in optimal condition, effectively contributing to thermal insulation and energy efficiency.
The implementation of a structured cleaning regime plays a vital role in prolonging the longevity of these exterior surfaces, thereby reducing the necessity for costly repairs or replacements in the future. A comprehensive maintenance strategy should include:
Incorporating a consistent cleaning schedule not only protects physical assets but also contributes significantly to the overall well-being of individuals who inhabit or work within the buildings.
External cladding is available in a variety of types, each presenting unique characteristics and benefits that cater to diverse architectural styles and climatic conditions.
Commonly utilized materials include:
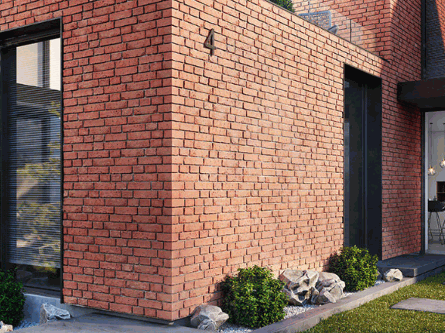
Furthermore, traditional options such as brick and stone cladding are often selected for their enduring beauty and robust structural properties.
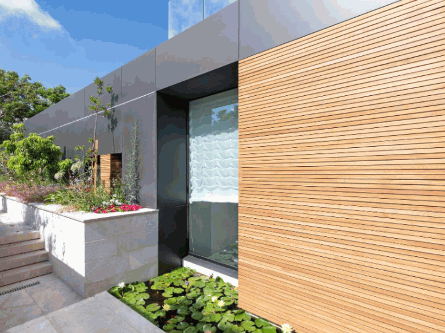
Timber cladding is a widely regarded choice due to its natural beauty, warmth, and versatility, making it suitable for a variety of design styles ranging from rustic to modern. It offers excellent thermal insulation and energy efficiency; however, it necessitates regular maintenance to prevent issues such as mold growth and water damage, which can compromise both its structural integrity and aesthetic appeal over time.
By selecting timber cladding, homeowners can benefit from advantages that extend beyond mere visual appeal. One significant advantage is its exceptional insulating properties, which help to regulate indoor temperatures and ultimately result in reduced energy costs. Additionally, timber is an inherently sustainable material, being a renewable resource that, when sourced responsibly, minimizes environmental impact.
To maintain its beauty and longevity, homeowners should be attentive to the required maintenance. Regular cleaning with mild detergents, a soft-bristled brush, and a pressure washer as needed, can prevent the accumulation of dirt and mildew. The application of protective finishes will help shield the timber from the elements, ensuring it retains its stunning appearance for years to come.
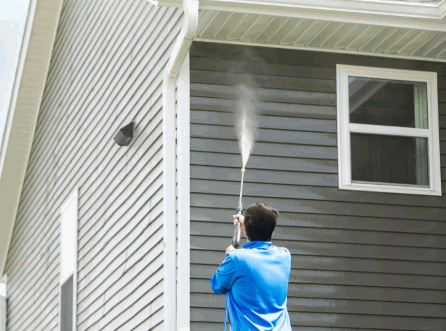
Vinyl cladding is recognized for its low maintenance requirements and exceptional durability, rendering it a preferred choice for many commercial buildings. Unlike traditional materials, vinyl cladding does not necessitate painting and can be easily cleaned using a pressure washer or mild detergent. This ensures that it maintains a fresh appearance while effectively protecting against moisture and other environmental factors.
The resilience of this material extends its lifespan, potentially leading to significant savings on replacement costs over time.
Given these qualities, vinyl cladding emerges as an ideal option for individuals seeking both aesthetic appeal and efficiency in their building's exterior, complementing other options such as PVC cladding for enhanced durability.

Metal cladding, particularly aluminum, is esteemed for its lightweight nature, durability, and exceptional resistance to weather elements, rendering it suitable for various building applications. This type of cladding exhibits high resistance to rust and corrosion, allowing it to withstand harsh environmental conditions while requiring minimal maintenance compared to traditional materials. Regular cleaning is vital to ensure its longevity and performance, especially in commercial settings.
The advantages of metal cladding extend beyond its physical properties. A significant benefit is its aesthetic appeal, as it is offered in a variety of colors and finishes that complement modern architectural designs. This versatility enables creative design opportunities while enhancing the overall visual impact of a building.
Key Advantages Of Metal Cladding:
To maintain its appearance and prevent corrosion, the following best practices are recommended: use of appropriate cleaning agents and tools such as a soft-bristled brush or soft cloth.

Brick cladding represents a traditional and timeless choice that provides exceptional structural integrity and insulation properties, making it a favored option for commercial buildings that seek both durability and aesthetic appeal. This form of cladding not only enhances the exterior appearance of a structure but also offers excellent resistance to fire and adverse weather conditions, thereby ensuring long-lasting performance.
Due to its robust characteristics, brick cladding acts as an effective barrier against environmental challenges while promoting energy efficiency. The aesthetic value is further enhanced by the variety of colors and textures available in brick options, allowing for customization to align with specific architectural visions. Its remarkable insulation properties help maintain optimal indoor temperatures throughout the year, potentially resulting in reduced energy costs.
To preserve the impressive appearance and functionality of brick cladding, regular cleaning is essential. Techniques such as power washing, gentle scrubbing with a mild detergent, and the application of specialized masonry cleaners can prevent the accumulation of dirt and moisture, which could lead to complications such as mold growth or material degradation.
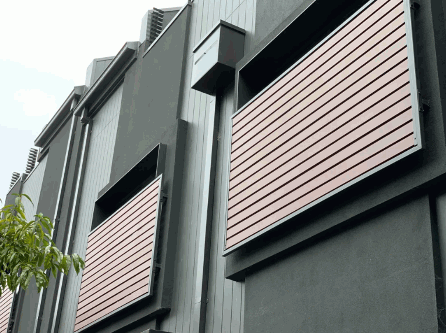
Composite and aluminum cladding integrate multiple materials to provide a robust and versatile exterior solution that enhances both energy efficiency and durability for contemporary buildings.
This innovative cladding option effectively replicates the appearance of wood or metal while offering superior resistance to rot, pests, and weather-related damage. As a result, it presents an appealing choice for architects and builders.
In the context of today’s sustainable building practices, composite cladding is distinguished by its aesthetic versatility, allowing for a broad range of design possibilities that can complement various architectural styles. The durability of the material ensures an extended lifespan, which reduces the frequency of replacements and associated costs, ultimately benefiting both homeowners and developers. Additionally, its improved insulation properties contribute to enhanced energy efficiency, leading to reduced energy expenses and a smaller carbon footprint.
Maintenance of composite cladding is straightforward, with periodic cleaning recommended to preserve its appearance. Specific stains or debris can generally be addressed with mild detergents. Conducting routine inspections for scratches or imperfections will also aid in maintaining the exterior in pristine condition.
To effectively clean external cladding, it is essential to utilize a range of tools and materials that ensure both efficiency and safety, ultimately prolonging the lifespan of the cladding materials.
Key items include:
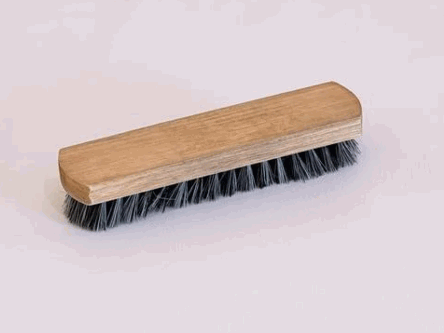
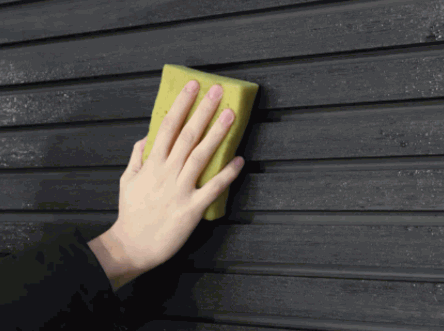
A soft-bristled brush is a vital tool for cleaning cladding, as it effectively removes dirt and debris without causing damage to the surface of the material. This tool is particularly beneficial for delicate surfaces such as wood cladding, where the use of harsher tools may result in scratches or compromise the integrity of the material.
Utilizing a soft-bristled brush provides numerous advantages for maintaining various cladding types, including vinyl, metal, and composite materials. Unlike abrasive scrubbers, the soft bristles deliver a gentle yet thorough cleaning action, ensuring that stains and grime are effectively lifted without harming the finish.
To enhance cleaning efforts, it is recommended to soak the brush in a mild cleaning solution before gently scrubbing the surface in a circular motion.
Regular maintenance of the brush, including proper storage away from direct sunlight, will ensure that its bristles remain in optimal condition, preparing it for future cleaning tasks.
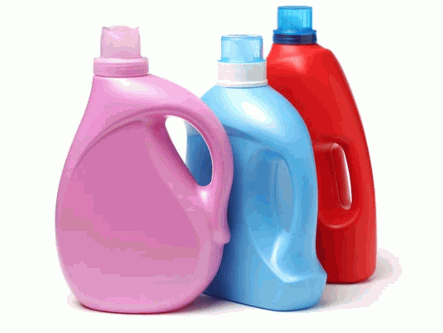
Utilizing a mild detergent as a cleaning solution is essential for effectively removing grime, mold, and mildew from external cladding while ensuring that the materials remain undamaged during the cleaning process. When diluted with water, a mild detergent can penetrate surfaces and break down stubborn stains, resulting in a thorough clean.
Selecting the appropriate cleaning products is critical to maintaining the integrity and appearance of cladding, as harsher chemicals may lead to deterioration or discoloration over time. A mild detergent, specifically formulated for various surfaces, can address a wide array of contaminants, including:
To utilize the detergent effectively, mix it with warm water according to the product instructions, apply it using a soft cloth or sponge, and rinse thoroughly with clean water. Additionally, consider alternatives such as vinegar solutions for biodegradable options, or specialized cleaners for materials such as vinyl, wood, PVC, or aluminum that may require specific care.
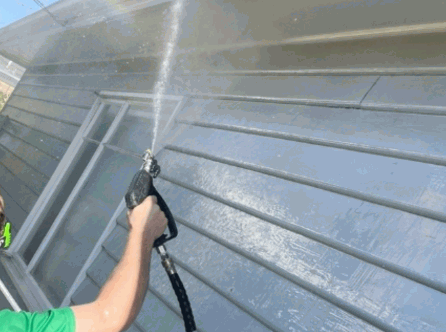
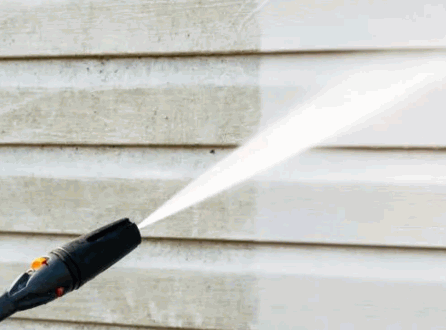
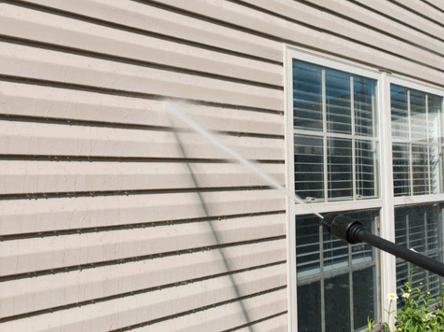
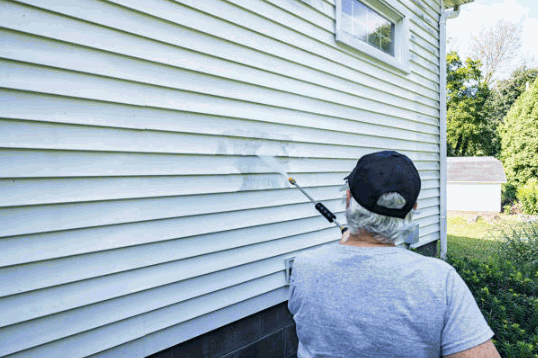
A pressure washer is a highly effective tool designed to enhance the efficiency of the cleaning process by delivering high-pressure water jets capable of removing dirt, mold, and debris from external cladding surfaces. This equipment proves particularly advantageous for larger areas of cladding, significantly reducing the time and effort required when compared to manual cleaning methods.
The utilization of a pressure washer offers several benefits that make it a preferred option for homeowners and professionals alike. Notably, it facilitates deeper penetration into crevices and hard-to-reach areas that traditional cleaning methods may overlook.
When operating a pressure washer, it is essential to consider the following guidelines:
Furthermore, it is imperative to wear appropriate safety gear, including goggles and sturdy footwear, to protect against flying debris. Additionally, ensuring that the area is clear of bystanders is crucial to prevent accidental injuries. By adhering to these simple precautions, users can maximize the effectiveness of this tool while minimizing potential risks.
Explore further: How Much To Pressure Wash A Roof
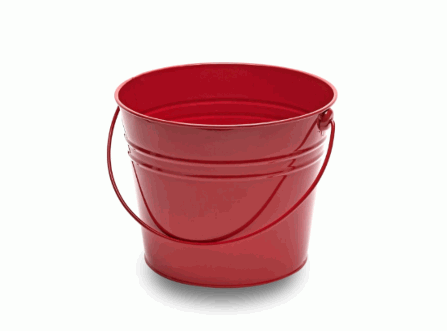
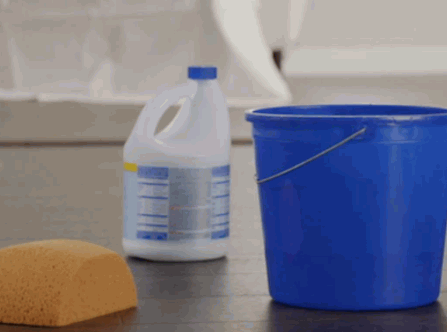
A sturdy bucket is essential for mixing cleaning solutions and transporting water during the cleaning process of external cladding. It allows the user to safely and conveniently prepare an adequate amount of cleaning solution, ensuring sufficient coverage for the entire area being cleaned. The bucket functions as a versatile tool that not only simplifies the cleaning operation but also enhances efficiency, thereby reducing the time required to complete the task.
When maintaining cladding, one must recognize the importance of having adequate supplies, as these are crucial for achieving effective results. A well-prepared cleaning setup may include:
Having all these tools readily accessible promotes seamless transitions during the cladding maintenance process, ultimately leading to a superior outcome.
A ladder is a critical component of safety equipment when accessing elevated areas of external cladding, including aluminum cladding, that requires cleaning, ensuring that all surfaces are adequately reachable during maintenance. The proper use of a ladder is essential in preventing accidents and facilitating thorough cleaning of hard-to-reach areas, which is vital for maintaining the structural integrity of the building.
When employing a ladder for cleaning purposes, adherence to safety measures is of utmost importance. The significance of accessibility cannot be overstated, as a correctly positioned ladder can significantly reduce the risk of falls and injuries. It is advisable to:
Additionally, wearing appropriate safety gear, such as helmets and harnesses, further enhances safety during the cleaning process. By prioritizing these practices, the likelihood of accidents is substantially diminished, facilitating a seamless and effective cleaning operation.

The use of protective gear is essential when cleaning external cladding to prevent potential health issues, such as allergies or asthma exacerbated by exposure to mold and dust. Necessary protective equipment includes gloves, goggles, and masks, which collectively ensure the safety of the individual performing the cleaning tasks, particularly when employing chemical cleaning solutions.
Given the various risks associated with cleaning activities, it is imperative to select appropriate equipment that not only provides physical protection but also minimizes the inhalation of harmful substances. The use of protective gear significantly decreases the likelihood of encountering serious health issues.
The following items are recommended:
By prioritizing the use of protective gear, individuals can effectively mitigate health risks while ensuring the cleanliness and safety of external cladding.
Cleaning external cladding necessitates a systematic approach that guarantees comprehensive coverage while minimizing the risk of damage to both the materials and adjacent structures.
The process generally involves several key steps:
This methodical approach ensures the proper use of safety gear and the employment of suitable tools, such as pressure washers and soft-bristled brushes, to achieve optimal results. Additionally, calling a professional service can provide expertise in handling more challenging cleaning tasks.
Preparing the area prior to cleaning external cladding is essential for ensuring a safe and efficient cleaning process. This preparation involves removing any obstacles, covering nearby plants or furniture to protect them from cleaning solutions, and ensuring that all necessary safety gear is worn to mitigate risks during the cleaning procedure.
When undertaking a cleaning project, implementing a few preliminary steps can significantly enhance both the outcome and the overall safety of the task.
Begin by thoroughly assessing the work area:
Furthermore, ensuring that safety gear such as goggles, gloves, and masks are readily available is paramount. By being proactive in these preparations, one can safeguard both the environment and personal well-being, thereby facilitating a smooth cleaning experience.
The removal of loose debris from external cladding prior to the application of any cleaning solution is essential. This practice not only enhances the effectiveness of the cleaning process but also prevents potential damage to the cladding materials. By clearing away dust, leaves, and other materials, the risk of mold growth is minimized, and the cleaning solution is better able to penetrate and clean the surface effectively.
To achieve optimal results, it is vital to employ appropriate tools during this preparatory phase. The use of soft-bristled brushes is highly recommended, as they effectively dislodge dirt without causing scratches or abrasions to the cladding surface. Additionally, a handheld vacuum can be useful for removing larger debris particles.
The following methods are effective for debris removal:
By incorporating these techniques into the cleaning routine, property owners can ensure a cleaner, more presentable exterior while also extending the lifespan of their cladding.
Mixing an appropriate cleaning solution is a critical step in the cleaning process for external cladding, as it ensures that the detergents effectively remove dirt, mold, and mildew. A commonly recommended mixture consists of a mild detergent combined with water, which provides a gentle yet efficient solution suitable for various cladding materials.
To achieve optimal results, it is essential to select the correct ratio of detergent to water. A typical guideline suggests mixing 1 part detergent to 10 parts water, with the possibility of adjusting this ratio for more stubborn stains. For resilient surfaces, such as vinyl or composite materials, a stronger solution may be necessary, such as a ratio of 1:5.
It is advisable to conduct a spot test in a discreet area to prevent potential damage. It is important to recognize that different cladding types, including wood, stone, and metal, possess unique properties, which require specific cleaning agents:
By carefully considering these factors, the effectiveness of the cleaning process can be significantly enhanced, thereby prolonging the lifespan of the cladding.
The application of the cleaning solution to the external cladding should be conducted methodically, ensuring that all areas receive sufficient treatment while avoiding oversaturation. It is advisable to utilize a spray nozzle or a soft-bristled brush to evenly distribute the solution, allowing it to effectively penetrate and break down grime and mold.
To enhance the effectiveness of the application, it is recommended to work in sections, treating one area at a time. This approach not only helps maintain focus on ensuring thorough coverage of each surface but also minimizes the risk of the solution drying too quickly.
For optimal results, consider the following guidelines:
It is also prudent to monitor weather conditions; conducting this task on a cloudy day is preferable to prevent the solution from evaporating too quickly due to direct sunlight.
Scrubbing the cladding with a soft-bristled brush is an essential component of the cleaning process, as it effectively lifts dirt and grime loosened by the cleaning solution. This gentle scrubbing action is critical for maintaining the integrity of the cladding while ensuring a thorough cleaning of the surface.
Selecting the appropriate brush for cladding composed of various materials can significantly influence the cleaning results. For example, when cleaning vinyl cladding, a brush with synthetic bristles strikes an optimal balance between rigidity and softness, enabling the effective removal of stubborn stains without scratching the surface. In contrast, for wooden cladding, a natural bristle brush may be more suitable, as it can conform to the textured surface, ensuring that the cleaning solution penetrates effectively without causing damage to the wood.
Utilizing the appropriate brush type tailored to the cladding surface not only safeguards the material but also enhances the overall cleanliness and appearance of the property.
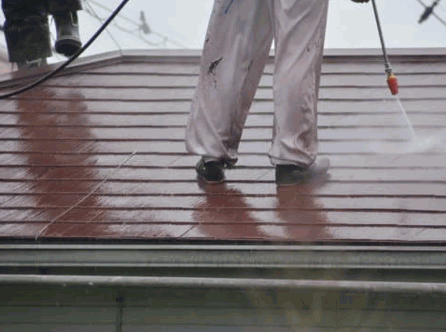
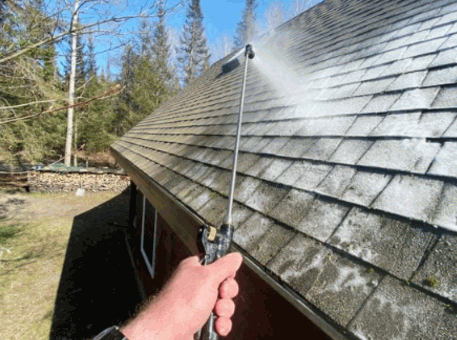
Rinsing the cladding with a pressure washer is an effective method for removing any residual cleaning solution and dirt following the scrubbing process, thereby ensuring a comprehensive cleaning of the surface. This technique not only accelerates the cleaning process but also protects the cladding materials from potential damage associated with harsh scrubbing methods.
Proper utilization of a pressure washer necessitates the selection of appropriate settings to avoid causing damage. It is advisable to begin with a lower pressure setting, typically ranging from 1500 to 2000 PSI, as this is gentle enough for most types of cladding. This approach ensures that the cleaning process remains efficient while minimizing the risk of harm to softer surfaces.
To optimize rinsing techniques, consider the following guidelines:
By adhering to these practices, one can enhance the effectiveness of the rinsing process while preserving the integrity of the cladding. Along with ensuring cleanliness, this step is crucial for extending the lifespan of exterior surfaces.
Thoroughly drying the cladding, including surfaces such as PVC cladding, after cleaning is essential to prevent moisture retention, which can lead to mold growth and water damage over time. Utilizing a soft cloth or allowing the cladding to air dry in a well-ventilated area ensures that all surfaces are adequately dried and maintained.
The importance of this final step in the maintenance routine cannot be overstated, as it significantly contributes to the longevity of the material. Proper drying techniques are vital for preserving the exterior surfaces in optimal condition, especially for cladding made from materials like PVC.
Implementing these precautions creates an environment conducive to maintaining the resilience of the cladding and protecting it from the detrimental effects of prolonged dampness.
Determining the appropriate frequency for cleaning external cladding is contingent upon several factors, including the type of cladding material such as cladding made from PVC, local environmental conditions, and the overall maintenance schedule for the building. Typically, a routine cleaning interval of every 6 to 12 months is recommended to mitigate issues such as mold growth and to maintain the aesthetic appeal and structural integrity of the cladding.
The material utilized for external cladding can significantly influence the required cleaning frequency. For example, vinyl and aluminum may necessitate less frequent cleaning compared to materials such as wood or stone, which are more prone to trapping dirt and moisture. PVC cladding, being durable and easier to clean, also requires less frequent maintenance.
Environmental conditions also play a critical role in determining cleaning frequency. Buildings located in coastal areas may experience salt deposits, thereby requiring more frequent washdowns compared to those situated in arid regions. Furthermore, urban environments typically expose cladding to higher levels of pollution and grime, necessitating more diligent upkeep.
Establishing a well-structured maintenance schedule that takes these factors into account not only enhances the longevity of the cladding but also increases the overall value of the property.
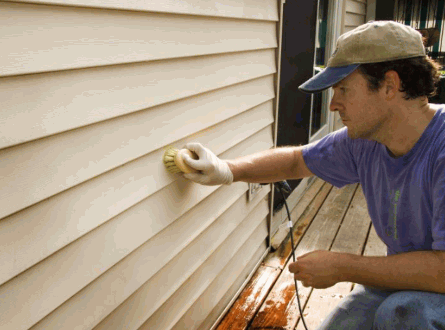
Table Of Contents
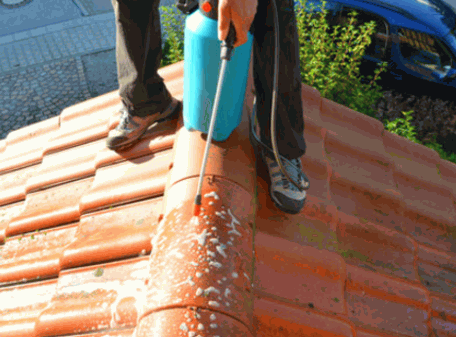
Pressure washing is a highly effective cleaning method for maintaining both the appearance and integrity of various surfaces, including roofs. This guide examines the significance of roof pressure washing and the numerous advantages it provides to homeowners, such as moss prevention and roof moss removal. Additionally, it addresses the associated costs, evaluates the feasibility of undertaking the project independently, and outlines circumstances in which it may be advisable to engage professional services. This comprehensive resource will equip you with the essential information needed to ensure your roof remains in optimal condition through effective roof cleaning and maintenance practices.
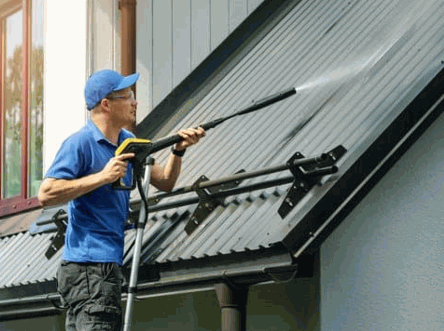
Pressure washing is a highly effective cleaning technique that utilizes high-pressure water spray to eliminate dirt, grime, mold, and other debris from various surfaces, including residential structures, driveways, and roofs. Some contractors recommend soft washing as an alternative cleaning method to protect delicate surfaces.
In Texas, where environmental conditions such as humidity contribute to the rapid growth of algae and moss on roofs, contractors frequently recommend pressure washing and soft washing as essential maintenance practices.
This method not only extends the lifespan of roofing materials but also enhances the overall curb appeal of properties, increasing their potential property values.
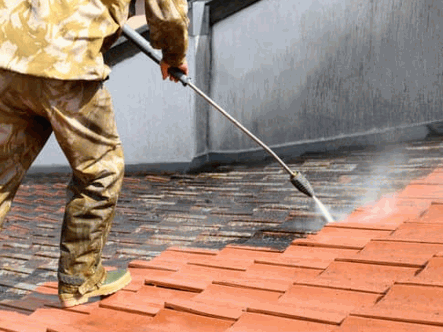
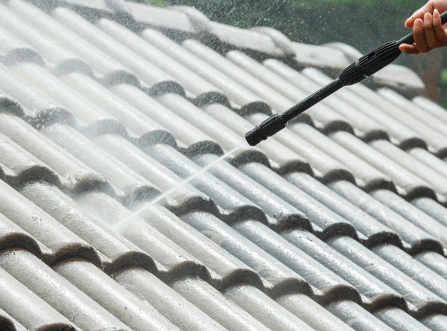
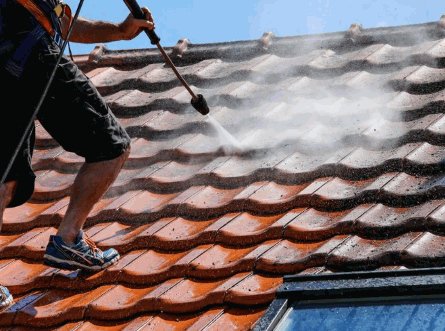
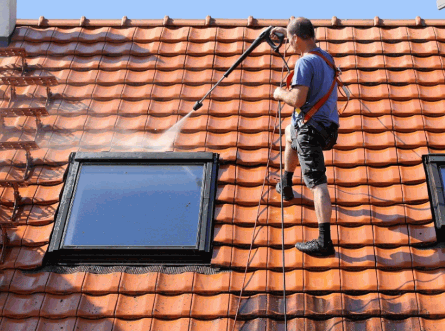
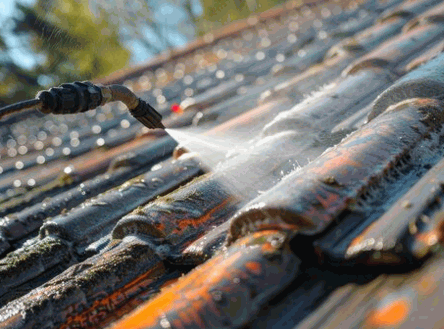
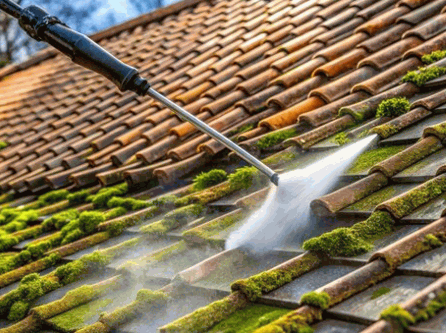
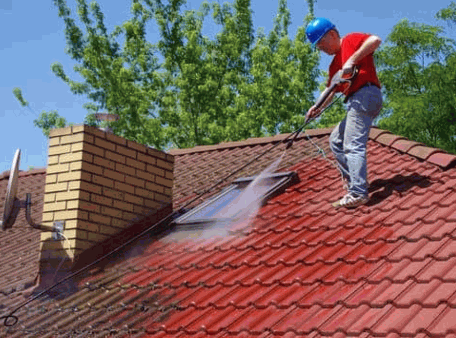
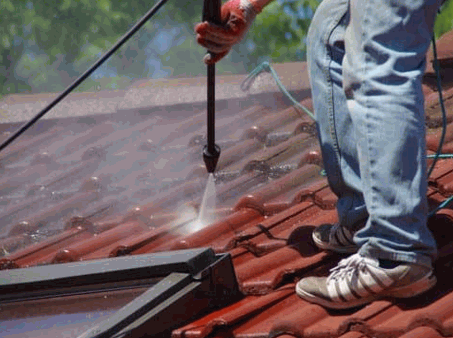
Roof pressure washing is a specialized cleaning process designed to address the distinct requirements of various roof types, effectively eliminating stubborn stains caused by moss, algae, and other organic substances that can compromise the integrity of the roof. This technique is particularly beneficial for homeowners seeking to maintain both the aesthetic appeal and longevity of their roofs, as it employs specific methods tailored to different roofing materials and sizes, including considerations of roof dimensions.
This service presents numerous advantages, ensuring that the roof remains in optimal condition while considerably enhancing its lifespan. During the pressure washing process, professionals evaluate the type of roofing material—whether asphalt shingles, tile, metal, or flat roofs—to determine the most effective cleaning method. Each type of roofing material presents unique challenges and requires varying levels of pressure, with cleaning chemicals sometimes used for enhanced effectiveness:
Regular maintenance of a roof through pressure washing is essential, as it helps to prevent the accumulation of harmful elements that could lead to costly repairs in the future. By incorporating this cleaning service into a routine maintenance schedule, the longevity of the roof can be significantly improved, reducing the need for premature roof repair.
Delve into: How To Clean Roof From Moss
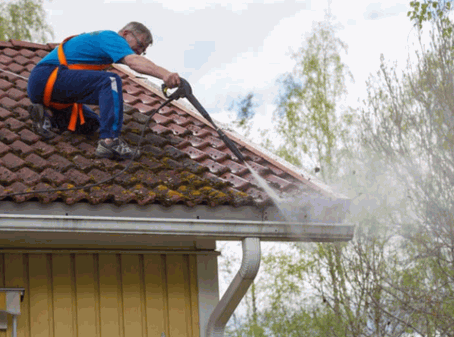
Roof pressure washing is essential for various reasons, primarily due to its role in maintaining the overall condition of a roof. It prevents damage caused by the growth of moss and algae, thereby extending the lifespan of roofing materials.
Regular cleaning not only improves the aesthetic appeal of a property but also helps avoid expensive repairs that can arise from neglecting roof maintenance. Incorporating roof vent cleaning and gutter cleaning into the routine can further enhance results. Furthermore, it contributes to the reduction of cleaning costs over time.

The advantages of roof pressure washing extend beyond mere aesthetics; this maintenance practice substantially improves curb appeal, prolongs the lifespan of roofing materials, and acts as a proactive measure to prevent damage and leaks. Additionally, it supports proper water drainage and prevents issues like blocked gutters.
By effectively removing harmful substances such as moss and algae, homeowners can maintain their roofs in optimal condition, which is crucial for both functionality and visual appeal.
One of the most immediate advantages of roof pressure washing is its capacity to significantly enhance curb appeal, as a clean roof can transform the overall aesthetic of a home. This enhancement is particularly evident in neighborhoods where residences are closely situated, as any grime or discoloration can detract from the visual harmony of the area.
When a property exhibits clarity and cleanliness, it not only attracts the attention of passersby but also instills a sense of pride among homeowners. The effects of roof cleaning extend beyond mere aesthetics; they can also substantially increase property values. For example, a homeowner in a suburban community reported receiving multiple offers above the asking price within days of pressure washing their roof. Such transformations are not solely superficial; they contribute to a more appealing neighborhood environment.
These improvements can evoke a positive psychological response in both residents and potential buyers, reinforcing the notion that cleanliness fosters a sense of community and well-being. Moreover, regular roof raking and cavity cleaning can contribute to maintaining a pristine environment.
Regular roof pressure washing can significantly extend the lifespan of roofing materials by removing harmful elements such as moss and algae, which can lead to deterioration over time. By investing in this cleaning method, homeowners can maximize the durability of their roofs and reduce the likelihood of premature repairs or replacements.
It is important to recognize that different roofing materials respond uniquely to neglect and maintenance practices. For example, asphalt shingles can last approximately 20 years with proper maintenance; however, this lifespan can be reduced by nearly 50% without routine care. Likewise, while metal roofing is known for its durability, it is susceptible to corrosion and rust when not regularly cleaned, resulting in a considerably shorter lifespan.
Statistics indicate that regular maintenance can increase the lifespan of asphalt shingles by up to 30% and nearly 50% for metal roofs when complemented with periodic pressure washing. The long-term financial benefits of such maintenance practices are substantial; homeowners can save thousands of dollars in repair costs while potentially increasing property value.
By incorporating pressure washing into their routine maintenance, homeowners not only protect their investment but also enhance the overall resilience of their roofs.
Preventing damage and leaks is a primary benefit of roof pressure washing, as this process effectively removes debris and organic growth that can compromise the integrity of the roof. By ensuring that roofs are clean and free of obstructions, homeowners significantly reduce the risk of water infiltration, which can lead to expensive repairs and structural issues.
Neglecting routine maintenance can result in considerable problems, such as cracked shingles and blocked gutters that trap moisture, potentially leading to the need for roof repair. For example, the growth of algae and moss not only diminishes the roof's visual appeal but also retains water, thereby accelerating decay and increasing the likelihood of leaks. The application of a roof sealant can further protect against such issues.
By incorporating pressure washing into a regular roof maintenance regimen, these issues can be addressed proactively. Effectively removing contaminants helps to extend the lifespan of roofing materials, leading to several advantages, including:
Ultimately, this preventative measure can result in substantial savings for homeowners in terms of repair costs.
The cost of pressure washing a roof can vary significantly based on several factors, including the size, type, and condition of the roof. Homeowners can anticipate an average total cost calculated on a per-square-foot basis.
By comprehensively understanding these factors, property owners can more effectively budget for roof maintenance and cleaning expenses, including average cost considerations, while ensuring that quality is not compromised.
Several factors influence the cost of pressure washing a roof, including roof size, material, and condition, all of which play a significant role in determining the final price. Understanding these factors can assist homeowners in making informed decisions when considering roof cleaning services, such as evaluating the benefits of pressure washing versus soft washing.
The roof size, typically measured in square feet, is the most apparent factor affecting the overall cost. Larger roofs will inherently require more time and resources for cleaning, resulting in increased labor and material expenses.
The type of roof material—such as asphalt shingles, tile, or metal—adds another layer of complexity to the pricing structure. Each material necessitates specific cleaning methods and chemicals, which can vary considerably in cost.
The existing condition of the roof is also critical; roofs that are heavily stained or have substantial algae growth may require additional treatment, including cleaning chemicals like bleach and water solutions, thus increasing the final bill.
The average cost for pressure washing a roof generally ranges from $200 to $600, depending on the square footage and specific requirements of the roof condition. This price range provides homeowners with a foundational understanding for budgeting this essential maintenance task according to HomeGuide and RCIA guidelines.
When evaluating the overall investment, it is important to consider various factors that can influence the final price:
Additionally, services such as moss removal or sealant application can considerably impact the overall budget. For instance, the cost for moss removal may range from $100 to $250, while the application of sealant could add an additional $200 to $300 to the total expense, as suggested by ARMA.
Consequently, it is advisable for homeowners to obtain itemized quotes to ensure transparency regarding costs and the necessary maintenance for their roofs.
Homeowners often inquire about the feasibility of pressure washing their roofs independently. While this task is indeed possible, it is imperative to consider essential safety precautions, equipment requirements, and the potential need for roof cavity cleaning prior to proceeding.
Possessing the appropriate tools and knowledge is crucial, as it can significantly impact the outcome of the cleaning process and mitigate the risk of damaging the roof or incurring personal injury.
Before undertaking DIY roof pressure washing, it is imperative to observe several safety precautions to prevent accidents or injuries during the cleaning process. This includes the use of protective gear, ensuring stable footing, and assessing the roof's condition to avoid falls or equipment-related incidents.
For homeowners intending to perform this challenging task, implementing a series of specific actions to enhance safety is crucial. First and foremost, the use of appropriate protective gear—such as non-slip footwear, helmets, and gloves—is essential. These items significantly reduce the risks associated with both height and wet surfaces.
By adhering to these precautions and maintaining a safety-first approach, homeowners in Texas and beyond can effectively mitigate the potential risks associated with roof pressure washing.
In preparation for DIY roof pressure washing, it is essential to possess the proper equipment and supplies to achieve effective cleaning results while ensuring safety. Key items necessary for this task include a pressure washer, suitable nozzles, safety gear, and, depending on the specific requirements of the roof, cleaning chemicals specifically formulated for the removal of moss and algae.
To commence, the pressure washer serves as the core of the operation, supplying the requisite water pressure to eliminate dirt and debris. It is advisable to select a model with adjustable pressure settings, enabling the user to accommodate various surfaces without causing damage, thereby optimizing roof cleaning techniques.
Furthermore, investing in a selection of nozzles is important, as each nozzle produces different spray patterns; wider sprays are appropriate for delicate materials, while narrower sprays effectively target stubborn stains. Safety gear, which includes gloves, goggles, and a protective mask, is crucial for ensuring safety during the operation.
Utilizing appropriate chemicals tailored to specific roof materials not only enhances cleaning efficiency but also extends the lifespan of the roof. For example, gentle cleaners are suitable for asphalt shingles, whereas more potent solutions are necessary for metal roofs, highlighting the importance of careful selection and application techniques.
A step-by-step guide for DIY roof pressure washing can assist homeowners in navigating the process effectively, ensuring they achieve clean results without causing damage to their roofs.
This comprehensive approach not only emphasizes safety but also addresses the specific requirements of various roofing materials, making it accessible for anyone to follow. The importance of preparation cannot be overstated, as it establishes the foundation for a successful cleaning experience.
Homeowners should begin by gathering essential tools and materials, including a pressure washer, appropriate cleaning solution, safety gear, and a sturdy ladder. The following outline provides a brief overview of the necessary steps:
By adhering to these steps, homeowners can ensure a thorough and safe roof-washing experience that enhances both the longevity and aesthetic appeal of their roofs.
Although some homeowners may consider undertaking roof pressure washing as a do-it-yourself project, there are particular situations in which it is advisable to engage a professional. This is especially true when dealing with complex roofing materials or when the homeowner lacks experience inappropriate cleaning techniques.
Professional contractors possess the necessary expertise and specialized equipment, to ensure a safe and comprehensive cleaning process.
Certain complex roofing materials, such as slate, tile, or metal roofs, necessitate specialized knowledge and techniques that often exceed the capabilities of the average homeowner. In such instances, engaging a professional for roof cleaning is advisable to ensure that the unique characteristics of these materials are effectively addressed without risking damage.
Different roofing materials present distinct challenges that require specialized expertise. For example, slate roofs are not only costly but also brittle, meaning that inadequate care during the cleaning process may lead to cracking or dislodging of the slates. Similarly, tile roofs can accumulate debris and moss in ways that if not properly managed, may result in water leaks or other significant structural issues. Furthermore, metal roofs can experience corrosion when exposed to harsh cleaning agents, leading to expensive repairs.
Thus, the importance of professional expertise cannot be overstated, particularly as improper cleaning practices can result in irreversible damage and increased costs over time.
If a homeowner lacks the experience or necessary equipment for effective roof pressure washing, it is often advisable to hire a professional who can execute the task safely and efficiently. Professionals are equipped with specialized tools and possess the training required to manage the complexities of pressure washing without risking damage to the roof or personal injury.
While many individuals may contemplate undertaking roof washing as a DIY project, the reality is that improper techniques can result in significant risks, including:
By engaging an expert, homeowners can derive considerable benefits. These professionals not only possess the experience necessary to perform the job correctly but also have access to:
Ultimately, selecting a qualified roof washing service ensures the roof's longevity and provides peace of mind, knowing that the job will be executed properly.
Time constraints can significantly influence the decision to engage a professional service for roof pressure washing, as this process tends to be both time-consuming and labor-intensive. Professionals possess the expertise to complete the task more efficiently, enabling homeowners to concentrate on other priorities while ensuring that their roofs receive proper roof-cleaning maintenance.
For numerous individuals juggling work, family, and various responsibilities, dedicating an entire weekend to roof cleaning may not be a practical option. The task entails not only pressure washing but also implementing safety measures, setting up equipment, and addressing potential repairs, all of which can require far more time than initially anticipated. Therefore, hiring experts liberates valuable time that homeowners can redirect toward their families or personal interests.
A recent testimonial from a satisfied client illustrates this point I thought I could clean my roof myself, but after spending half a day on just prep work, I opted for professionals. They finished the job in two hours!" This experience resonates with many others and highlights several key benefits.
Engaging professional services for roof cleaning not only improves efficiency but also allows homeowners to enjoy their well-deserved leisure time without the burden of labor-intensive chores.
Determining the appropriate frequency for pressure washing a roof is essential for effective roof maintenance and moss prevention. General recommendations advise cleaning every 1 to 3 years, depending on environmental factors such as climate and surrounding vegetation. Regular cleaning is vital for maintaining the integrity and appearance of the roof, ultimately extending its lifespan.
The specific frequency of cleaning can be influenced by various factors that warrant careful consideration. For example, in regions like Texas with frequent rainfall, roofs may require more regular washing due to the increased moisture that promotes mold and algae growth. Conversely, in climates characterized by prolonged drought periods, cleaning may be necessary less frequently.
Selecting the appropriate pressure washing company is critical for achieving effective roof cleaning and preserving the integrity of roofing materials. Homeowners should take into account various factors, including the company's reputation, customer reviews, and the range of services provided, as advised by industry contractors.
Plus these key considerations, it is imperative for homeowners to conduct comprehensive research on potential service providers. Verification of credentials is a crucial step; this involves confirming that the company is licensed and certified to perform pressure washing services. Additionally, ensuring that the company possesses liability insurance is important, as it protects homeowners from potential damages during the cleaning process.
As homeowners evaluate their options, it is essential to pay close attention to feedback from previous clients, as this can offer invaluable insights into the quality of service provided. Consulting resources like RCIA (Roof Cleaning Institute of America) can also provide guidance.
By employing these strategies, homeowners can foster trust and increase the likelihood of a satisfactory outcome in their roof maintenance endeavors. Additionally, referring to standards set by organizations such as ARMA (Asphalt Roofing Manufacturers Association) can ensure best practices are followed.
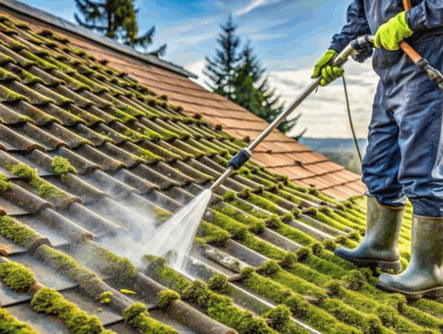
Table Of Contents
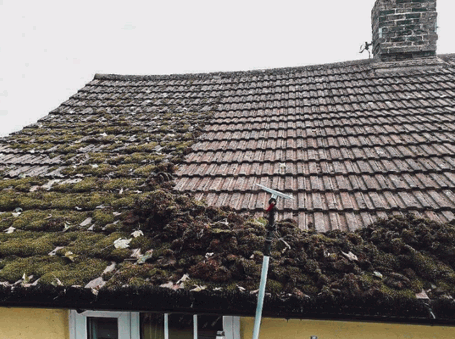
Moss on roofs can pose significant issues beyond mere aesthetic concerns; if left unaddressed, it may result in serious structural damage. This article examines the various causes of moss growth, the critical importance of roof moss removal, and the most effective methods for roof cleaning. Additionally, it outlines essential safety precautions and alternative removal techniques to ensure the protection of both the home and its surroundings, with insights from home maintenance experts. By the conclusion of this article, readers will possess the necessary knowledge to maintain their roofs in a moss-free and optimal condition, preventing moss growth and extending their roof lifespan.
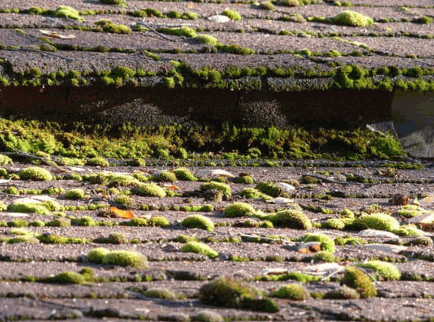
Moss growth on roofs is primarily attributed to a combination of moisture, shade, and an environment that supports organic growth, particularly impacting residential roofs in regions such as Connecticut, Colorado, and the Pacific Northwest.
When shingles retain moisture due to inadequate sunlight and ventilation, it creates an optimal habitat for moss proliferation, which can compromise the roof's structural integrity. This growth not only diminishes the aesthetic appeal of the home but also results in long-term damage if appropriate preventive measures are not taken.
Therefore, understanding the underlying causes is essential for effective moss removal and comprehensive roof maintenance.
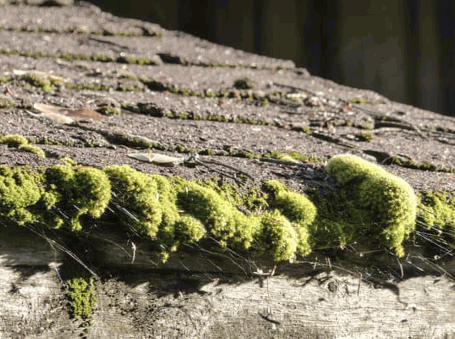
Removing moss from roofs is essential for preserving the structural integrity and longevity of roofing materials. Unchecked moss growth can result in moisture retention, which damages shingles and promotes wood rot, potentially compromising the overall structure of the roof.
Over time, the presence of moss can lead to various significant issues. It not only fosters an environment conducive to lingering moisture but can also contribute to the deterioration of roof underlayment. As moss continues to proliferate, it may lift shingles, creating openings that allow rainwater to infiltrate, resulting in potential leaks within the home. Such leaks can lead to costly water damage and mold growth, underscoring the importance of regular roof maintenance.
Engaging in a professional cleaning service provides substantial benefits. Utilizing specialized techniques and tools, experts can effectively remove moss without causing harm to the roofing materials, ensuring a comprehensive cleaning that extends the roof's lifespan.
Key practices to consider include:
The removal of moss from roofs can be achieved through a range of methods, encompassing both do-it-yourself solutions and professional cleaning services. Effective removal typically requires the preparation of a cleaning solution, which is then applied directly to the affected areas, followed by scrubbing and rinsing to ensure comprehensive treatment.
Additionally, homeowners should consider implementing preventive measures to inhibit future moss growth, thereby enhancing the longevity of their roofs.
Prioritizing safety precautions is essential when undertaking roof cleaning, particularly during the removal of moss, to prevent accidents that could result in serious injuries. Homeowners should utilize appropriate protective gear, such as harnesses, non-slip footwear, and goggles, to create a secure working environment while addressing moss on their roofs.
Plus the use of protective gear, it is critical to implement appropriate ladder safety protocols to minimize the risk of falls. Ensure that the ladder is positioned on a stable, even surface and at the correct angle for safe ascent. Before initiating any cleaning tasks, it is advisable to assess the weather conditions, as wet or windy days can render the roof dangerously slippery.
Protecting the area below the working zone is vital; it is prudent to place tarps or drop cloths to catch falling debris, thereby safeguarding landscaping and exterior features.
Before initiating the moss removal process, it is essential to gather all necessary tools and materials. This may include a scrub brush, a garden sprayer for applying DIY moss removal solutions, and a ladder to ensure safe access to the roof. Having these essentials readily available not only streamlines the cleaning procedure but also enhances safety and efficiency.
To ensure a successful moss removal and prevent future algae growth, consider incorporating the following essential tools and materials into your preparation:
These items, when prepared in advance, not only enhance the effectiveness of the cleaning process but also contribute to a safer working environment, ensuring that each session is both productive and less hazardous.
To effectively remove moss from roofs, it is imperative to begin by clearing away any debris and loose moss. This initial step prepares the surface for the application of cleaning solutions and ensures better adherence to the moss killer. Proper preparation is essential for achieving optimal results.
Before applying any cleaning agents, it is crucial to remove all types of debris, including leaves, branches, and dirt. This not only creates a more accessible surface for the cleaning process but also minimizes the risk of conditions that may allow moss to thrive in any remaining organic materials. By dedicating time to the following actions:
one can significantly enhance the effectiveness of subsequent cleaning measures, leading to a longer roof lifespan. This thorough preparation also reduces the likelihood of future moss growth, as these remnants tend to retain moisture, thereby creating an ideal environment for moss proliferation.
Applying a moss-killer solution is a crucial step in the roof cleaning process, as it effectively targets moss growth. This can be achieved through the use of either a commercial chemical solution or a DIY moss remover composed of natural ingredients.
Proper handling of the application process can significantly enhance the effectiveness of moss removal efforts. It is essential to read and adhere to the manufacturer's instructions for any chemical solutions, as each product may contain specific guidelines regarding dilution ratios, application techniques, and safety precautions.
For example, some products may necessitate mixing with water prior to application, while others are designed for immediate use. Environmentally conscious homeowners may opt for organic alternatives, which can be equally effective without posing a risk to surrounding plant life.
Applying moss killer during dry weather conditions is recommended, as it greatly improves absorption and overall effectiveness, leading to better results in addressing unsightly patches. By following these application strategies, individuals can ensure a more efficient and thorough removal of moss, thereby contributing to the longevity and aesthetic appeal of the roof.
Once the moss killer solution has been adequately applied, the subsequent step involves gently scrubbing the roof to remove any remaining moss, followed by rinsing with water to eliminate debris and cleaning residues, thereby ensuring a comprehensive treatment.
During this critical phase, it is imperative to utilize a soft-bristle brush or a non-abrasive sponge, as the use of harsh scrubbing tools may damage the shingles and compromise their structural integrity. The process should begin at the top of the roof and progress downward in small sections, applying light pressure. This approach not only facilitates the removal of moss but also minimizes the risk of dislodging any shingles.
Successfully completing this cleaning technique will restore the roof’s health, providing lasting protection and enhancing its overall appearance, ultimately preserving the roof's integrity.

To prevent future moss growth on residential roofs, homeowners should implement a series of preventive measures, including regular roof maintenance, ensuring adequate water drainage, and considering the installation of zinc strips or roof strips that inhibit the growth of moss and algae. Incorporating a DIY moss remover can also be an effective strategy.
Conducting routine inspections of the roof can assist in identifying potential problem areas before they develop into more serious issues. Trimming overhanging branches is also an effective strategy, as it reduces shade and prevents the accumulation of debris, which can trap moisture and promote moss growth.
Additionally, maintaining proper ventilation is essential for facilitating airflow that dries moist areas, ultimately protecting the roof from decay and structural damage.
Each of these strategies significantly contributes to prolonging the lifespan of the roof and preserving its overall integrity, thereby allowing homeowners to enjoy their roofs without concerns regarding unwanted growth or damage.
There exist several alternative methods for the removal of moss from roofs, each with its own advantages and disadvantages. These methods, often discussed in Home Improvement Ideas forums, include:
These options enable homeowners to select the most appropriate option based on their individual circumstances.
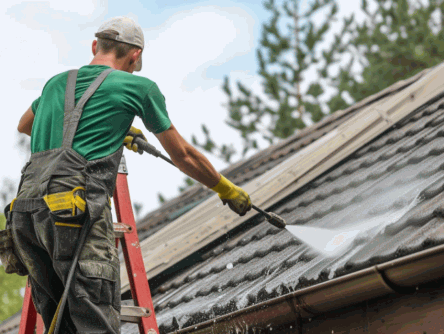
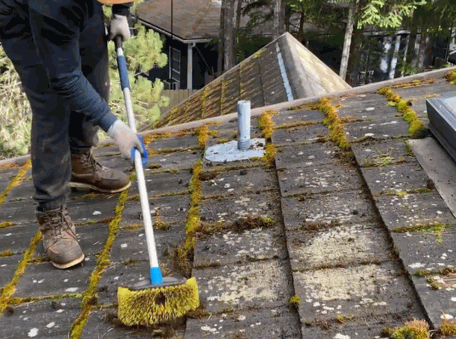
Pressure washing is an effective method for removing moss, as it utilizes high-pressure water to dislodge moss and algae; however, it requires caution to avoid damaging shingles or compromising the integrity of the roof structure.
Plus being a powerful tool for cleaning surfaces, pressure washing provides numerous advantages for homeowners seeking to enhance the appearance of their properties. Employing this technique can effectively restore driveways, decks, and patios by eliminating accumulated debris, grime, and persistent organic growth.
It is essential to acknowledge the potential risks involved. For instance, improper use of pressure settings may lead to gouging or deterioration of sensitive materials. Therefore, it is advisable to:
While pressure washing can significantly improve the aesthetic appeal of various outdoor spaces when applied correctly, understanding its techniques and implementing appropriate safety measures can help mitigate risks and safeguard one's investment.
Find out more: How To Clean External Cladding
Chemical treatments for moss removal utilize specially formulated solutions designed to eliminate moss and prevent its regrowth. However, homeowners should exercise caution and select eco-friendly options, such as DIY solutions like vinegar and baking soda, to minimize environmental impact.
When determining the appropriate approach, it is imperative to consider not only the effectiveness of the chemical in eradicating moss but also its safety for the surrounding flora and fauna. Consequently, numerous solutions available in the market present specific advantages:
Regardless of the selected method, adhering to application guidelines is essential for achieving successful outcomes while protecting the surrounding landscape.
Manual removal of moss entails the physical scraping of moss from the roof surface using brushes or scrapers. This method can be effective; however, it requires careful attention to avoid damaging the shingles and to ensure thorough removal of the moss.
To execute this task effectively, it is essential to use appropriate tools, such as a stiff-bristled brush, a plastic scraper, or a pressure washer set to a low setting. Ahead of commencing the work, it is critical to observe safety precautions, including the use of a sturdy ladder, wearing non-slip footwear, and securing the work area to prevent accidents.
By carefully evaluating the benefits and drawbacks of manual removal, homeowners can make informed decisions that align with their needs and preferences while effectively maintaining their roofs.
When removing moss from roofs, it is essential to take specific precautions to ensure a safe and effective process. This includes utilizing appropriate protective gear, being mindful of the surrounding environment, and avoiding harsh chemicals that may damage roofing materials or nearby vegetation.
Using appropriate protective gear is essential when cleaning roofs to safeguard against potential hazards, such as falls and exposure to chemicals. This practice ensures a safer working environment while addressing issues related to roof moss.
Prioritizing safety during such tasks not only minimizes the risk of injury but also enhances overall efficiency. Protective gear encompasses a variety of items specifically designed for this purpose:
Consistently employing this gear will foster a safer working environment and promote the well-being of those engaged in roof cleaning activities.

It is essential to be mindful of surrounding plants and animals during the moss cleaning process, as certain chemicals and debris can inadvertently harm vegetation and wildlife. Therefore, selecting environmentally friendly cleaning solutions is of paramount importance.
Protecting the local ecosystem should always be a priority, particularly when conducting maintenance tasks such as roof cleaning. Many chemicals employed in traditional cleaning methods have the potential to seep into the soil and waterways, contributing to pollution and posing a threat to local biodiversity.
To minimize this impact, consider the following recommendations:
By implementing these precautions, individuals can effectively remove moss while preserving the delicate balance of the surrounding ecosystem.
To safeguard both the roof and the surrounding environment, it is advisable to refrain from using harsh chemicals like chlorine bleach during moss cleaning. Instead, one should opt for biodegradable and safe cleaning solutions, such as DIY moss removers, that effectively eliminate moss without causing any damage.
The use of harsh chemical solutions can lead to the long-term degradation of roofing materials, thereby compromising their integrity and lifespan. Additionally, these chemicals may enter gutters and stormwater systems, posing significant risks to local ecosystems. Research has demonstrated that runoff from roofs treated with toxic cleaning agents can contaminate nearby water bodies, adversely affecting aquatic life.
To mitigate such risks, it is prudent to consider alternatives that prioritize both effectiveness and safety:
By transitioning to these environmentally friendly options, one can ensure a cleaner roof and a healthier surrounding area.
Regular roof cleaning to remove moss is essential for maintaining the integrity of a home. It is recommended that roofs be inspected and cleaned at least once a year, with increased frequency in areas that experience high moisture and moss growth. Using a DIY moss remover can also be effective in keeping your roof free from moss.
Several factors significantly influence the optimal frequency of roof cleaning. For instance, the regional climate plays a critical role in moss proliferation, as regions characterized by prolonged wet seasons or elevated humidity levels create favorable conditions for moss development. In regions such as the Pacific Northwest, where moisture levels are consistently high, moss growth can be a persistent issue.
The material of the roof also affects maintenance frequency; different materials may necessitate distinct care routines and can vary in their susceptibility to moss accumulation. For example, residential roofs made of asphalt shingles may require different care than those made of metal. Furthermore, the proximity of trees can lead to the accumulation of debris on the roof, which promotes moisture retention and encourages moss growth.
Implementing preventive measures, such as conducting regular inspections and trimming overhanging branches, is essential for minimizing the frequency of required cleanings. Installing zinc strips on your roof can also help to prevent moss from growing.
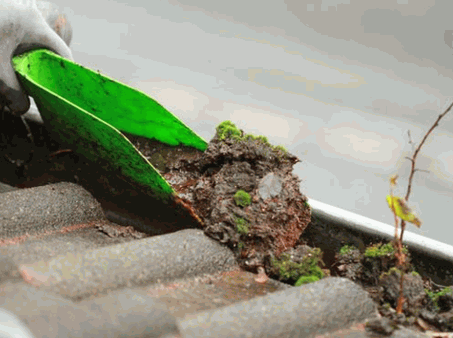
Table Of Contents
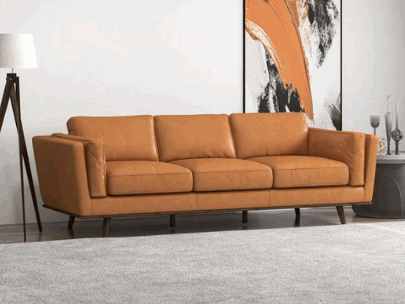
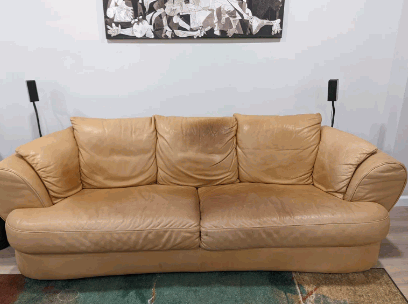
Aniline leather is celebrated for its luxurious softness and natural beauty, making it a favored choice for sofas, showcasing its vibrant colors and full-grain quality.
This material stands out from other types of leather, including nubuck and suede, with its unique characteristics.
We explore how to properly care for aniline leather sofas, common leather stains you might encounter, and effective leather restoration techniques.
You'll also find tips on protecting your investment with stain protection to ensure it remains stunning for years to come.
Whether you’re a new owner or looking to maintain your existing sofa, this guide has you covered with leather care tips and maintenance routines.
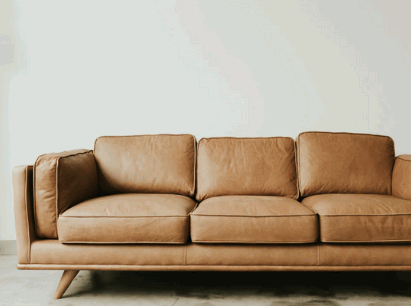
Aniline leather is a premium type of leather known for its softness, unique character, and vibrant colors, often achieved through an intricate dye process that retains the natural markings and grain of the hide, making it a favored choice in leather upholstery. This full-grain leather undergoes minimal processing, making it sensitive to moisture and stains, which requires careful leather maintenance and attention to leather sensitivity. With its luxurious appearance and feel, aniline leather develops a beautiful patina over time, enhancing its aesthetic appeal and making it a preferred choice for high-end leather products, including furniture care and upholstery.
Delve into: How To Care For Stressless Leather Furniture
Aniline leather sofas are special due to their characteristic softness and natural beauty, offering a luxurious seating experience that is unmatched by other types of leather, thanks to their unique leather types. Each piece is unique, showcasing the exquisite grain, texture of the hide, and its leather finish, which adds depth and warmth to any interior. This premium quality leather not only enhances the aesthetic appeal of furniture but also requires a dedicated leather care routine, including regular cleaning and leather conditioner application, to ensure longevity and preserve its rich appearance, making it an investment for discerning homeowners.

The main difference between aniline leather and other types of leather, such as nubuck and suede, lies in the dye process and level of treatment each undergoes, affecting their respective leather absorbency and sensitivity. Aniline leather is dyed with soluble dyes, retaining the natural surface of the hide, while nubuck is sanded to create a soft, velvety texture, and suede is made from the underside of the hide, giving it a different feel and look, leading to varied leather cleaning methods. Aniline leather is more sensitive to spills and stains, requiring specialized cleaning of leather products and care to maintain its appearance.
This distinction is pivotal when considering durability and wear over time.
In terms of maintenance, aniline leather requires gentle cleaning with specialized leather cleaning products, while nubuck can benefit from a softer brush due to its texture, and suede often needs a protective spray followed by careful spot cleaning to avoid damage, ensuring proper leather preservation.
Understanding these nuances, including the unique characteristics of aniline leather, can significantly influence one's choice based on lifestyle and usage.

Caring for an aniline leather sofa is essential to preserve its beauty and extend its lifespan, and it involves a consistent leather care routine that includes regular cleaning, leather conditioning, and protection against stains. Because aniline leather is sensitive to moisture and spills, it's crucial to use the right leather cleaning products specifically designed for this type of leather, incorporating appropriate leather cleaner tips. Additionally, applying a high-quality leather conditioner can help nourish and protect the surface, preventing it from drying out and maintaining its natural sheen over time, contributing to leather maintenance and preservation.
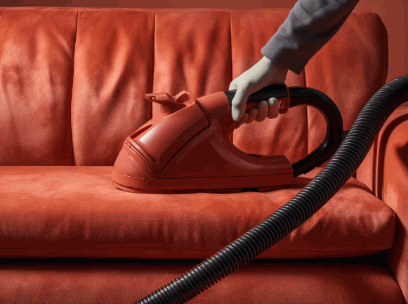
Regular dusting and vacuuming are vital components of leather care, helping to remove debris and dust that can accumulate on the surface of aniline leather sofas and potentially cause scratches or damage, ensuring the care of leather upholstery. Using a soft leather cleaning brush can effectively lift dirt without harming the delicate finish of the leather, while a vacuum with a suitable attachment can reach crevices and maintain the overall cleanliness of the upholstery, thereby enhancing leather preservation. This proactive approach ensures that your conditioned leather remains pristine and vibrant, avoiding issues associated with neglect and promoting leather safety.
Maintaining the beauty of aniline leather requires attention to detail, the right tools, and effective leather techniques.
Here are some best practices to follow for leather maintenance:
By adhering to these recommendations, you can ensure the longevity and aesthetic appeal of your leather upholstery, making it a cherished part of your home while enjoying its leather beauty.
Cleaning spills immediately is crucial for maintaining the integrity of aniline leather, which is more sensitive to liquids than other leather types, particularly due to its unique leather types. When a spill occurs, it’s essential to blot the area with a soft, absorbent cloth or paper towel to soak up excess liquid without rubbing, which could push the stain deeper into the leather, leading to stubborn leather stains. Following this initial step, using a recommended leather cleaning product designed for aniline leather can help safely remove any remaining residue, preventing long-term damage and unsightly leather stains.
To ensure the effective management of spills and maintain leather integrity, one should follow a systematic approach.
By adhering to these techniques, individuals can maintain the beauty and longevity of their aniline leather, preventing potentially irreversible damage and preserving its unique texture and leather patina. Remember, regular leather maintenance is key to keeping your leather in pristine condition.
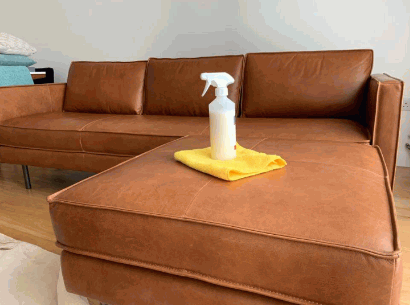
Using a specialized leather cleaner is an effective way to maintain your aniline leather sofa, as it helps to gently remove dirt and oils while preserving the leather's natural finish and enhancing its leather protection. It's important to select a cleaner specifically formulated for aniline leather, as using inappropriate products can lead to discoloration or damage, affecting the overall leather safety. Regular application of a high-quality leather cleaner, as part of your leather care kit, will keep your furniture looking fresh and prolong its lifespan while ensuring comprehensive leather cleaning.
For optimal results, consider the following leather cleaner tips when applying leather cleaning products:
It is recommended to clean aniline leather every 3-6 months, or more frequently if the sofa is subjected to heavy use, to maintain its beauty and ensure proper leather preservation.
Remember, choosing the right leather care products for maintaining your aniline leather is crucial for longevity and appearance.
Avoiding harsh chemicals is crucial in the care of aniline leather, as these substances can damage the sensitive surface and strip away its natural oils and color, impacting leather sensitivity. It's advisable to steer clear of cleaners containing alcohol, ammonia, or any abrasive agents, which can lead to irreversible harm and compromise leather maintenance. Instead, opt for gentle leather cleaning products designed specifically for aniline leather that follow recommended leather care instructions, ensuring that your sofa remains protected and in pristine condition, enhancing its leather beauty.
Along with choosing appropriate cleaning products, understanding the specific needs of aniline leather can further enhance its longevity and leather preservation. Regular maintenance is essential; even a simple dusting with a soft, lint-free cloth can prevent dirt buildup, contributing to effective leather care.
Look for reputable brands that emphasize natural ingredients and eco-friendliness in their formulations, ensuring responsible leather care practices. This transition to safer alternatives not only protects the leather but is also beneficial for the environment, creating a sustainable approach to leather care and promoting eco-friendly leather products.
Common stains on aniline leather sofas can range from ink and oil to food and beverage spills, each requiring specific leather stain removal techniques for effective removal. Aniline leather's sensitivity to liquids means that prompt action is key to preventing long-lasting damage; knowing how to approach these stains can help preserve the leather's beautiful appearance and maintain its leather patina. Understanding the nature of these stains and applying the correct leather stain removal methods are essential components of a successful leather care routine, ensuring proper leather maintenance and preservation.
Ink stains on aniline leather are particularly challenging due to the leather's sensitivity, but with prompt action, they can be managed effectively. To treat an ink stain, first blot the area with a dry cloth to absorb any excess ink without rubbing, which could spread the stain further. Following this, using a specialized leather cleaner designed for sensitive leather can help lift the remaining ink without causing damage to the leather's finish.
When dealing with stubborn ink stains, it’s essential to proceed carefully. Here are some do’s and don’ts to keep in mind:
Following these steps will not only help with ink stains but also support the overall care of aniline leather.
Oil stains on aniline leather can be particularly troublesome, as the oil can penetrate the leather's surface and lead to darkened patches if left untreated. To address an oil stain, it is important to act quickly by blotting the area with a clean cloth to absorb excess oil without rubbing it in. Following this initial step, applying a leather cleaner specifically formulated for oil stain removal can help lift the stain without harming the leather's sensitivity.
To ensure a more comprehensive approach to leather care, it is advisable to periodically treat aniline leather with a conditioner designed to maintain its softness and resilience. This preventative measure not only provides a barrier against stains but also revitalizes the leather's natural oils. Regular dusting with a soft, dry cloth can further protect the surface from dirt and grime.
By following these strategies, one can prolong the life and appearance of aniline leather, ensuring it remains a treasured piece for years to come.
Food and beverage stains are common culprits that can mar the appearance of your aniline leather sofa, but with the right approach, they can often be removed without a trace.
It's crucial to clean these spills immediately; start by gently blotting the area with a soft cloth to absorb as much liquid as possible. Next, use a leather cleaner recommended for aniline leather, following the care instructions for best results, to ensure your leather remains unblemished.
Consider these effective strategies:
By implementing these techniques, you can significantly enhance the longevity and appearance of your furniture while effectively tackling any uninvited stains.
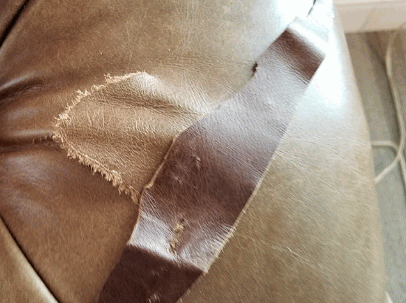
Yes, aniline leather sofas can be repaired, and understanding the right techniques for leather repair and restoration is necessary for maintaining their beauty and longevity. Minor scratches and scuffs can often be treated with a leather conditioner or specific restoration products designed for aniline leather. For deeper damage such as tears, professional leather repair services can provide the expertise needed to restore the leather's integrity while ensuring that any repairs blend seamlessly with the original surface.
Minor scratches and scuffs on aniline leather can often be minimized with the application of a high-quality leather conditioner, which helps nourish the leather and restore its natural appearance. To treat these imperfections, start by gently cleaning the area with a soft cloth to remove any dust or debris before applying the conditioner liberally. This will not only enhance the leather's shine but also reduce the visibility of minor damage, promoting better leather maintenance in the long run.
When considering leather care, it's essential to choose the right leather conditioner based on the type of leather and its specific needs. There are various options available in the market, such as cream, lotion, and spray conditioners, each offering unique advantages.
To apply the conditioner effectively, smear a small amount onto a clean cloth and gently buff it into the leather in circular motions, ensuring even coverage. Regular conditioning not only helps to prevent future damage but also prolongs the life of the leather, keeping it soft and supple.

For deeper scratches and tears in aniline leather, professional leather restoration services are often the best option to achieve a seamless repair. These experts utilize specialized techniques and products designed for leather restoration, ensuring that the repair blends naturally with the existing leather surface. Attempting to fix deep scratches on your own can lead to further damage, especially considering the sensitivity of aniline leather, making it crucial to seek professional help to restore your furniture to its original glory.
When selecting a service provider for leather repair, it’s important to consider several key factors:
By focusing on these aspects, you can ensure that your leather pieces aren’t just repaired but revitalized, allowing them to maintain their beauty and durability over time.
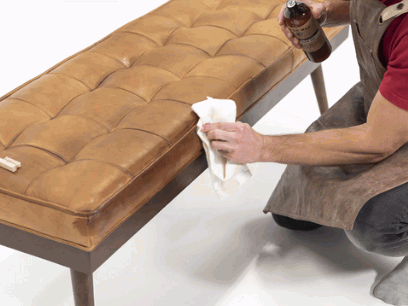
Protecting your aniline leather sofa is paramount for maintaining its beauty and durability, and it involves a combination of preventive measures and regular leather care practices. Applying a high-quality leather protection cream can help shield the leather from spills and stains, while a consistent application of leather conditioner nourishes the surface and keeps it supple. Additionally, incorporating leather maintenance tips into your cleaning routine ensures that your sofa remains in excellent condition for years to come.
Using a leather protector specifically designed for aniline leather is an effective way to guard against spills and stains while maintaining the natural beauty of the leather. This protective product creates a barrier that repels liquids, making it easier to clean up accidental spills before they soak in and cause damage. To achieve the best results, apply the leather protection cream according to the manufacturer's instructions and integrate this step into your regular leather care routine for optimal protection.
When considering leather care, various leather protection products are available, including sprays, creams, and waxes, each suited to different types of leather. It's crucial to select the right product to ensure compatibility with aniline leather's unique properties.
For long-lasting effectiveness, reapply the leather protector every 3 to 6 months, depending on usage and exposure to elements. Regular maintenance not only sustains the leather's appearance but also prolongs its lifespan.
By establishing a steadfast routine, one can effortlessly protect their cherished leather possessions from potential harm.
Avoiding direct sunlight is crucial for protecting your aniline leather sofa, as prolonged exposure can lead to fading, drying, and cracking of the leather. Positioning your sofa away from windows or using curtains can effectively reduce the amount of sunlight it receives, thereby preserving the rich color and texture of the leather. This simple yet effective strategy is an essential part of leather care that contributes to the longevity and aesthetic appeal of your furniture.
To further enhance your approach to leather maintenance, consider these practical tips:
These steps not only protect the leather but also maintain its luxurious appeal over time, ensuring your precious investment remains in excellent condition.
Rotating cushions on an aniline leather sofa is a highly effective method for ensuring even wear and extending the life of your upholstery.
By regularly changing the position of the cushions, you prevent certain areas from becoming overly compressed or faded due to regular use. This simple action reduces the risk of uneven wear, which can lead to a decline in both the durability and aesthetic appeal of the leather.
This practice, when coupled with proper leather care techniques, such as gentle cleaning and conditioning, can help maintain the texture and color vibrancy of your suite.
Consider implementing a schedule for cushion rotation, possibly every few months, to ensure that each section of your sofa receives equal attention.
Along with rotation, employing protective products like moisture repellents can significantly enhance the longevity of your furniture's surface, allowing you to enjoy its beauty for years to come.
Using a leather conditioner, specifically aniline cream, is essential for maintaining the soft, supple feel of aniline leather, protecting it from drying out and cracking over time. Regular application of a high-quality leather conditioner nourishes the leather and helps to preserve its natural beauty, ensuring that it remains conditioned and well-protected against potential damage. This should be an integral part of your leather care routine, ideally applied every three to six months, depending on usage and environmental conditions.
When selecting a conditioner, it's crucial to choose one specifically formulated for leather types; for instance, cream-based conditioners like Geist work well for aniline leather while oil-based options can benefit more durable varieties, such as nubuck suede. Before application, make sure the surface is clean and free from dust or dirt by following a thorough leather cleaning guide to ensure optimal absorption.
Incorporating these techniques into your routine not only enhances the appearance of leather but also prolongs its lifespan, making it a worthwhile investment.
Table Of Contents
Stressless leather furniture combines ultimate comfort and stylish design, making it a popular choice for many homes.
To keep it looking its best, proper care and maintenance, including a dedicated Leather Care Kit, are essential.
This guide explores what sets Stressless leather furniture apart, how to effectively clean and protect it using the right cleaning products, and common mistakes to avoid.
You’ll also find helpful cleaning tips for fixing minor damage, ensuring your investment remains stunning and comfortable for years to come.
Dive in to discover the secrets to preserving your Stressless leather furniture!
Find out more: How To Take Care Of Leather Sofa

Ekornes Stressless Leather Furniture, crafted by Ekornes, embodies a unique combination of comfort experience and style, seamlessly integrating advanced ergonomic design with timeless aesthetics, making it a preferred choice for discerning customers. The luxurious leather surfaces not only enhance your living space but also provide a long-lasting comfort experience that is hard to match. Understanding what makes these pieces special is essential for maintaining their beauty and function, and it starts with recognizing their durable leather construction.

What sets Stressless Leather Furniture apart is its ultimate comfort, innovative design, and rich historic connection that dates back to Norway. Each piece is meticulously engineered to offer exceptional support, making every seating experience unparalleled in both comfort and style, contributing to the overall furniture aesthetics. This unique furniture line not only serves as a practical addition to any home but also enhances the overall furniture aesthetics, showcasing the artistry that Ekornes is renowned for.

Cleaning Stressless Leather Furniture requires a consistent cleaning routine that emphasizes the importance of using the right cleaning products, including a specialized leather cleaner and protection solution, from a dedicated Leather Care Kit. This kit typically includes effective leather cleaner, protection cream, and microfiber cloths, as well as cleaning wipes designed to maintain the integrity of the leather surfaces while guarding against stains and wear. Adhering to the care instructions in the maintenance booklet can greatly enhance the longevity of your luxurious furniture, ensuring it remains stain-resistant and beautiful.
Regular dusting is a vital part of the furniture cleaning routine for Stressless Leather Furniture, ensuring that dust and debris don't accumulate on the surface and damage the leather. Using a soft microfiber cloth is recommended as it effectively traps dust particles without scratching the leather surfaces, maintaining both aesthetics and durability.
It’s not just about looks; effective dust removal helps prolong the life of your furniture by preventing grime buildup that can lead to wear and tear. Ideally, dusting should be done at least once a week, but frequent touch-ups may be necessary in high-traffic areas or during seasonal changes when dust levels rise.
For optimal results, consider creating a cleaning routine that incorporates gentle cleaning solutions specifically designed for leather.
This combination of techniques ensures that your furniture remains not only clean but also retains its intended luster, enhancing your living space over time and prolonging its lifespan.
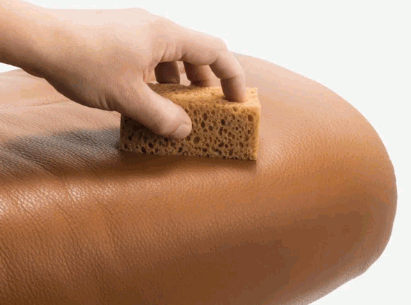
Spot cleaning is essential for addressing stains on Stressless Leather Furniture and should be performed as soon as a spill occurs to prevent permanent damage, utilizing a quality cleaning product.
Immediate attention not only prevents stains from setting in but also significantly extends the life of your furniture. When a spill happens, gently blot the area with a clean, dry microfiber cloth, taking care not to rub, which can spread the stain.
Following this initial step, employing a high-quality leather cleaner specifically designed for Stressless Leather Furniture can effectively lift stains while preserving the integrity of the surface. Consider these cleaning tips for optimal results:
By adopting these practices, anyone can ensure their leather remains beautiful and stain-free.
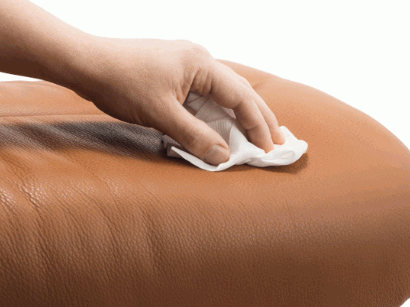
Deep cleaning your Stressless Leather Furniture, including using a leather conditioner and a protection solution, is an essential maintenance step that should be performed periodically to rejuvenate and protect the leather. This process often involves applying a specialized leather conditioner and a protection cream to create a protective barrier against future spills and stains, ensuring the furniture remains in pristine condition.
To begin the deep cleaning journey, it’s crucial to gather all necessary items, allowing for a smooth and efficient process. You may want to consider the following steps:
Through these steps, anyone can transform their leather furniture and prolong its life, reinforcing the significance of deep cleaning in regular maintenance routines.
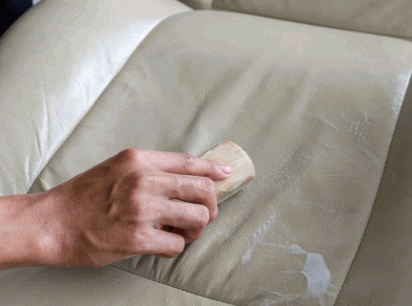
To effectively clean and maintain Stressless Leather Furniture, it is crucial to use specific products from the Leather Care Kit, which typically includes a leather cleaner, leather conditioner, cleaning wipes, and protection wipes. Each of these products is designed to enhance the longevity of the leather surfaces while providing effective stain removal and protection solutions.
A quality leather cleaner is essential for keeping Stressless Leather Furniture clean and looking its best, as it effectively removes dirt and stains while providing a protective barrier without damaging the leather's surface.
These cleaners typically contain emulsifiers that lift away grime and specialized agents that condition the leather, preventing it from drying out or cracking. When searching for the ideal cleaner, consider factors such as the type of leather—aniline, semi-aniline, or pigmented—as each requires different care.
Ensuring the right cleaner is used not only maintains the appearance but also extends the life of the furniture, enhancing its overall comfort and style.
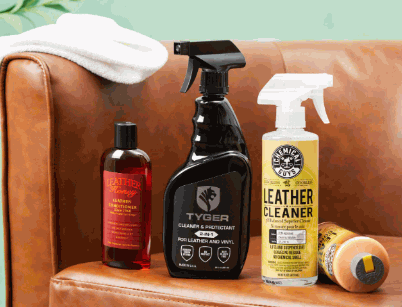
A leather conditioner is an essential product for maintaining the durability and appearance of Stressless Leather Furniture, as it nourishes the leather and prevents it from drying out or cracking. Regular application of a quality conditioner acts as a long-lasting protection solution that enhances the leather's lifespan.
These conditioners work by penetrating the leather's surface, replenishing its natural oils, and forming a protective barrier against environmental factors such as moisture and dirt. It's advisable to incorporate leather conditioning into the cleaning routine every 6 to 12 months, depending on usage and exposure to various elements, to maintain the signature base of the furniture.
To maximize the benefits, start by cleaning the leather thoroughly with a gentle soap and water solution, allowing it to dry completely before applying the conditioner.
When selecting a conditioner, look for products that are specifically formulated for leather types and avoid those with harsh chemicals that can do more harm than good, ensuring the durability of your furniture. By prioritizing leather care, you ensure that your Stressless Leather Furniture remains a stunning feature of your home for years to come.
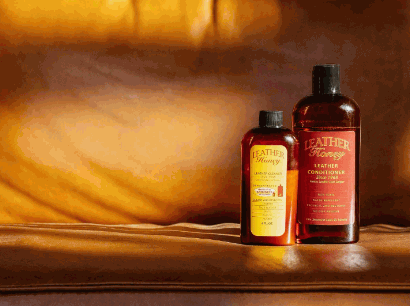
Protecting your Stressless Leather Furniture is paramount to ensure its longevity, and it involves a blend of strategies including the application of a quality protection solution, protective cream, and the use of a hardwood floor protector, along with avoiding direct sunlight and heat sources. Utilizing protective covers can also significantly reduce the risk of damage from environmental factors and spills.
One of the simplest yet most effective ways to protect Stressless Leather Furniture is to avoid placing it in direct sunlight, as prolonged exposure can lead to fading and cracking of the leather surfaces. Sunlight can significantly diminish the furniture's aesthetics and durability, making it essential to position it thoughtfully within your living space.
To further safeguard against potential damage, consider the following practical tips for placement, including avoiding direct sunlight and utilizing a protective barrier.
By making these simple adjustments, homeowners can maintain the beauty and integrity of their leather furniture, including Stressless pieces, for years to come, making it a cherished investment in comfort and style.
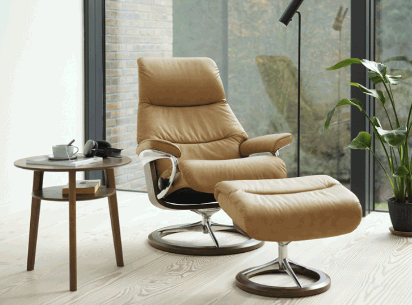
Keeping Stressless Leather Furniture, such as those from Ekornes, away from heat sources is crucial for maintaining its integrity, as excessive heat can cause the leather to dry out and become brittle. Understanding how to position your furniture concerning heaters, radiators, and fireplaces is pivotal in preventing long-term damage.
The impacts of heat extend beyond mere appearance; they can alter the texture and flexibility of the leather, ultimately affecting comfort and usability. Ensuring that furniture is placed a safe distance away from these heat sources can significantly reduce the risk of cracks and discoloration.
It’s essential to recognize that protection tips not only refine aesthetics but also safeguard your investment, preserving the plush feel and rich color of the leather for years to come.
Utilizing protective covers is an efficient method to safeguard your Stressless Leather Furniture from dust, spills, and potential damage, such as that caused by children's play, ensuring its long-term beauty and functionality. These covers act as a barrier, preventing various elements from coming into direct contact with the leather, thereby preserving its quality.
There are several types of protective covers available, each tailored to meet specific needs while enhancing leather protection. Choosing the right cover, along with utilizing a quality Leather Cleaner, not only extends the life of your furniture but also simplifies maintenance.
Here are some popular options for protective covers:
To maximize the effectiveness of these protective measures, consider applying a leather conditioner, like the one found in the Leather Care Kit, regularly, which will further aid in maintaining the material's softness and shine.
Caring for Stressless Leather Furniture requires attention to detail, particularly in recliner maintenance, and there are several common mistakes that can dramatically affect its longevity and appearance. Using harsh chemicals, neglecting to follow the manufacturer's instructions, and failing to utilize protective covers can lead to irreversible damage and decreased furniture aesthetics.
One of the most detrimental mistakes in leather cleaning is using harsh chemicals that can strip the leather of its natural oils and lead to irreversible damage. Choosing the appropriate cleaning products, such as the Leather Cleaner from our Leather Care Kit, is crucial to maintaining the quality of Stressless Leather Furniture and ensuring its longevity.
Many people overlook the importance of selecting gentle, leather-safe alternatives that protect the texture and appearance of their furniture, especially when considering products with easy-to-use features.
Instead of resorting to alcohol-based cleaners or ammonia, consider opting for natural solutions that are much kinder to the leather, like those found in the Fabric Care Kit. For instance:
By adopting safer cleaning methods, you can effectively reduce the risk of damage while preserving the beauty and integrity of leather items for years to come.
Neglecting to follow the manufacturer's instructions for leather care can lead to significant issues, as these guidelines are tailored specifically for Stressless Leather Furniture from Ekornes to ensure optimal maintenance. Each chair or sofa comes with a maintenance booklet that provides detailed care instructions that should be strictly adhered to.
Ignoring these invaluable instructions can result in undesired consequences such as premature wear, discoloration, and even irreparable damage to the furniture's surface, which may affect the product features you initially loved. The maintenance booklet is not just an accessory; it serves as an essential guide for the proper usage of cleaning products and techniques designed to enhance the longevity and appearance of leather.
By taking the time to consult the care instructions, one can ensure that their investment remains aesthetically pleasing and functional for years to come, reinforcing the significance of treating furniture with the respect it deserves while enjoying the timeless base of Stressless designs.
Failing to use protective covers is a common oversight that can expose Stressless Leather Furniture to dust, spills, and other potential damage, which can easily be prevented with the right care kit. These covers act as a protective barrier, ensuring that your investment remains in pristine condition for years to come.
By utilizing these essential covers, including waterproof fabrics, homeowners not only safeguard their furnishings but also extend their lifespan significantly. Various options are available to suit different aesthetic preferences and functional needs.
Incorporating these practical maintenance strategies can protect against wear and tear while keeping your Stressless Leather Furniture looking brand new.
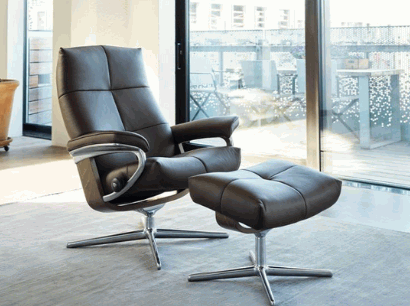
Fixing minor damage on Stressless Leather Furniture, such as scratches, scuffs, and stains, is often easier than many believe, as there are effective methods and products available for leather repair, including the Leather Conditioner. Addressing these issues promptly can help maintain the luxurious look and feel of your furniture, ensuring it remains a centerpiece of your home.
Scratches on Stressless Leather Furniture can often be easily repaired with the right techniques and products, such as those included in the Leather Care Kit, helping to restore the leather to its original condition. Applying a leather conditioner directly to the scratched area can often help to minimize the appearance of the scratch and nourish the leather.
Along with conditioning, utilizing specific leather repair kits can significantly enhance the outcome. These kits typically include a variety of colors and adhesive compounds designed for seamless application.
Always follow up with a protective leather sealant to prevent future damage, significantly prolonging the life and look of your furniture.
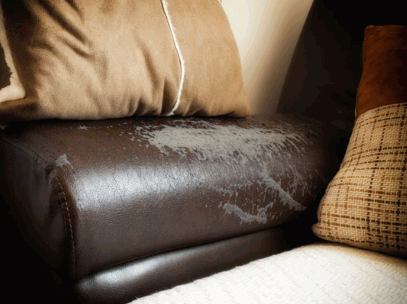
Scuffs are a common form of leather damage that can be addressed using simple repair techniques, ensuring that Stressless Leather Furniture maintains its luxurious appearance. Gently rubbing the affected area with a microfiber cloth and a specialized leather cleaner can often restore the leather's look without further damage.
Following these initial steps, it’s important to take a closer look at the leather condition. If the scuff mark remains, consider using a leather conditioner to further nourish the material. Here’s a simple guide to addressing the issue effectively:
Regular maintenance, such as using a microfiber mitten for cleaning and using high-quality products, will keep the leather looking pristine, prolonging the life of Stressless Leather Furniture.
Stains on Stressless Leather Furniture can pose a challenge but can often be effectively removed with appropriate cleaning tips and products. Quick action, such as using a dedicated leather cleaner, minimizes the potential for long-term damage and keeps your furniture looking pristine.
When faced with an unexpected spill, it’s essential to act swiftly and correctly to ensure the longevity of your beloved leather pieces. Utilizing a dedicated leather cleaner not only aids in removing the stain but also nourishes and protects the leather, preserving its natural luster. Here are some helpful cleaning tips:
By promptly addressing stains with these effective techniques, one can prevent the risk of discoloration and extend the life of the furniture.
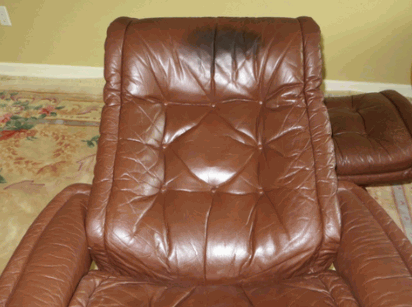
Table Of Contents
When it comes to furniture, leather sofas stand out for their unique blend of style, comfort, and durability.
Caring for them requires a different approach than other materials.
Discover what sets leather sofas apart, how to maintain their pristine condition, and the best products to keep them looking new.
Essential tips on what to avoid and ways to protect your investment from damage will also be shared.
Ready to unlock the secrets of leather care?
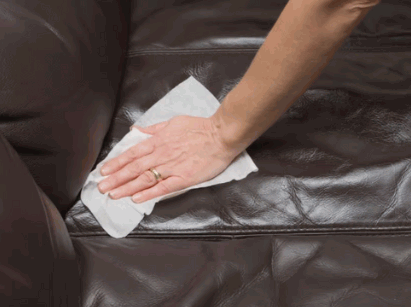
Leather sofas stand apart from other types of sofas due to their unique materials, craftsmanship, and aesthetic appeal. Unlike fabric sofas that may wear out with time, leather sofas possess a timeless quality, enhancing the elegance of any living space. The choice of leather, such as aniline leather or pigmented leather, plays a crucial role in the durability and appearance of the sofa. Moreover, leather sofas not only provide a luxurious feel but also require specific leather care techniques to maintain their beauty and prolong their lifespan, making them a popular choice among furniture designers and homeowners alike.
The material used in leather sofas, especially aniline leather and pigmented leather, significantly influences their quality and appearance.
Choosing the right leather upholstery is essential, as it not only serves as a style statement but also impacts the sofa's lifespan. Aniline leather, known for its luxurious feel and rich hues, showcases the natural grain, making each piece unique. Its porous nature requires careful maintenance; therefore, using appropriate cleaning solutions is critical.
Both types affect the overall look and feel of the sofa, enableing individuals to make informed choices that align with their lifestyle.
The comfort level of leather sofas is often unmatched, thanks to the natural flexibility and durability of leather, which molds to the body over time, creating a personalized seating experience that welcomes relaxation and convenience in any living space.
Unlike fabric sofas, which can sometimes trap heat and moisture, leather sofas provide a cooler seating surface while also being incredibly resilient. They age gracefully, developing a rich patina that adds character to any room. The design of leather sofas often incorporates ergonomic shapes that support the body’s natural posture, enhancing overall comfort.
To maintain this level of comfort and luxury, proper leather maintenance is essential. Regular conditioning and careful cleaning can prevent cracks and fading, ensuring the sofa remains inviting for years to come. Here are some key tips for effective leather care:
By prioritizing leather treatment, the longevity and beauty of the sofa can be assured, making it a truly worthwhile investment.
One of the standout features of leather sofas is their exceptional durability, which, when properly maintained, can last for many years.
This longevity stems from several factors that enhance the quality and resilience of leather as a material. For instance, the quality of leather used plays a crucial role; higher-grade leather has natural oils that protect it from wear and tear.
Establishing a routine for
is essential to prevent common issues such as leather cracking. Regularly treating the leather helps in maintaining its suppleness and luster, ensuring that the aesthetic appeal of the sofa matches its outstanding durability. Those who invest time in proper care will likely witness not only its enduring beauty but also a comfortable seating experience that can stand the test of time.
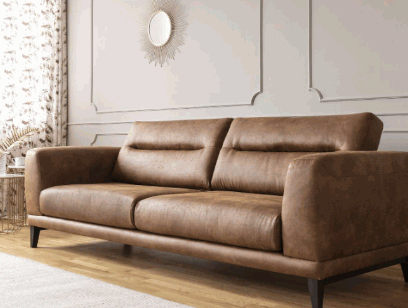
Proper cleaning and maintenance of your leather sofa are essential to preserve its appearance and prolong its lifespan, ensuring it remains a beautiful focal point in your living room. Regular care routines should include simple techniques to clean leather, such as using a microfiber cloth and appropriate household products. Additionally, utilizing leather conditioners can help nourish the material, preventing it from drying out or cracking. Knowing the right cleaning solutions and methods will make leather care an effortless task, allowing you to enjoy your leather sofa for years to come.
Regular dusting and vacuuming are vital steps in the leather care routine that help maintain the beauty and integrity of your leather sofa.
These practices not only remove surface dirt but also prevent the buildup of grime, which can lead to fading and deterioration over time. Utilizing a microfiber cloth during this process is especially effective, as its fine fibers capture dust and dirt without scratching the leather surface.
Implementing a consistent cleaning schedule ensures that the upholstery remains in optimal condition, enhancing its longevity and aesthetic appeal. To maintain the leather effectively, consider the following points:
By regularly dusting and vacuuming, you not only protect your furniture investment but also enjoy a more inviting and comfortable living space.
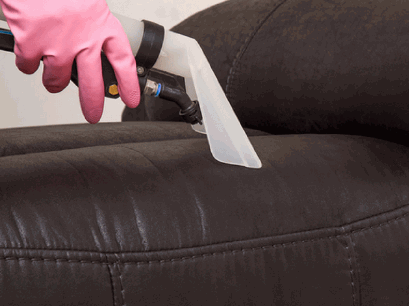
In terms of cleaning spills and stains on leather, prompt action is crucial to prevent permanent damage and maintain the sofa's appearance. Taking immediate steps ensures that the leather retains its luxurious look and feel, while also extending its lifespan, which is essential for anyone wanting to invest in quality furniture or accessories.
To effectively tackle different types of stains, it's important to have a few cleaning solutions on hand. Here are some strategies and specific practices to follow:
Common stains include grease, ink, and watermarks, and each requires a tailored approach for the best results. Regular maintenance, such as conditioning the leather periodically, can further help in maintaining its pristine condition.
Always remember that maintaining clean leather will save you from the stress of dealing with difficult stains in the future.
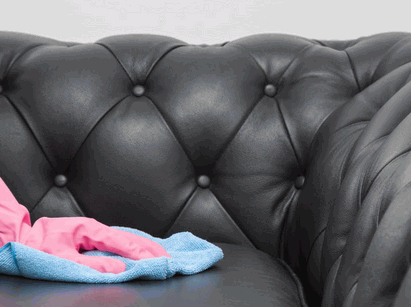
Conditioning and moisturizing the leather sofa are essential for maintaining its suppleness and preventing cracking, ensuring its longevity.
Regular use of leather conditioners not only enhances the rich appearance of the leather but also creates a barrier against dirt and moisture. When applied correctly, these products penetrate the material, nourishing it deeply.
Over time, consistently treating leather can significantly improve its durability, making it less susceptible to wear and tear. By incorporating a regular conditioning schedule into your cleaning routine, you can keep your leather furniture looking vibrant and textured for years to come.
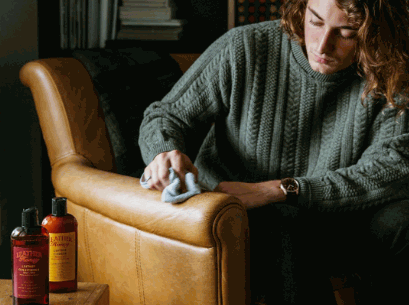
Choosing the right products for cleaning and conditioning your leather sofa is crucial for preserving its quality and extending its lifespan.
A good leather cleaner is the first step in maintaining the cleanliness and appearance of your leather sofa, ensuring that it remains as inviting and beautiful as the day you brought it home. Taking the time to choose the right product is essential to safeguard the integrity of the leather, as different types may require tailored care. For effective results, look for cleaners that are specifically designed for the type of leather you own, whether it's aniline, pigmented, or suede. Understanding how to apply the cleaner can also enhance its effectiveness.
Here are some key factors to consider:
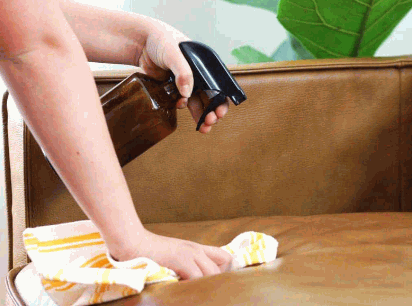
Using a leather conditioner is essential for keeping your leather sofa moisturized and preventing it from drying out or cracking over time. Consider using a specialized leather cream for optimal results.
Regular application of a leather conditioner not only enhances the leather appearance of your furniture but also significantly extends its lifespan. This vital maintenance step hydrates the leather fibers, creating a protective barrier that repels dirt and resists stains.
By incorporating this routine, you help maintain both the aesthetic and functional qualities of your leather upholstery. It's also beneficial to consider using leather oils or a leather nourisher to further enhance durability.
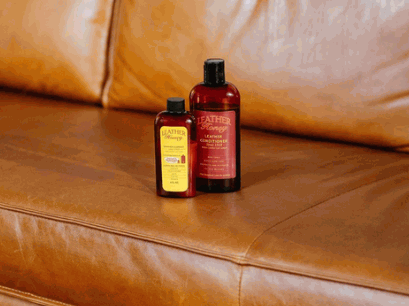
When maintaining your leather sofa, it's just as important to know what to avoid as it is to understand the proper cleaning techniques.
Using harsh chemicals on your leather sofa can lead to irreversible damage, including discoloration and degradation of the material, ultimately resulting in a loss of its luxurious appeal and comfort that many cherish in their homes. Consider avoiding common household cleaners in favor of a specialist cleaner designed for leather.
By opting for gentler cleaning methods, one can preserve the natural beauty and integrity of leather upholstery. Safer alternatives such as vinegar and olive oil solutions or specialized leather conditioners, along with products like leather serum, not only ensure effective cleaning but also enhance the longevity of the leather fabric.
Ultimately, choosing these more thoughtful cleaning solutions fosters a healthier environment and safeguards the quality of your leather items for years to come.
Excessive water can be detrimental to leather, causing it to lose its natural flexibility and leading to cracking over time.
When cleaning leather, it is crucial to remember that maintaining its quality requires minimizing moisture exposure. Use warm water and a dry cloth to avoid excess moisture. As leather is a natural material, it breathes and interacts with its environment; therefore, using as little water as possible is essential to preserving its integrity. Utilizing cotton swabs can help in delicate cleaning tasks. Proper techniques involve using damp cloths instead of soaking the surface, ensuring you avoid waterlogged conditions that can lead to irreversible damage.
For effective cleaning, consider the following methods:
By following these practices, one can maintain leather's natural beauty and flexibility, extending its lifespan significantly.
Prolonged exposure to direct sunlight can fade the leather color of your leather sofa and weaken its overall durability.
To safeguard these luxurious furnishings, consider implementing effective strategies for positioning and using coverings.
Using protective measures is crucial to ensure leather sofas remain vibrant and intact over time. For instance, it's advisable to place the sofa away from windows or areas that receive excessive sunlight during peak hours, which could otherwise lead to leather scraping. If relocating is not an option, investing in high-quality curtains or blinds will assist in controlling light exposure, which is vital for maintaining leather durability. Utilizing specialized leather protectors can provide a barrier against harmful UV rays. Regular maintenance through conditioning and cleaning methods will also contribute significantly to preserving the leather's integrity.
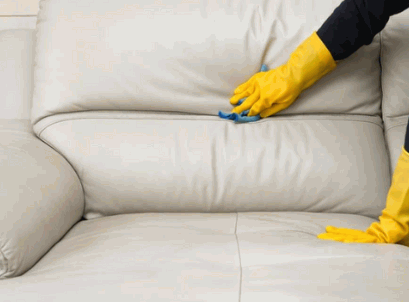
Protecting your leather sofa from damage requires a proactive approach to maintenance and care, ensuring it remains a valuable and stylish addition to your home.
One of the simplest yet most effective ways to protect your leather sofa is by keeping sharp objects away from its surface.
Not only do these items pose a risk of creating unsightly cuts and scratches, but they can also compromise the integrity of the material over time. Any sharp object, whether it’s a set of keys, a pair of scissors, or even a rough-edged piece of furniture, can lead to unintended damage.
To ensure the safety of your leather sofa, consider implementing these practical leather tips:
By adopting these precautions, you not only preserve the aesthetics of your sofa but also extend its lifespan, ensuring that it remains a centerpiece in your living space and a comfortable couch for years to come.
Preventing spills and stains on your leather sofa is crucial for maintaining its pristine appearance and longevity.
Indeed, taking proactive measures ensures that the beauty of your leather remains intact for years to come. To achieve this, individuals should consider the strategic placement of food and drinks, minimizing the risk of accidental spills.
Using coasters and trays can be a game-changer in protecting surfaces. Immediate cleanup is equally important; if a spill occurs, addressing it promptly can prevent deeper stains from setting in. Remember, routine maintenance such as conditioning and cleaning contributes significantly to the leather's durability and appearance.
Using a leather protector can significantly enhance the durability and appearance of your leather sofa by offering an additional layer of protection against wear and tear.
This additional layer not only safeguards against accidental spills, scratches, and daily wear but also keeps your leather looking pristine for years, enhancing the leather shine.
By regularly applying a leather protector, you can maintain the natural suppleness of the material and prevent it from drying out or cracking, which ensures longevity and comfort.
Consistent use of a leather protector will not only boost the aesthetic appeal of the sofa but also save costs in the long run by avoiding repairs and replacements, ensuring the leather remains supple and flexible.

Table Of Contents
Solar panels are a great way to harness the power of the sun and reduce your carbon footprint. Like any technology, they can encounter problems that require fixing. From broken panels to faulty wiring, there are several common issues that can arise with solar panels.
In this article, we will explore these problems and provide you with tips on how to troubleshoot them. We will also discuss when it's time to call a professional for help and how you can prevent future issues with your solar panels.
Let's dive in and learn how to keep your solar panels running smoothly!

Solar panels are an important component of a renewable energy system, providing environmentally friendly power to homes and businesses. However, like any other technology, solar panels might need fixing due to various factors such as physical damage, weather conditions, or wear and tear over time.

Identifying common problems with solar panels is crucial for maintaining an efficient and long-lasting renewable energy system. Issues can range from physical damage to electrical faults.
Broken or damaged panels are one of the most visible and obvious issues that can affect the performance of a solar energy system.
Physical damage to solar panels can result from various factors, such as falling debris, harsh weather conditions, or even accidental impact. Falling branches, hailstorms, or strong winds can lead to cracks, chips, or shattered glass on the panels. Storm damage, including heavy rain or snow, can also weaken the structural integrity of the panels over time.
Faulty wiring or poor connections can significantly reduce the efficiency of solar panels, affecting the overall energy output.
When your solar panels are not performing to their full potential, it can be frustrating and costly. Some common symptoms of faulty wiring include flickering lights, tripped circuit breakers, or outlets that feel warm to the touch. These issues may indicate loose connections, overloaded circuits, or damaged wires.
An experienced electrician can diagnose and repair these problems promptly to ensure the optimal performance of your solar panel system. Regular checks and maintenance are crucial to prevent potential hazards like electrical fires and ensure that the wiring and connections remain in good condition over time.

Inverter issues can cause significant disruptions in converting the direct current (DC) generated by solar panels into alternating current (AC) for home use.
One common problem related to inverters is a drop in efficiency due to aging components or improper maintenance. This can result in power losses during the conversion process, leading to increased energy consumption and higher electricity bills.
Issues with inverter connectivity or software glitches may cause intermittent power outages or fluctuations, impacting the smooth operation of household appliances. If left unaddressed, these problems can not only reduce the overall performance of the solar energy system but also shorten the lifespan of the inverter itself.
In such cases, it becomes necessary to consider replacing the inverter to ensure optimal energy efficiency and uninterrupted power supply.
Dirty or shaded panels can drastically reduce the energy output of your solar system by blocking sunlight from reaching the photovoltaic cells.
To ensure your solar panels operate at peak efficiency, it is crucial to regularly clean and maintain them. Dust, debris, bird droppings, and other contaminants can accumulate on the surface, hindering the absorption of sunlight.
By scheduling routine cleanings, you can prevent buildup and optimize the performance of your solar array. Be mindful of any trees or structures that may cast shadows on your panels, as shading can significantly diminish their output. Proper placement and periodic trimming of obstructing vegetation can help mitigate this issue.

Troubleshooting solar panel issues involves a systematic approach to identify, diagnose, and fix problems affecting the performance of your renewable energy system. By regularly inspecting and maintaining your panels, you can ensure optimal energy production.
The first step in troubleshooting is to check for any physical damage to your solar panels, such as cracks or broken glass.
This can be done through a visual inspection of the panels, looking closely for any signs of wear and tear. Pay special attention to the corners and edges where damage is more likely to occur. If you notice minor cracks or chips, you can consider using repair resin to fill and seal these areas to prevent further deterioration.
For more severe damage, such as extensive cracks or shattered glass, it is crucial to seek professional repair or even replacement to ensure the panels function efficiently and safely. Regular maintenance and timely repairs can help extend the lifespan of your solar panels and maximize their energy production.
Testing the wiring and connections is essential to ensure that there are no loose or damaged wires that could interrupt the flow of electricity from your solar panels.
One tool that is commonly used for this purpose is a multimeter. To start, set the multimeter to the appropriate function, usually the continuity or resistance setting. Then, carefully probe the connections and wiring to check for any irregularities. A proper reading indicates a good connection, while a fluctuating or no reading may indicate a problem.
If any issues are found during the testing process, it is highly advisable to reach out to a qualified electrician immediately. Electrical systems can be complex and dangerous, and professional help ensures the safety and efficiency of your solar panel setup.
Monitoring the inverter is a crucial step in troubleshooting as it is responsible for converting the DC power generated by your solar panels into usable AC power.
Checking the inverter's display for error codes or performance metrics can provide valuable insights into its functioning. Typically, error codes are displayed numerically or with specific symbols that indicate issues like overheating, grid connection problems, or voltage irregularities.
Understanding these indicators is essential for timely intervention and maintenance. Common inverter issues include sudden shutdowns, reduced power output, or unusual noises during operation. If these problems persist despite basic troubleshooting, it may be time to consider repairing or replacing the inverter to ensure optimal performance of your solar PV system.
Regular cleaning and removing shade from your solar panels can significantly improve their efficiency by ensuring maximum sunlight exposure.
One important tip for safely cleaning solar panels is to use a soft brush or sponge with mild detergent and water. Avoid abrasive cleaners that could scratch the panels. Consider installing shade management strategies like trimming trees or adding reflective surfaces to redirect sunlight onto the panels.

While some minor issues with solar panels can be resolved through basic troubleshooting, there are instances when calling a professional repair expert is essential to ensure the safety and efficiency of your renewable energy system.
If you observe significant physical damage to your solar panels, such as extensive cracks or shattered glass, it's crucial to call a professional repair service immediately.
Attempting to handle damaged solar panels without the necessary expertise can pose serious risks. Not only can you potentially harm yourself, but you may also cause further damage to the panels. Professional repair technicians have the knowledge and tools to safely assess the extent of the damage. They can determine whether the panels need repair or complete replacement.
If you are not comfortable or experienced with electrical work, it is safer and more efficient to call a professional to handle any wiring or connection issues in your solar panel system.
Attempting DIY electrical work, especially in intricate systems like solar panels, can pose serious risks both in terms of personal safety and the functionality of the system. One crucial aspect of electrical work is ensuring all components are correctly installed and regularly maintained, which requires specialized knowledge and precision. Qualified repair professionals have the expertise to carry out thorough inspections, identify potential hazards, and make necessary adjustments to guarantee the system's optimal performance and longevity.
Replacing an inverter is a complex task that should be performed by a professional to ensure that your solar energy system continues to operate efficiently.
There are several signs that indicate when an inverter may need replacement. These include unusual noises coming from the inverter, a decrease in energy production, or warning lights flashing on the display panel. Ignoring these signs could lead to further damage to your solar system and result in decreased energy output.
The inverter plays a crucial role in converting the direct current (DC) electricity generated by solar panels into alternating current (AC) electricity that can be used to power your home. For this reason, it's essential to seek professional expertise when replacing an inverter to ensure proper installation and functionality.
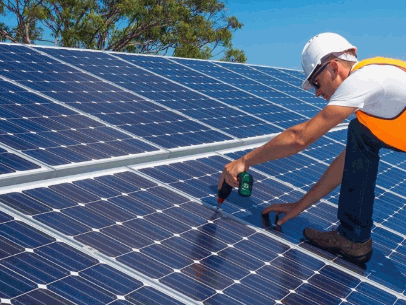
Preventing future problems with solar panels involves regular maintenance, proper installation, and proactive measures to avoid potential issues that could affect the efficiency and longevity of your renewable energy system.
Regular maintenance and cleaning are essential to ensure that your solar panels continue to operate at peak efficiency and generate maximum energy.
One of the key aspects of maintaining your solar panels is to regularly check for any debris, dirt, or shading that may be obstructing their optimal performance. It is recommended to perform visual inspections at least once a month to identify any issues. Clearing away leaves, bird droppings, and other debris can significantly improve the panel's efficiency.
Using a soft brush or cloth, gently scrub the surface of the panels with a mild detergent and water solution to remove any dirt or grime.
Ensure that the mounting system and connectors are secure and in good condition. Apply roof sealant around the panel edges to prevent water infiltration, especially after heavy rainfall or snow. Taking these proactive steps can extend the lifespan of your solar panels and protect your investment in the long run.
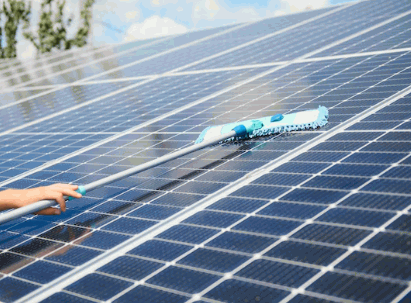
Proper installation and wiring are fundamental to the performance and safety of your solar panel system, ensuring that all components work harmoniously.
By entrusting the installation to a professional, you can be confident that the solar panels will be positioned correctly to receive maximum sunlight exposure, optimizing energy production.
A skilled technician will ensure that the wiring is done meticulously, reducing the risk of short circuits or system malfunctions down the line.
Using a high-quality racking system is also crucial as it provides stability and durability to your solar setup, safeguarding it against harsh weather conditions and ensuring a longer lifespan.
Incorporating an energy meter in the installation allows you to monitor the system's performance accurately, identify any potential issues promptly, and maximize energy efficiency.
Take a look: How To Install Solar Panels On Roof
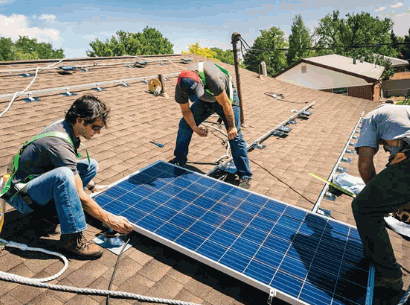
Avoiding shading and obstacles is crucial to maintaining the efficiency of your solar panels, as even partial shading can significantly reduce energy output.
Shading can cause what is known as the 'Christmas light effect,' where shaded cells can consume energy rather than produce it, affecting the overall output of the system. To minimize shading impact, consider the strategic placement of panels in areas with minimal obstructions, such as trees or nearby buildings. Regular trimming of overhanging branches or shrubs can ensure that vegetation does not cast shadows on the panels, allowing them to capture maximum sunlight.
Table Of Contents
Are you maximizing the efficiency of your solar panels? Regular cleaning is crucial to ensure optimal performance and longevity.
In this comprehensive guide, we will explore the importance of cleaning solar panels, the risks of neglecting maintenance, and the best methods for keeping your panels spotless.
Discover how often to clean your solar panels, the necessary tools for the job, and essential precautions to take.
Stay tuned for expert tips on maintaining clean solar panels and the option of professional cleaning services.
Learn more: How To Fix Solar Panels
Ensuring that your solar panels are clean is crucial because dirt buildup can significantly reduce their efficiency by blocking sunlight, which is essential for optimal energy production.
When dirt, dust, or other debris accumulate on the surface of solar panels, they create a barrier that reduces the absorption of sunlight, leading to lower electricity generation. Clean solar panels can capture more sunlight and convert it into energy more effectively, maximizing the system's output.
Maintaining cleanliness also prolongs the lifespan of solar panels, as the accumulated dirt can cause irreversible damage over time. Regular cleaning not only ensures peak performance but also helps in identifying any potential issues early on.
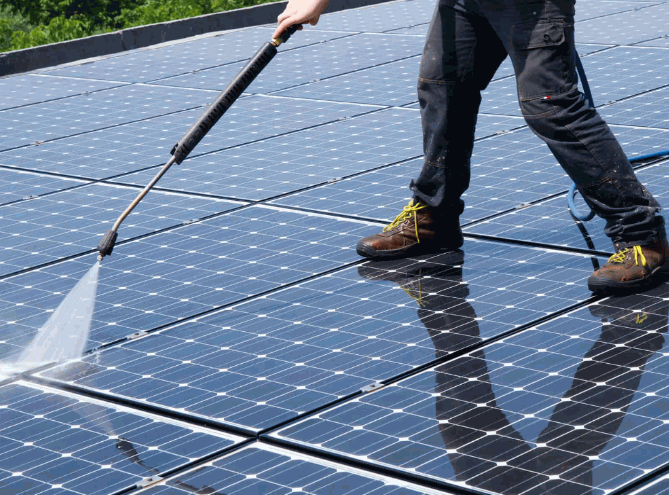
Neglecting to clean your solar panels can lead to decreased efficiency, higher energy bills, and potential issues with the product warranty due to dirt and debris obstructing sunlight.
When solar panels are not properly maintained, the accumulated grime and dust can act as a barrier, preventing sunlight from reaching the photovoltaic cells. As a result, the panels produce less electricity, causing a drop in their overall efficiency. This drop in efficiency translates to higher energy bills as the system must work harder to generate the same amount of power.
Along with increased costs, failing to clean solar panels regularly can also lead to potential long-term damage. Dirt buildup can cause hot spots on the panels, affecting their performance and lifespan. This damage not only impacts the panels but can also void the product warranties provided by manufacturers.
The frequency of cleaning solar panels depends on factors like location, weather conditions, and the amount of dirt buildup, but regular maintenance is generally recommended by solar companies to ensure optimal performance.
Most experts suggest that solar panels should be cleaned at least every 6 months to maintain efficiency. In areas with high levels of dust, pollen, or bird droppings, more frequent cleaning may be necessary. It is important to consider the local climate as well.
For instance, regions with frequent rain may naturally help rinse off dirt, reducing the need for manual cleaning. On the other hand, areas close to industrial zones or highways may require more frequent cleaning due to pollution.
The best time to clean solar panels is early in the morning or late in the afternoon when the sunlight is not too intense, which helps in maximizing cleaning efficiency and safety.
During these times, the angle of the sun's rays is less direct, reducing the risk of overheating the panels or causing damage to the delicate components.
Cleaning solar panels during peak sunlight hours can not only be less effective due to the rapid evaporation of water and cleaning solutions, but it can also pose safety hazards such as burns or glare from intense rays.
This is why experts recommend scheduling panel maintenance during the cooler hours of the day to ensure optimal results.
To efficiently clean solar panels, a variety of tools are required as part of a solar cleaning kit, including a soft brush, non-abrasive sponge, mild detergent, and a hose or pressure washer to ensure proper solar panel maintenance.
A soft-bristled brush is essential for gently removing dirt and debris from the surface of solar panels without causing any scratches or damage.
Using a soft-bristled brush ensures that the delicate surface of the solar panels remains unharmed during the cleaning process. The soft bristles effectively dislodge dirt and grime without compromising the integrity of the panels. Unlike harsher brushes which can leave scratches or degrade the protective coatings, a soft-bristled brush provides a gentle yet thorough cleaning solution.
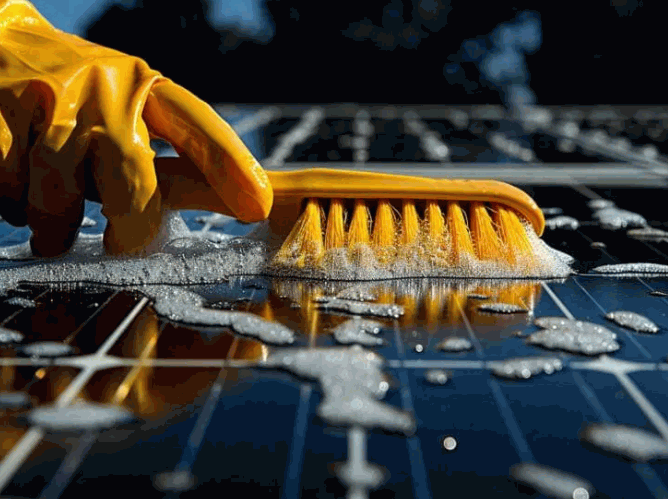
Using a non-abrasive sponge along with a mild cleaning solution helps in gently clean the surface of solar panels without causing scratches or damage to the glass.
When cleaning solar panels, it is essential to use materials that are gentle yet effective to ensure optimal performance of the panels. Non-abrasive sponges are perfect for this task, as they can remove dirt, dust, and other residues without leaving any marks or scratches. By combining the sponge with a suitable cleaning solution, you can easily tackle stubborn stains and grime without harming the delicate surface of the panels. This approach not only maintains the efficiency of the solar panels but also extends their lifespan, ensuring they continue to generate electricity efficiently.
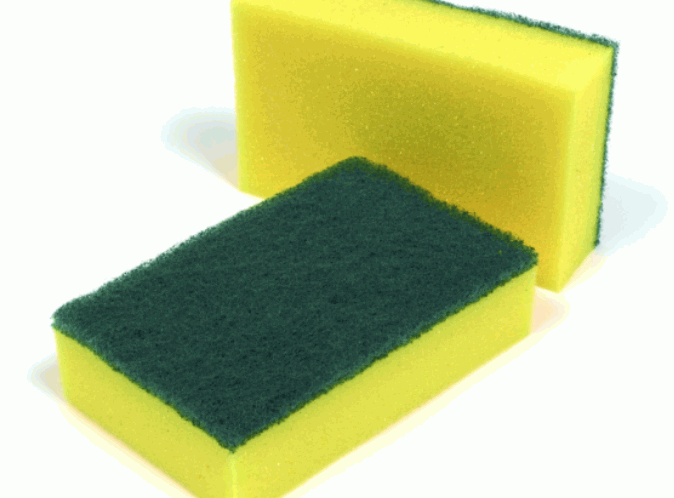
A mild detergent is recommended as part of the cleaning solution for solar panels to ensure the glass remains clear and free of streaks while effectively removing dirt and grime.
In terms of selecting a suitable mild detergent for cleaning solar panels, opt for options that are gentle and eco-friendly, avoiding harsh chemicals that can potentially damage the panel's surface over time.
To prepare the cleaning solution, mix a small amount of the mild detergent with warm water in a bucket or spray bottle. It is crucial to use a diluted solution to prevent residue build-up and ensure a spotless finish on the solar panels. Apply the solution generously to the panels using a soft sponge or cloth, gently scrubbing to loosen dirt and grime without scratching the glass surface. Rinse thoroughly with clean water and allow the panels to air dry for optimal results.
A hose or a pressure washer can be used to rinse off the cleaning solution and any loose dirt from the solar panels, ensuring they are thoroughly cleaned.
When using a hose, it's important to adjust the nozzle to a gentle spray to avoid causing any damage to the panels. A pressure washer can be a more powerful option, but it should be set to a low-pressure setting to prevent the risk of cracking or scratching the solar panels.
Before starting the cleaning process, it's advisable to check for any cracks or damage to the panels. Always ensure the panels are cool to the touch to avoid thermal shock when applying water. Safety goggles and non-slip footwear are recommended while working with water and cleaning agents to protect yourself from potential hazards.

The best method for cleaning solar panels can vary depending on the setup and accessibility of the panels, with both manual and automated cleaning methods offering distinct advantages.
Manual cleaning involves using tools like a soft brush, non-abrasive sponge, and mild detergent to clean solar panels by hand, ensuring thorough maintenance.
It is crucial to rinse the panels thoroughly with clean water to remove any soap residue. Avoid using harsh chemicals or abrasive materials that can damage the panels' surface and decrease their efficiency.

Automated cleaning systems are designed to clean solar panels efficiently without human intervention, making the cleaning process quicker and often more thorough.
These systems utilize advanced technologies such as sensors, robotic arms, and water jets to ensure the removal of dirt, dust, and debris from solar panels. One of the key benefits of automated cleaning systems is their ability to operate on a preset schedule, ensuring regular maintenance without the need for manual oversight.
Various types of automated cleaning systems are available, including stationary systems that move along a track and portable systems that can be positioned directly on the panels.
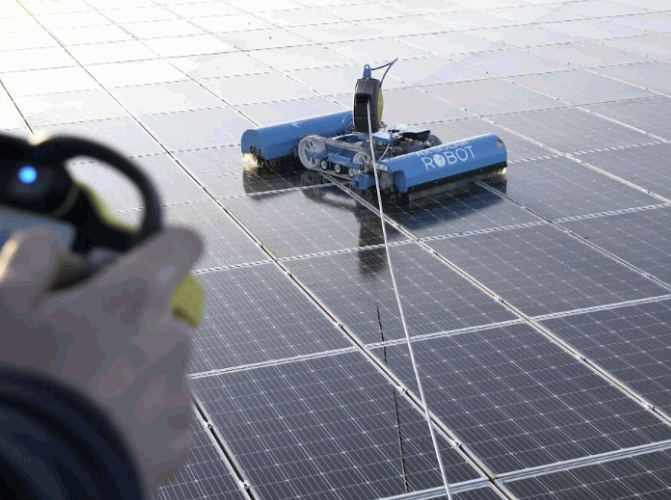
Taking proper precautions during the cleaning process of solar panels is crucial to ensure both personal safety and the longevity of the panels, including adhering to manufacturer instructions and electrical safety guidelines.
Before starting the cleaning process, it is essential to turn off the power to the solar panels to prevent electrical hazards and ensure safety.
Failure to shut off the power source before cleaning solar panels can lead to serious injuries or even fatalities due to the risk of electric shock.
Wearing protective gear such as gloves and safety glasses is important during the cleaning process to protect yourself from potential hazards and ensure the safe handling of cleaning tools and solutions.
Aside from gloves and safety glasses, wearing appropriate footwear can also be crucial to prevent slipping or falling while working on solar panels. Consider using a dust mask to avoid inhaling any particles or fumes during the cleaning process.
When selecting protective gear, opt for items that are specifically designed for working with solar panels to ensure the best fit and protection. Ensuring that your gear is in good condition and properly maintained is equally important for your safety.
Choosing the right protective gear not only safeguards your well-being but also enhances your efficiency and effectiveness in maintaining solar panels for optimal performance.

It is crucial to avoid using harsh chemicals during the cleaning process as they can damage the surface of the solar panels and reduce their efficiency.
When harsh chemicals come into contact with solar panels, they can degrade the protective coating and potentially lead to cracks or scratches. These damages not only impact the aesthetics of the panels but can also interfere with their functionality by obstructing sunlight absorption.
Using organic cleaning solutions, such as a mixture of water and vinegar, is a safer alternative that effectively removes dirt and grime without causing harm to the panels. Gentle cleaning techniques like soft brushes or sponges can help maintain the longevity of the panels without risking any structural harm.
Yes, there are numerous professional services available for cleaning solar panels, often offered by solar installation companies and other specialized solar companies to ensure efficient and safe cleaning.
These professional cleaning services play a crucial role in maintaining the optimal performance of your solar panels. By having experts regularly clean your panels, you can ensure that they are free from dirt, debris, and other obstructions that can reduce their efficiency.
Professional cleaning services often use specialized equipment and cleaning solutions that are safe for both the panels and the environment. This not only extends the lifespan of your solar panels but also helps in maximizing the energy production from your solar system.
Maintaining clean solar panels is essential for optimal solar panel efficiency and long-term performance, and some helpful tips include regular inspections, proper cleaning techniques, and timely maintenance.
Regular inspections play a crucial role in detecting any potential issues early on, such as dirt buildup or shading from nearby objects. By identifying these issues promptly, you can address them before they significantly impact your solar panel's output.
In terms of cleaning, using a gentle soap solution or specialized solar panel cleaning products along with a soft sponge or cloth can effectively remove dirt and debris without damaging the panels. Scheduling timely maintenance with a professional can help ensure all components are functioning correctly and prevent any unexpected breakdowns.
Table Of Contents
Considering installing solar panels on your roof but not sure where to start?
This article will discuss what solar panels are, the benefits of installing them, and the factors to consider before making the decision.
We will also provide you with a step-by-step guide on preparing your roof for solar panel installation and the necessary steps to install them successfully.
Dive into the world of solar energy and harness the power of the sun!
Solar panels are devices that convert sunlight into electricity using solar power technology, helping generate clean and renewable energy for homes and businesses, thus reducing dependency on traditional energy sources.
These panels typically consist of interconnected solar cells that capture the sun's rays and convert them into usable electricity through the photovoltaic effect. The captured energy can then be stored in batteries or fed back into the grid for wider use. Solar panels play a crucial role in the shift towards sustainable energy sources, as they are eco-friendly and can significantly reduce carbon emissions. The advancements in technology have made them more efficient and cost-effective over the years, making solar power a viable option for many households and organizations.
Explore: How To Clean Solar Panels On Roof

Installing solar panels on your roof can significantly reduce your energy bills, provide long-term financial savings, and contribute positively to the environment by decreasing your carbon footprint and reliance on fossil fuels.
The benefits of installing solar panels include substantial reductions in energy bills, increased home value, and the generation of clean energy that supports a sustainable lifestyle.
Solar panels offer a pathway to long-term financial savings as they harness the power of the sun to generate electricity for your home, significantly cutting down on monthly energy costs. This not only translates to lower utility bills but also shields you from the volatility of traditional energy prices. Enhancing your property with solar panels can boost its resale value, making it more attractive to potential buyers and standing out in the real estate market.
On the environmental front, solar power reduces your carbon footprint by decreasing reliance on fossil fuels, thus contributing to a healthier planet. By embracing renewable energy sources like solar, homeowners actively participate in the fight against climate change and promote a more sustainable future for generations to come.
Before installing solar panels, it is crucial to consider various factors such as the location and amount of sunlight your roof receives, the orientation and angle of your roof, the material and condition of your roof, and your overall energy usage and needs.
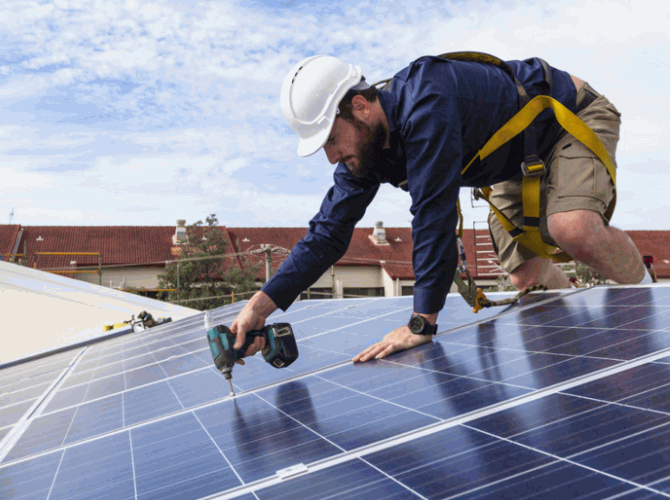
The location of your home and the amount of sunlight it receives are critical factors in determining the efficiency of your solar power system.
When choosing the ideal location for your solar panels, it is essential to consider regional factors such as weather patterns, shading from nearby structures or trees, and local regulations. For instance, homes in sun-drenched regions like Arizona or Southern California may have more optimal conditions for solar energy production compared to areas with frequent cloud cover.
Assessing the orientation of your roof and ensuring it has sufficient exposure to the sun during peak hours can significantly impact the overall energy output of your system. A south-facing rooftop generally receives the most sunlight throughout the day, making it an ideal location for solar panel installation.
The orientation and angle of your roof play a vital role in the effectiveness of solar panels, as they need to be positioned to capture the maximum amount of sunlight.
The optimal positioning of solar panels on a roof is typically facing towards the south in the northern hemisphere and north in the southern hemisphere. This allows them to receive the most sunlight throughout the day.
The angle of the roof should be adjusted depending on the latitude of your location. For instance, roofs in lower latitudes may benefit from a shallower angle, while those in higher latitudes might require a steeper angle to optimize solar panel efficiency.
The type of material and the overall condition of your roof are crucial factors to evaluate before proceeding with the installation of solar panels.
When considering different roof materials, it is important to take into account their compatibility with solar panel installation. For example, metal roofs are often praised for their durability and longevity, making them a suitable choice for supporting solar panels. Their smooth surface allows for easy installation and maintenance of solar arrays. On the other hand, tile roofs, while aesthetically pleasing, may require additional reinforcements to support the weight of solar panels. Ensuring that your roof is in good condition and structurally sound is imperative to prevent any issues during or after the installation process.
Understanding your home's energy usage and needs is essential to ensure that the solar power system you install is adequately sized and configured to meet your requirements.
One way to assess your energy consumption patterns is by analyzing your monthly utility bills. Take note of your average kilowatt-hour usage to get a sense of how much electricity your household consumes. Consider the energy-intensive appliances and electronics you use regularly, such as air conditioners, heaters, refrigerators, and washing machines.
By evaluating when and how you use the most energy, you can tailor the size and design of your solar power system to offset peak energy demand periods. This customization ensures that your system is optimized to generate electricity efficiently and effectively, ultimately leading to long-term cost savings and a reduced carbon footprint.
Before installing solar panels, it is essential to prepare your roof through thorough inspection, cleaning, and necessary repairs, as well as obtaining all required permits and approvals from local authorities.
Conducting a thorough inspection of your roof to assess its condition is the first critical step in preparing for solar panel installation.
Regular roof inspections play a vital role in ensuring the longevity and efficiency of your roof. By evaluating for any signs of damage, deterioration, or potential weaknesses, you can address issues proactively and prevent costly repairs down the line. A well-maintained roof not only safeguards your property but also enhances its overall value.
While it's possible to conduct visual checks yourself, hiring a professional for a comprehensive inspection is highly recommended. Professionals have the expertise and tools to spot hidden problems that might go unnoticed by the untrained eye. Investing in a professional inspection can save you time, money, and headaches in the long run.
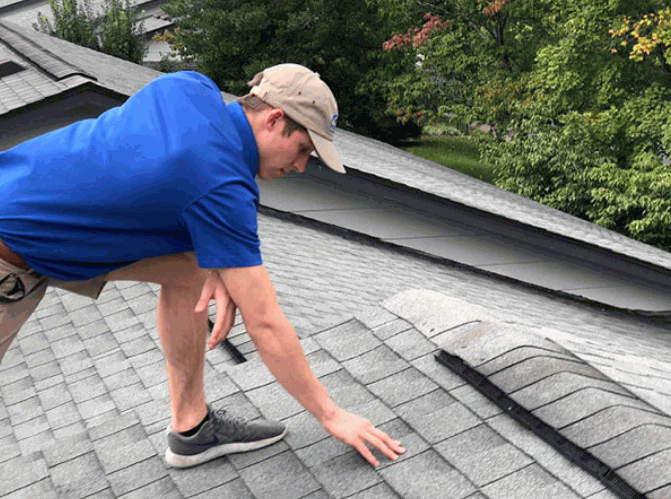
Cleaning and repairing your roof ensures that it is in optimal condition to support the solar panels, preventing potential issues down the line.
Before initiating the cleaning process, carefully inspect the roof for any signs of damage, such as cracked shingles or leaks. If any issues are detected, it's crucial to address them promptly to avoid further deterioration.
These steps, coupled with regular maintenance, will prolong the lifespan of your roof and safeguard your solar investment.
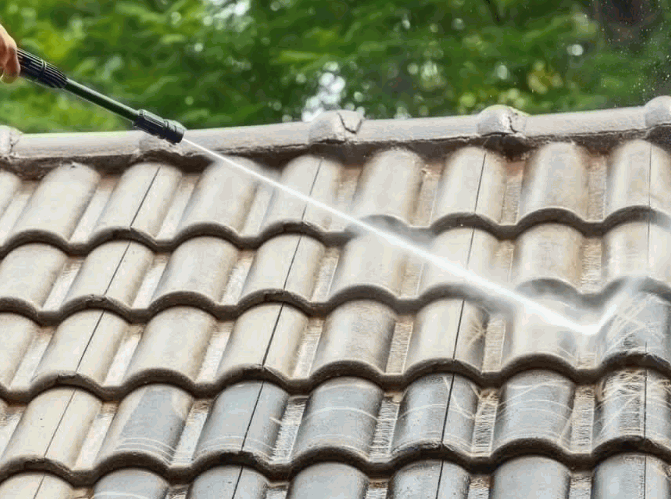
Reinforcing your roof structure is necessary to ensure it can support the weight of the solar panels and withstand various weather conditions.
One commonly used method to reinforce roof structures is through the installation of stanchions and rails. Stanchions are vertical support posts that help distribute the weight of the solar panels evenly across the roof. These are typically made of durable materials such as steel or aluminum.
Rails, on the other hand, are horizontal beams that connect the stanchions and provide a stable framework for mounting the solar panels. These rails are securely fastened to the stanchions to create a solid foundation for the panels.
Securing the necessary permits and approvals from local authorities ensures that your solar panel installation complies with all local building laws and regulations.
Before beginning the process, it is crucial to understand the specific requirements set forth by your local government. This typically involves submitting detailed documentation such as architectural plans, engineering specifications, and evidence of compliance with zoning laws. Upon submission, the authorities will review your application to ensure it aligns with the established regulations. In some cases, you may be required to schedule inspections to confirm that the installation meets safety standards and environmental guidelines. Once all criteria are met and approvals are granted, you can move forward confidently with your solar panel project.
The installation process for solar panels on your roof involves several critical steps, including mounting the panels, connecting the wiring, installing the inverter, integrating with the electrical system, and conducting a final inspection and testing.
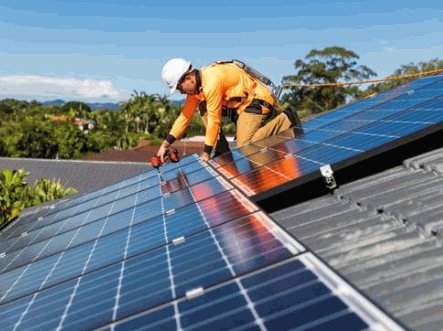
Mounting the solar panels on a roof involves securely attaching them using rails and stanchions to ensure stability and optimal positioning for sunlight exposure.
When installing the rails, it's crucial to consider the roof's material for appropriate anchoring. Roof types vary, which can impact the mounting process.
Proper alignment and spacing of rails are essential for supporting the weight of the solar panels and ensuring structural integrity.
After mounting, the next step is to connect the solar panels with the necessary wiring to create a cohesive solar power system.
When connecting the solar panels, it is essential to use high-quality wiring to ensure optimal performance and longevity of the system. Typically, solar panels are connected in series or parallel configurations, depending on the specific requirements of the installation. Series connections involve linking the positive terminal of one panel to the negative terminal of the next, while parallel connections connect all positive terminals together and all negative terminals together.
Proper insulation and protection of the wiring connections are crucial to prevent electrical hazards and ensure the system's safety. It is recommended to use weatherproof and UV-resistant wiring to withstand outdoor conditions and minimize the risk of damage over time. Regularly inspecting the wiring connections for wear and tear can help identify potential issues early on and address them promptly.
Installing the inverter is a crucial step in the solar panel installation process, as it converts the direct current (DC) generated by the panels into alternating current (AC) used by most home appliances.
There are generally two types of inverters used in solar power systems: string inverters and microinverters. String inverters are commonly used in larger installations and are more cost-effective, while microinverters are installed on each individual panel for better efficiency and monitoring capabilities.
During the installation process, the inverter is typically placed in a well-ventilated area near the main electrical panel. Proper wiring and grounding are crucial to ensure the safe and efficient operation of the solar power system.
The role of the inverter in a solar power system cannot be understated, as it is responsible for converting the DC electricity produced by the panels into AC electricity that can power your household appliances and feed excess energy back into the grid.
Connecting the solar power system to your home's electrical system involves integrating it with the fuse board or consumer unit, typically requiring the expertise of a qualified electrician.
To begin the process, ensure the solar power system is turned off and isolated from the grid to prevent any accidents.
An inspection by a certified electrician is recommended to verify that the system is integrated safely and in compliance with local regulations.
The final step involves a thorough inspection and testing of the entire solar power system to ensure it complies with regulations and performs efficiently.
This final inspection and testing stage is crucial in guaranteeing that all components of the system are functioning as intended. During this process, technicians meticulously examine the panels, inverters, wiring, and other key elements for any signs of damage or malfunction. Various performance tests are conducted to verify that the system is generating the expected amount of power and properly feeding it back into the grid. By rigorously evaluating every aspect, any potential issues can be identified and rectified before the system is fully operational.
Table Of Contents
If you're looking to spruce up your outdoor space with stylish and durable furniture, resin-wicker patio furniture may be the perfect choice for you.
We will explore what resin wicker is made of, the different types available, and the numerous benefits it offers such as weather resistance and low maintenance.
Additionally, we will provide tips on how to clean and maintain your resin wicker furniture, discuss potential disadvantages, and help you choose the right resin wicker patio furniture considering design, quality, comfort, and functionality.
Whether you're a seasoned patio furniture aficionado or a newcomer to the world of outdoor decor, this article will guide you through all you need to know about resin wicker furniture.

Resin wicker patio furniture is a popular choice for outdoor settings, made from synthetic materials designed to mimic the look of natural wicker while offering improved durability and weather resistance.
Composed of high-quality, durable materials such as PVC, nylon, or polyethylene, resin wicker patio furniture is woven into intricate patterns that add a touch of elegance to any outdoor space. This type of furniture is versatile and can be found in a wide range of styles, from classic to modern designs. Its synthetic composition allows it to withstand various weather conditions, making it an ideal choice for outdoor use without the risk of warping, fading, or deteriorating over time.
Check out: Can Resin Patio Furniture Be Painted

Resin wicker is typically made from synthetic resin materials like HDPE (High-Density Polyethylene), which are known for their durability and weather resistance, making them ideal for outdoor furniture.
These materials offer several advantages over natural wicker, such as being more resistant to UV rays, moisture, and heat. This means that outdoor resin wicker furniture can withstand harsh weather conditions without fading or deteriorating, making it a popular choice for patio and garden furniture.
The synthetic resin fibers used in resin wicker are also easy to clean and maintain, requiring only a simple wipe-down with a damp cloth. They are lightweight, making it easy to rearrange and move furniture as needed.

There are different types of resin wicker, including natural wicker, synthetic wicker, HDPE synthetic wicker, and PVC, each with its own set of characteristics and uses.
Natural wicker is made from organic materials such as rattan, bamboo, or reed. It has a traditional look and is often used in outdoor furniture due to its aesthetic appeal.
Synthetic wicker, on the other hand, is crafted from polyethylene or resin, providing greater resistance to UV rays and water, making it perfect for outdoor settings. HDPE synthetic wicker stands out for its exceptional durability, with high tensile strength and weather resistance. PVC wicker, although less commonly used, is known for its budget-friendly nature but may lack the durability of other resin wicker types.

The benefits of resin wicker patio furniture are numerous, making it an excellent choice for outdoor settings due to its durability, weather resistance, and low maintenance requirements.
One of the primary benefits of resin wicker patio furniture is its weather resistance, as it can withstand various weather conditions, including UV rays and rain, without deteriorating.
Resin wicker's ability to resist the detrimental effects of weather makes it an ideal choice for outdoor furniture that will be exposed to the elements. Unlike natural wicker, which can warp or fade over time when exposed to sunlight and moisture, resin wicker maintains its integrity for years to come.
This resilience to weather conditions means that homeowners can enjoy their outdoor spaces without having to constantly worry about their furniture deteriorating. Whether it's a scorching summer day or a rainy autumn evening, resin wicker remains steadfast, providing both durability and aesthetic appeal.
Resin wicker is highly durable due to its synthetic material composition, such as HDPE synthetic wicker, which ensures that the woven furniture can endure regular use without breaking down easily.
The resin wicker's resistance to UV rays, moisture, and temperature fluctuations makes it suitable for outdoor use, as it won't warp, fade, or crack over time like natural wicker would. This material's strength and flexibility also make it less prone to splintering or splitting, ensuring a smoother and safer surface for seating and dining.
Another significant advantage of resin wicker patio furniture is its low maintenance requirements, as the HDPE material does not need frequent cleaning or special treatments to stay in good condition.
Unlike natural wicker, resin wicker is resistant to sun damage, moisture, and temperature fluctuations, making it ideal for outdoor use in various climates.
This durability means you can leave your resin-wicker furniture outside year-round without worrying about it deteriorating.
Simple maintenance involves occasional cleaning with a mild soap and water solution, followed by a rinse and air dry.
This minimal upkeep allows you to enjoy your outdoor space without the hassle of constant maintenance tasks.
Resin wicker patio furniture is lightweight, making it easy to move and rearrange, thanks to the properties of HDPE fibers used in its construction.
Its lightweight nature not only eases the burden of transportation but also enables users to effortlessly change the layout of their outdoor space according to their needs or preferences. This flexibility is especially valuable for occasions like hosting outdoor gatherings or adapting to different weather conditions.
The portability of lightweight furniture offers the convenience of shifting pieces from the patio to the garden or poolside, ensuring versatile usage. The durability of HDPE fibers ensures that the furniture can withstand outdoor elements, providing long-lasting value.

Maintaining the aesthetic appeal and functionality of resin wicker patio furniture involves regular cleaning and proper care to ensure its longevity and performance in outdoor environments.
Regular cleaning of resin wicker patio furniture is essential to prevent dirt buildup and maintain its appearance, typically involving simple procedures like wiping with a damp cloth.
It is recommended to gently scrub the wicker with a mild soap and water solution to tackle tougher stains that may accumulate over time. For the nooks and crannies, a soft-bristled brush can be handy in ensuring every nook is cleaned thoroughly.
To maintain the luster of your resin-wicker furniture, periodic waxing or polishing can be beneficial, giving the pieces a renewed shine. Regular upkeep, ideally every two to three weeks, will not only preserve the integrity of the furniture but also extend its lifespan, allowing you to enjoy it for years to come.

Deep cleaning of resin wicker furniture may be required occasionally to remove stubborn dirt or stains, using mild detergent and water to clean the HDPE resin material thoroughly.
For a comprehensive deep cleaning session, gather essential tools such as a soft-bristled brush, a bucket of warm water, mild soap or detergent, and a microfiber cloth. Begin by removing cushions and pillows if any, and gently brush off loose debris from the wicker surface. Prepare a soapy solution in the bucket and dip the brush in it to scrub the furniture, paying attention to crevices and corners. Rinse off the soap residue with clean water and wipe down the furniture with a damp microfiber cloth to maintain its sheen.
To extend the life of resin wicker patio furniture, it is essential to protect it from prolonged exposure to sun and rain by using covers or placing it in sheltered areas during extreme weather conditions.
One effective method for safeguarding resin wicker from the elements is by applying a layer of UV-resistant protective sealant. This sealant creates a barrier that shields the furniture from harmful sunlight, preventing fading and deterioration.
Using high-quality weatherproof covers when the furniture is not in use can provide an extra layer of defense against rain, snow, and other harsh weather conditions. These covers help maintain the integrity of the wicker material and prolong its lifespan.
Another useful strategy is to regularly clean and maintain the resin wicker furniture. By keeping it free from dirt, debris, and moisture accumulation, you can prevent mold, mildew, and other forms of damage that can occur over time.
While resin wicker patio furniture offers many benefits, it also has certain disadvantages, primarily related to its synthetic materials and aesthetic compared to natural wicker.
One of the main criticisms of resin wicker is that it does not look as natural as real wicker, with the synthetic materials lacking the organic appeal of natural plant-based wicker.
Real wicker, crafted from natural plant fibers like rattan, cane, or bamboo, exudes a classic charm with its earthy tones and intricate weaving patterns. The imperfections in real wicker, such as slight color variations and irregularities in texture, add to its authenticity and character. In contrast, resin wicker, made from synthetic materials like PVC, tends to have a uniform appearance that can sometimes appear too perfect, lacking the warmth and natural feel of authentic wicker.

Resin wicker can be prone to fading over time, especially when exposed to constant sunlight, although UV-resistant treatments can help mitigate this issue.
Excessive exposure to UV rays is the primary culprit behind the fading of resin wicker furniture. The sun's powerful rays break down the polymers in the resin, leading to discoloration and deterioration over time.
To prevent fading, it's crucial to invest in high-quality resin wicker furniture that is specifically designed to withstand UV exposure. Look for pieces that are treated with UV inhibitors or coated with protective finishes to enhance their UV resistance.
Regular cleaning and maintenance can prolong the vibrancy of resin wicker. Wiping down the furniture regularly with a mild soap solution and covering it when not in use can shield it from the harsh effects of sunlight.
Choosing the right resin wicker patio furniture involves considering various factors such as design, quality of materials, comfort, and functionality to ensure it meets your outdoor living needs.
When choosing resin wicker patio furniture, it is important to consider the design and style to ensure it complements your outdoor space and meets your aesthetic preferences.
Resin wicker furniture comes in a variety of styles ranging from traditional to modern, allowing you to find the perfect match for your outdoor decor. Neutral colors like beige, brown, and gray offer versatility and easily blend with different color schemes. On the other hand, bold colors such as navy blue or forest green can make a statement and add a pop of color to your outdoor area. You can opt for intricate woven patterns or sleek minimalist designs based on your personal taste.
Checking the quality of materials used in resin wicker furniture is crucial, as high-quality HDPE resin ensures better durability and performance in outdoor conditions.
High-quality materials are fundamental in determining the longevity and resilience of resin wicker furniture. Premium HDPE resin is known for its exceptional resistance to UV rays, moisture, and temperature variations, making it perfect for withstanding outdoor elements. In addition, top-grade materials contribute to the furniture's colorfastness, preventing fading and maintaining a vibrant look over time.
Identifying superior materials involves examining the density, construction, and finish. Look for tightly woven strands and smooth, consistent finishes, indicative of meticulous craftsmanship and durability. Quality materials not only enhance the aesthetics but also offer superior comfort and durability, providing lasting value for your investment.
Comfort and functionality are key considerations when selecting resin wicker patio furniture, as pieces should not only look good but also provide a comfortable seating experience and practical use.
One of the standout features of resin wicker patio furniture is its cushions, which enhance the overall comfort level. Ergonomic designs play a crucial role in ensuring that each piece provides adequate support for long hours of lounging or dining outdoors. The multi-functional aspects of this furniture, such as adjustable components or convertible features, add versatility and convenience to outdoor living spaces. By prioritizing comfort and functionality, you can create a welcoming and practical outdoor oasis that suits your lifestyle.