Table Of Contents
Are you noticing water pooling at the bottom of your dishwasher or a funky smell emanating from it? It might be time to clean the drain of your dishwasher.
This guide will discuss why it is important to clean the dishwasher drain, the signs that indicate it needs cleaning, the materials required, and a step-by-step process to effectively clean the drain.
We will also explore how often the dishwasher drain should be cleaned, alternative methods for cleaning, and tips to prevent future clogs. Let's ensure your dishwasher runs smoothly and efficiently!
Cleaning the drain of a dishwasher is crucial to prevent clogs, maintain optimal performance, and ensure the longevity of your appliance. Over time, food particles, grease, and debris can accumulate in the drain, leading to blockages that may hinder the proper drainage of water during the dishwasher's cycles. Regular cleaning also helps in eliminating foul odors and maintaining a hygienic environment in your kitchen.
By regularly cleaning the dishwasher drain, you not only prevent potential clogs but also enhance the overall efficiency of your appliance. A clogged drain can disrupt the flow of water, affecting the cleanliness of your dishes and even causing leaks in severe cases. Ensuring a clear drain allows the dishwasher to function as intended, providing you with sparkling clean dishes every time.

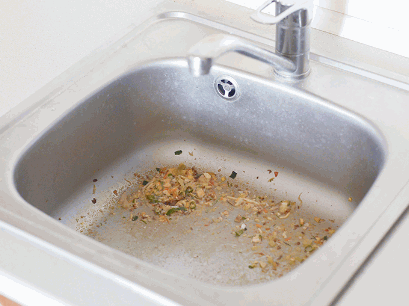
Several signs indicate that your dishwasher drain requires cleaning, such as slow or incomplete drainage after a cycle, pooling water at the bottom of the appliance, persistent odors emanating from the dishwasher, and gurgling or unusual noises during operation. A visible backup of water in the sink connected to the dishwasher or the presence of debris in the drain filter are clear indicators of a clogged dishwasher drain.
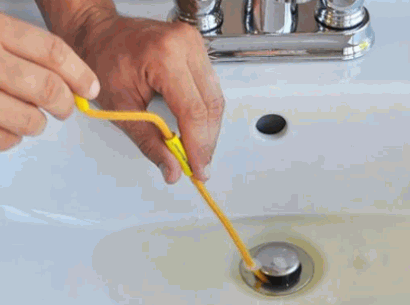
Another common sign of a clogged dishwasher drain is when water backs up into the sink while the dishwasher is running, indicating a blockage in the drainage system. The air gap, a small cylindrical device located on the sink, can also provide clues; for instance, if it overflows during the dishwasher cycle, this suggests a problem with the drainage.
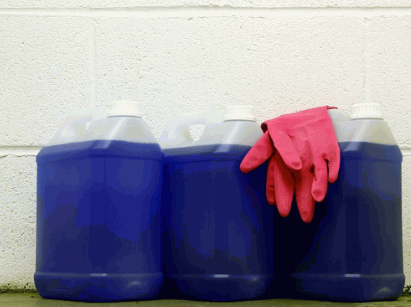
To effectively clean the drain of a dishwasher, you will need basic household items such as white vinegar, baking soda, a soft brush or cloth for scrubbing, the dishwasher's manual for guidance on accessing the drain components, specialized dishwasher cleaning products, and dishwashing liquid for a thorough rinse and final cleaning step.
White vinegar, often hailed for its natural cleaning prowess, serves as a potent disinfectant that can help eliminate stubborn grime and odors within the drain.
When combined with baking soda, a versatile cleaning agent with gentle abrasive properties, a fizzy reaction occurs, aiding in the dislodging of debris and grease buildup.
A soft brush or cloth is essential for physically scrubbing away any remaining residue or particles that may cling to the drain walls.
The dishwasher's manual is your ultimate resource for understanding the specific layout of your appliance's drain system and how to safely clean it.
Specialized dishwasher cleaning products are formulated to target and break down tough stains and mineral deposits, ensuring a thorough cleansing process.
For the final step, using dishwashing liquid helps remove any leftover cleaning agents and leaves the dishwasher smelling fresh and ready for use.
Cleaning the drain of your dishwasher involves a series of steps to ensure the thorough removal of debris, clogs, and buildup. From removing the bottom rack to accessing the drain components, using vinegar and baking soda solution for cleaning, and checking the drain hose for any obstructions, each step plays a crucial role in maintaining a clean and functional dishwasher drain.
Once you have removed the bottom rack, inspect the drain area for any visible debris or clogs. Use a soft-bristle brush or a toothbrush to gently scrub away any residue.
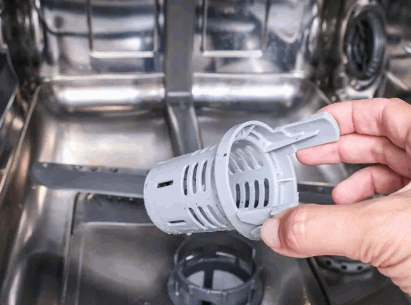
Next, locate the filter in your dishwasher and remove it carefully. Clean the filter under running water to wash away any trapped food particles. For a deep clean, soak the filter in a vinegar and water solution to break down oils and grease.

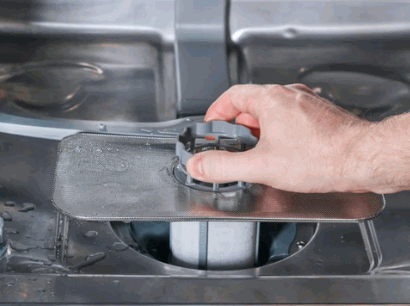
The first step in cleaning a dishwasher drain is to remove the bottom rack to access the drain area easily. Pull the rack outward gently, ensuring it is empty of any dishes or utensils, and set it aside for cleaning separately.
Once you have removed the bottom rack, it's essential to inspect it for any food particles or debris that may have accumulated. Use a damp cloth or sponge to wipe down the rack, paying special attention to any corners or crevices where grime tends to build up.
Before cleaning the rack, ensure that your dishwasher is unplugged to prevent any accidents. You may also want to wear protective gloves to avoid any sharp edges on the rack causing injury. When handling the rack, be mindful of any fragile parts and avoid applying excessive force to prevent damage.
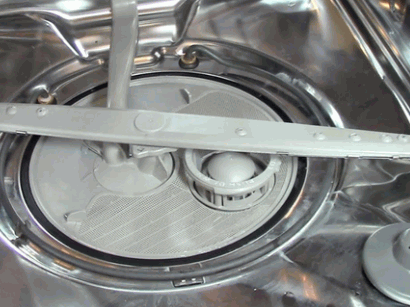
After removing the bottom rack, locate the dishwasher drain and inspect it for any visible debris or clogs. Use a flashlight for better visibility and a tool such as a soft brush or cloth to gently remove the accumulated debris without damaging the drain components.
Proper lighting is crucial during this inspection process as it helps you identify even the smallest debris that might be causing drainage issues in your dishwasher.
Taking your time to carefully clean the drain ensures that you do not inadvertently push the debris further into the system, potentially worsening the clog.
When inspecting the drain, pay attention to any food particles, soap scum, or mineral buildup that could be obstructing the flow of water.
Remember to always handle the drain and its components delicately to avoid causing any damage that might lead to costly repairs in the future.
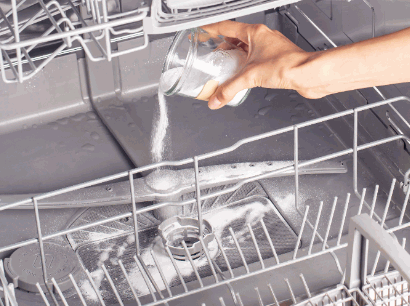
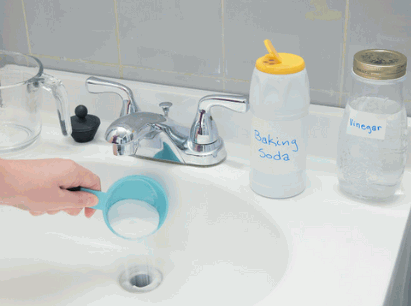
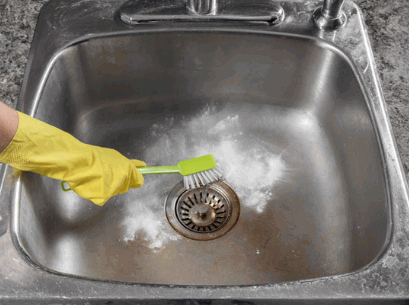
To effectively clean the dishwasher drain, create a solution of white vinegar and baking soda. Pour the vinegar into the drain, followed by baking soda, and allow the mixture to fizz and break down residue and odor-causing particles for about 15-20 minutes.
This simple cleaning method harnesses the power of a chemical reaction between the vinegar and baking soda. When these two ingredients interact, they create a bubbling effect that helps dislodge stubborn debris clinging to the drain walls. Plus breaking down grime, this fizzy reaction releases carbon dioxide gas which further aids in pushing out dirt and eliminating unpleasant smells. The recommended duration of 15-20 minutes gives ample time for the mixture to work its magic, thoroughly cleansing the drain. Remember to run a hot water rinse cycle after to complete the process.
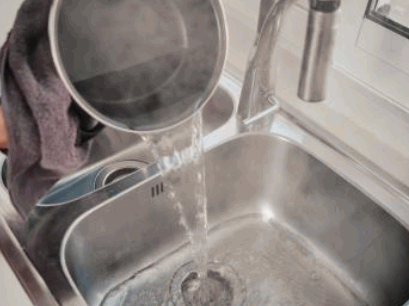
After the vinegar and baking soda solution have had time to work on the drain, rinse the drain thoroughly with hot water to flush out loosened debris and residue. This step helps in ensuring that the drain is free of any remaining particles and cleaning solution.
Using hot water is crucial in this step as it helps to dissolve and remove any stubborn residues that have been loosened by the vinegar and baking soda mixture. The hot water not only aids in rinsing away the debris effectively but also ensures that no traces of the cleaning agents are left behind. When rinsing, make sure to allow the hot water to flow through the drain at a steady pace, thoroughly cleaning all areas.
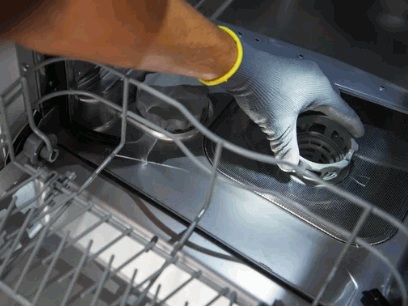
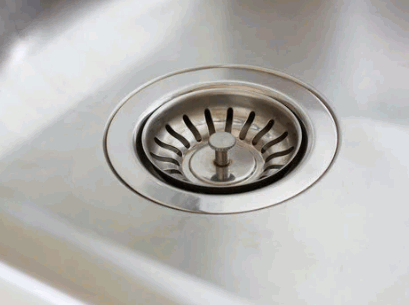
Next, locate and remove the dishwasher filter for cleaning. Inspect the filter for any debris or blockages, and wash it under running water to remove trapped particles. Ensure the filter is completely clean before reinserting it back into the dishwasher.
Proper maintenance of the dishwasher filter is essential for the efficient functioning of your appliance. Debris and food particles can accumulate over time, causing drainage issues and affecting the cleanliness of your dishes. By regularly inspecting and cleaning the filter, you can prevent potential clogs and ensure that your dishwasher continues to work effectively.
Avoid using harsh chemicals or abrasive scrubbing pads when cleaning the dishwasher filter, as these can damage its delicate mesh structure. A gentle scrub with a soft brush or sponge should suffice to remove any stubborn residues. Check the manufacturer's instructions for specific cleaning recommendations tailored to your dishwasher model.
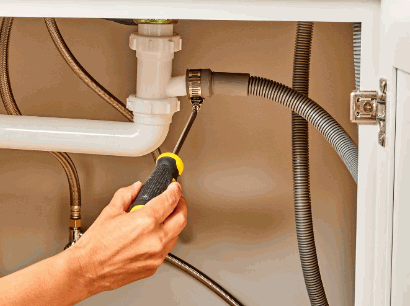
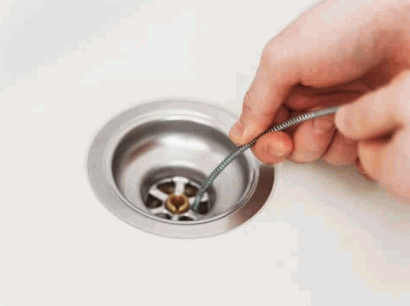
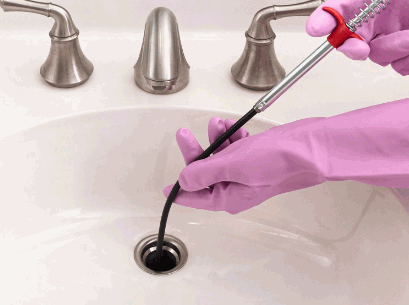
Inspect the dishwasher drain hose for any clogs or kinks that may obstruct the flow of water. Carefully straighten out any kinks and remove any visible clogs to ensure smooth drainage during the dishwasher's operation.
Check for debris accumulation at the connection points between the hose and the dishwasher or garbage disposal. Use a flashlight to look inside the hose for any blockages, such as food particles, grease, or small objects. It's advisable to detach the hose and clean it out if necessary, ensuring there are no stubborn blockages impeding the water flow. Running hot water through the hose after cleaning can help clear out any residual debris and maintain a clear pathway for efficient drainage.
Once the drain components are clean and free of debris, reassemble the dishwasher by replacing the filter, rack, and any removed parts. Run a test cycle with the dishwasher empty to ensure that the drain functions properly and there are no leaks or drainage issues.
Proper maintenance of your dishwasher is crucial to ensure its efficient performance. Reassembling the machine correctly after cleaning the drain components is essential to prevent any future problems. Make sure the filter is secure in place, and the rack fits back perfectly. Running a test cycle post-cleaning allows you to observe the dishwasher's functionality firsthand. Monitor any unusual sounds or water leakage during this process. It's advisable to perform regular maintenance routines to extend the lifespan of your dishwasher.
It is recommended to clean the dishwasher drain at least once a month or more frequently if you notice signs of drainage issues or unpleasant odors. Regular maintenance of the dishwasher drain helps prevent clogs, maintain optimal performance, and extend the lifespan of the appliance.
Plus preventing clogs and maintaining optimal performance, regular cleaning of the dishwasher drain also helps in avoiding bacterial buildup and ensuring hygienic dishwashing. By cleaning the drain on a monthly basis, you can significantly reduce the risk of mold growth and foul odors in your dishwasher.
To identify if your dishwasher drain needs cleaning, inspect it for any visible debris or standing water after a cycle. If you notice slow drainage or hear unusual noises during operation, it might indicate a clog that needs attention.
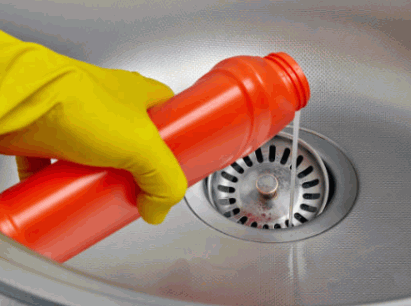
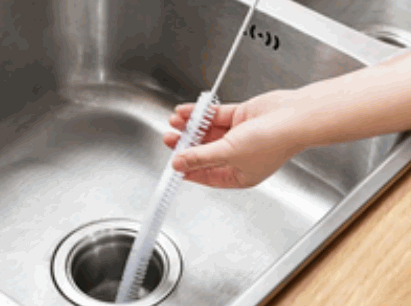
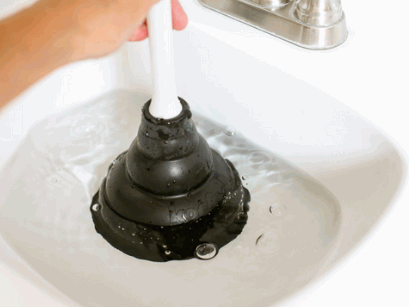
Apart from using vinegar and baking soda, there are alternative methods to clean the dishwasher drain. You can opt for commercial dishwasher cleaners designed specifically for drain maintenance, utilize a plunger to dislodge stubborn clogs, or manually clean the drain pipe using a pipe brush and hot water to ensure thorough cleaning.
Commercial dishwasher cleaners are easily available in the market and are formulated to break down grease and grime that accumulate in the drain over time. They offer a convenient solution for those looking for a quick and effective fix.
On the other hand, plungers can be a simple yet powerful tool to tackle blockages by creating pressure to push through the clogs.
For a more hands-on approach, manual cleaning with a pipe brush and hot water allows you to physically remove any buildup along the drain pipe walls. This method ensures a comprehensive clean, particularly in hard-to-reach areas that may be missed by other cleaning techniques.
Commercial dishwasher cleaners offer a convenient solution for deep cleaning the dishwasher drain. These specialized products are formulated to break down tough residues, eliminate odors, and maintain the cleanliness of the drain system effectively. Follow the manufacturer's instructions for the proper use of the commercial cleaner for optimal results.
Using a commercial dishwasher cleaner not only removes grease buildup but also prevents clogs and ensures your dishwasher functions efficiently. By regularly cleaning the drain with a commercial cleaner, you can extend the lifespan of your dishwasher and improve its overall performance. These cleaners are designed to be safe for use in dishwashers and are effective in preventing mold and mildew growth in the drain system. Always check the product label for specific guidelines on application and dosage to achieve the best results.
Explore further: What Is The Best Kitchen Drain Unblocker

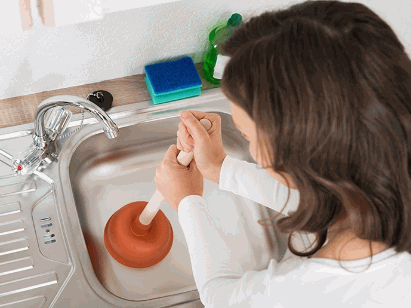
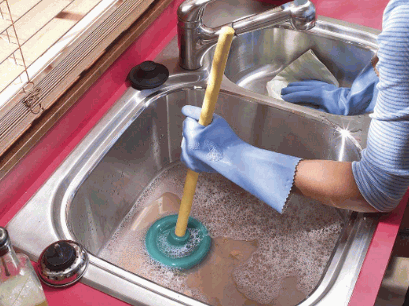
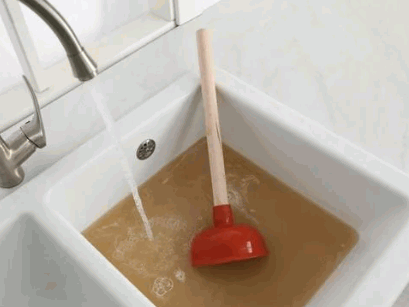
In case of persistent clogs in the dishwasher drain, using a plunger can help dislodge blockages and restore proper drainage.
When tackling a clog in your dishwasher drain, it's important to first ensure that the plunger's cup completely covers the drain opening. This tight seal is crucial in creating the necessary suction force to dislodge the blockage efficiently.
Once the seal is formed, gently push down on the plunger handle and then pull up in a pumping motion. This action helps to create pressure within the drain, breaking up the debris causing the clog. Remember to maintain a firm grip on the plunger and avoid using excessive force to prevent damage.
If the clog persists after the initial attempt, repeat the plunging process several times. Patience and consistent pressure are key in effectively clearing stubborn blockages in the dishwasher drain.
To prevent future clogs in the dishwasher drain, incorporate regular maintenance and cleaning practices into your routine. Avoid rinsing excess food particles down the drain, use a mesh filter to catch debris, run hot water periodically to flush the drain, and ensure the air gap is clear to facilitate proper drainage and prevent backups.
Be cautious with what goes into your dishwasher; scraping off plates before loading them can significantly decrease the chances of clogs.
Regularly inspect and clean the filter to ensure it is free from blockages.
Consider using a dishwasher cleaning solution periodically to prevent the buildup of grease and soap scum.
Implementing these preventive measures not only keeps your dishwasher running smoothly but also extends its lifespan and ensures efficient performance.

Table Of Contents
Are you tired of dealing with a clogged kitchen drain?
In this article, we will explore the world of kitchen drain unblockers. From how they work to the different types available, we will cover everything you need to know.
Discover the best kitchen drain unblockers on the market, along with tips on how to use them effectively. We will also discuss alternative methods for unclogging kitchen drains and precautions to keep in mind.
Say goodbye to stubborn clogs with our comprehensive guide!
A kitchen drain unblocker is a specialized product designed to remove clogs and blockages in kitchen sinks, ensuring smooth water flow and proper drainage. These unblockers are essential for maintaining the plumbing system and preventing issues caused by accumulated debris and grease.
In terms of maintaining a functional kitchen environment, kitchen drain unblockers play a crucial role in avoiding the inconvenience of a clogged sink. By efficiently breaking down organic matter, grease, and soap scum that often causes blockages, these products help prevent water backups and foul odors in your kitchen. Regular use of quality drain unblockers not only keeps your sink free from blockages but also extends the lifespan of your plumbing system by minimizing the risk of more severe clogging issues.
Dig deeper: How To Clean Drain In Sink
Kitchen drain unblockers work by breaking down and dissolving various substances that cause clogs, such as grease, hair, and food particles, in the pipes of the plumbing system. These products use chemical or mechanical means to unclog drains effectively and restore proper water flow.
When kitchen drain unblockers come into contact with the clog-causing materials, they initiate a process that breaks down the blockage, allowing it to be easily flushed away. The chemical drain cleaners contain powerful agents that react with the substances, while the mechanical uncloggers utilize tools such as augers or plungers to physically dislodge the obstruction.
By targeting and dissolving these key culprits of clogs, including grease, hair, and food particles, these drain unblockers efficiently clear the passageways within the plumbing system. This action promotes smooth water flow and helps prevent future blockages from occurring, maintaining the optimal functioning of the drains.
There are three main types of kitchen drain unblockers: chemical drain cleaners, mechanical drain cleaners, and natural drain unblockers. Each type offers unique benefits and approaches to effectively address clogs and blockages in kitchen sinks and plumbing systems.
Chemical drain unblockers utilize powerful formulations to break down grease, hair, and other blockages in the plumbing system. These products undergo rigorous testing to ensure safety and effectiveness, with some variants designed specifically for septic tanks and different pH levels.
They work by incorporating chemical compounds that interact with the clogs, causing them to break apart and dissolve. The ingredients in these drain unblockers are carefully selected to target specific types of blockages, such as organic matter and soap scum.
When using chemical drain cleaners, it is vital to follow the manufacturer's instructions diligently to prevent accidents or damage to the plumbing system. Gloves and protective eyewear are recommended to shield the skin and eyes from potential chemical splashes.
It is essential to note that certain chemical drain unblockers may not be suitable for use in septic tank systems, as they can disrupt the natural balance of bacteria necessary for the tank's functioning.
Mechanical drain unblockers, such as plumber's snakes and pipeline video inspection systems, offer physical solutions for removing blockages in pipes. These tools are effective in dislodging debris, clearing tree root intrusions, and identifying cracks or leaks in the sewer line.
Plumber's snakes, also known as drain augers, feature a long, flexible cable with a coiled end that can navigate through pipes to break up clogs. On the other hand, video inspection systems utilize small cameras attached to flexible rods to provide real-time visuals of the interior pipe condition. By pinpointing the exact location of obstructions, these tools allow plumbers to precisely target and resolve the issues efficiently.
Natural drain unblockers rely on eco-friendly ingredients like vinegar and baking soda to break down blockages without harsh chemicals. These solutions are gentle on pipes, making them ideal for regular maintenance and preventing grease buildup in the P-Trap and other plumbing components.
One of the key advantages of using natural drain unblockers is their ability to effectively tackle stubborn blockages while being environmentally conscious. By harnessing the powerful cleaning properties of vinegar and baking soda, these solutions offer a safe and sustainable alternative to traditional harsh drain cleaners. Not only do they help in keeping your drains clear and odor-free, but they also help in maintaining the overall health of your plumbing system.
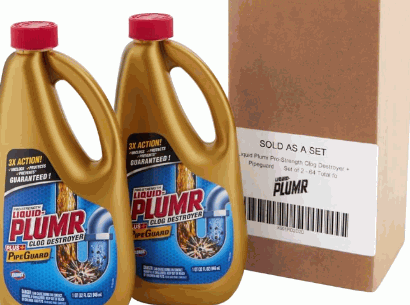
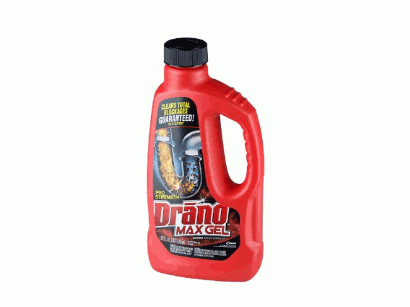
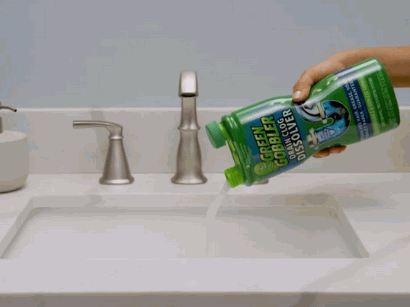
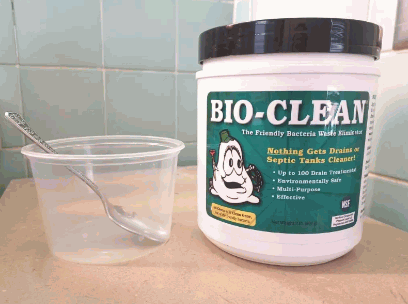
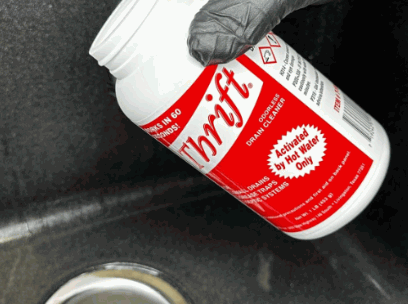
In terms of selecting the best kitchen drain unblockers, there are several top-rated products to consider. These options, including Liquid-Plumr Pro-Strength Drain Unblocker, Drano Max Gel Clog Remover, Green Gobbler Drain Clog Dissolver, Bio-Clean Drain Septic Bacteria, and Thrift Marketing GIDDS-TY Drain Cleaner, have been recognized for their effectiveness in addressing various clogging issues.
Each of these drain unblockers offers unique advantages that cater to different needs. While Liquid-Plumr is known for its fast-acting formula that can dissolve tough clogs quickly, Drano provides a powerful solution for deep-seated blockages. Green Gobbler stands out for its eco-friendly and biodegradable formula, making it a popular choice for environmentally-conscious consumers.
On the other hand, Bio-Clean uses natural enzymes to break down organic matter, making it a safe and effective option for regular maintenance. Thrift Marketing GIDDS-TY combines power and affordability, offering a cost-effective solution for common drain issues.
Liquid-Plumr Pro-Strength Drain Unblocker is a powerful solution designed to tackle tough clogs and blockages in kitchen sinks and plumbing systems. Its fast-acting formula effectively breaks down grease and organic matter while ensuring safety for pipes and septic tanks.
One of the standout features of Liquid-Plumr Pro-Strength Drain Unblocker is its ability to dissolve hair, soap scum, and other stubborn debris that often leads to blockages in drains. This product is not only effective in clearing clogs quickly but also prevents future build-ups, ensuring a smooth flow of water through the pipes. Its non-corrosive formula is gentle on pipes, making it a reliable choice for maintaining the integrity of your plumbing system.
Drano Max Gel Clog Remover is a trusted solution for eliminating blockages in kitchen drains and pipes. Its tested formula effectively targets grease and hair build-up, ensuring safe and thorough unclogging to maintain optimal plumbing functionality.
By utilizing a powerful combination of ingredients, this clog remover dissolves even the toughest clogs swiftly, without causing any harm to your pipes or septic systems. One of the standout features of this product is its ability to work on both partially clogged drains and fully blocked pipes, providing versatility for various situations. Tested under rigorous conditions, Drano Max Gel has proven its efficacy in unclogging drains, making it a reliable choice for households facing recurrent plumbing issues. Its user-friendly application further simplifies the process, saving time and effort in dealing with stubborn clogs.
Green Gobbler Drain Clog Dissolver is a bio-friendly solution that targets blockages caused by organic compounds, grease, and food remnants. This product is safe for septic tanks and utilizes natural enzymes to break down clogs effectively without harmful chemicals.
It is designed to be gentle on the environment while still providing a powerful solution for clogged drains. The natural enzymes in Green Gobbler Drain Clog Dissolver work by breaking down organic matter at a molecular level, making it an effective yet eco-conscious choice. Its compatibility with septic tanks makes it a versatile option for households looking to maintain their plumbing systems without causing harm to the environment.
Bio-Clean Drain Septic Bacteria is a specialized product that utilizes beneficial bacteria and enzymes to break down organic matter in kitchen drains and septic systems. This solution promotes a healthy microbial environment, preventing future clogs and maintaining optimal septic tank performance.
By fostering a balanced bacterial ecosystem, this innovative product effectively mitigates the buildup of grease, fats, proteins, and other organic wastes that often lead to blockages in plumbing systems. The enzymatic action of Bio-Clean Drain Septic Bacteria accelerates the decomposition process, ensuring that waste is broken down efficiently and effectively. This gentle yet powerful formula is not only environmentally friendly but also helps to prevent foul odors and backups, providing a sustainable solution for septic tank maintenance.
Thrift Marketing GIDDS-TY Drain Cleaner is a reliable solution for effectively clearing kitchen drain clogs and blockages. Its powerful formulation targets grease and debris buildup, ensuring safe and efficient unclogging without causing harm to plumbing systems.
One of the standout features of this drain cleaner is its ability to swiftly break down tough clogs, providing a quick and hassle-free solution for households dealing with stubborn blockages. Its non-corrosive nature makes it gentle on pipes, preventing any potential damage during the cleaning process.
The dependable performance of Thrift Marketing GIDDS-TY Drain Cleaner offers peace of mind to users, knowing they can trust its efficacy in maintaining clear and free-flowing drains. By effectively dissolving organic matter and grease, it promotes a healthier plumbing system and minimizes the risk of recurrent blockages.
Using a kitchen drain unblocker effectively involves following the product instructions, applying the solution directly into the affected drain, and allowing sufficient time for it to work on the clog.
It's crucial to choose a drain unblocker suitable for the type of blockage you are dealing with, whether caused by grease, food particles, or soap residue.
Always wear protective gloves and goggles when handling drain unblockers to prevent skin irritation or accidental splashes.
To prevent future blockages, consider installing drain guards to catch debris before it enters the pipes, and remember to run hot water through the drains regularly to help clear any buildup. If the clog persists, a plumber's snake can be a handy tool to navigate deep into the pipes and dislodge the obstruction efficiently.
When using kitchen drain unblockers, it is important to prioritize safety by wearing protective gear such as gloves and goggles. Consider the environmental impact of the product and its compatibility with septic tanks to prevent harm to beneficial bacteria in the system.
Proper ventilation is crucial when working with potent drain-unblocking solutions to avoid inhaling harmful fumes. Ensuring adequate airflow in the area can mitigate the risks associated with strong chemical agents. It's also advisable to read and follow the manufacturer's instructions carefully to handle the product safely and effectively.
Plus using traditional drain unblockers, there are alternative methods for unclogging kitchen drains. These include pouring boiling water, creating a mixture of baking soda and vinegar, using a plunger, and employing a plumbing snake to dislodge stubborn blockages.
One effective way to start the unclogging process is by pouring boiling water down the drain. This can help break down grease and debris that may be causing the blockage. For a more natural approach, you can mix equal parts of baking soda and vinegar to create a foaming solution that can dissolve organic material. Another practical tool to have on hand is a plunger, which can create pressure to dislodge minor clogs. In cases of more severe blockages, a plumbing snake can be used to physically remove the obstruction within the pipes.
Boiling water is a simple yet effective method for loosening minor blockages in kitchen drains. By pouring hot water down the drain, you can help dislodge grease and food particles that may be causing slow drainage.
When using this method, it is important to boil a large pot of water until it reaches a rolling boil. Once the water is sufficiently hot, carefully pour it down the affected drain in a slow and steady stream. The heat from the boiling water can effectively break down the grease and debris that are causing the blockage, allowing them to flow through the pipes more easily. This method is particularly suitable for minor clogs caused by organic matter build-up or grease accumulation.
A mixture of baking soda and vinegar serves as a natural DIY solution for unclogging kitchen drains. The fizzy reaction created by these ingredients can help break down debris and odor-causing substances, offering a chemical-free alternative to traditional drain unblockers.
When combined, the baking soda and vinegar produce carbon dioxide gas, creating a bubbling action that helps dislodge blockages. This method is not only environmentally friendly but also budget-friendly, as these common household items are inexpensive and readily available. Unlike harsh drain cleaners that contain harmful chemicals, this homemade solution is safer for both your pipes and the environment.
A plunger is a powerful tool for dislodging stubborn clogs in kitchen drains through the application of suction pressure. By creating a vacuum seal and plunging vigorously, you can break up blockages and restore proper water flow in the plumbing system.
When using a plunger, it's essential to ensure a tight seal between the plunger's cup and the drain opening. This seal is what allows the plunger to create the necessary suction to dislodge the obstruction.
Start by positioning the plunger directly over the drain and press down firmly, then rapidly push and pull the handle to generate the required pressure. This repeated motion helps to loosen and remove the blockage, allowing water to flow smoothly once again.
Plungers are particularly effective for clearing simple clogs caused by organic matter, grease, or small objects that have become trapped in the pipe. For more serious blockages or issues deeper within the plumbing system, it's best to seek professional assistance.
A plumbing snake, also known as a drain auger, is a mechanical tool used to navigate through pipes and dislodge deep blockages in kitchen drains. By inserting the snake into the drain and rotating it, you can break apart debris and clear obstructions along the sewer line.
When dealing with stubborn clogs that are not responsive to plunging, a plumbing snake becomes a valuable asset. The design of the snake allows it to maneuver through twists and turns in the pipes, reaching blockages that are situated far down the line. As the snake is rotated, its corkscrew-like tip grabs onto the debris, allowing you to pull it back out of the drain. This process is effective not only for removing clogs from kitchen drains but also for addressing issues in sewer lines.
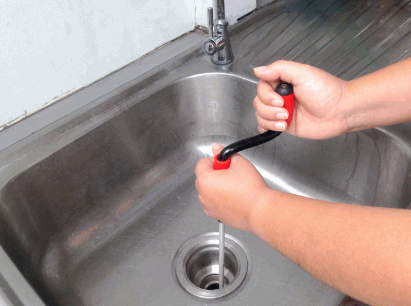
Table Of Contents
Have you ever experienced the frustration of a clogged sink drain?
There are various reasons why sink drains get blocked, from food particles to grease and hair.
In this article, we will explore the causes of sink drain clogs and discuss the tools you need to clean them effectively.
Whether you prefer using a plunger, drain snake, or natural remedies like baking soda and vinegar, we've got you covered.
Stay tuned for tips on preventing clogs and learn why it's essential to keep your sink drains clean.
Sink drains get clogged due to various reasons, including the accumulation of food particles, grease, oil, hair, and soap scum. Understanding these causes can help in preventing clogs and maintaining a clean and functional drain.
Food particles are a common culprit in kitchen sinks, where scraps of vegetables, seeds, or even small pieces of meat can build up over time, restricting water flow. Grease and oil from cooking can solidify in the pipes, creating blockages that impede drainage. Hair is another major issue, especially in bathroom sinks or showers, as it easily clumps together with soap scum, forming tough clogs.
Regular maintenance, such as using drain covers, disposing of food scraps properly, and periodically cleaning the pipes with vinegar or baking soda can help avoid these clogging problems and ensure a smoothly running drain system.
Learn more: How To Clean Drain Of Dishwasher
The build-up of food particles in sink drains is a common issue in many households, leading to slow drainage and potential clogs. Proper cleaning and maintenance can prevent this buildup and ensure smooth water flow.
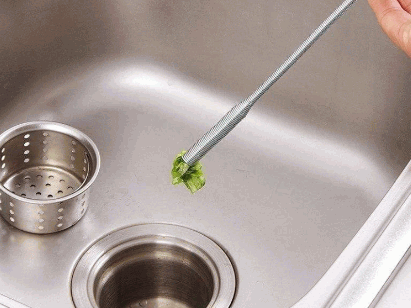
Food particles often stick to the walls of the drain and can accumulate over time, causing blockages. One effective way to remove these particles is by using a mixture of vinegar and baking soda. Pour this down the drain, let it sit for a while, then flush it with hot water to break down the debris. Another handy trick is to use a plumber's snake to physically dislodge any stubborn clogs that are deeper in the drain.
Grease and oil accumulation in sink drains is a major contributor to clogs, especially in kitchen sinks where cooking residues often find their way into the plumbing. Regularly cleaning and degreasing the drains can help prevent blockages.
In kitchen sinks, the combination of food particles, fats, and oils creates a sticky residue that coats the pipes over time. This build-up not only restricts water flow but also provides a breeding ground for bacteria and unpleasant odors. To combat this, using specialized grease-fighting cleaners or natural solutions like baking soda and vinegar can effectively break down the greasy deposits. Installing a strainer or drain cover can help trap larger food particles and prevent them from entering the pipes.

Hair and soap scum can create stubborn clogs in bathroom sink drains, leading to water backup and unpleasant odors. Regular cleaning with suitable products can prevent these blockages and maintain a fresh-smelling drain.
When hair gets washed down the drain, it often combines with soap scum, forming a sticky residue that coats the pipes over time.
This residue then traps other debris passing through the drain, gradually building up and impeding the flow of water.
To effectively combat this buildup, it's recommended to use a drain snake or a mixture of baking soda and vinegar.
These natural remedies can help break down the clogs without harsh chemicals that may damage your pipes.

Cleaning sink drains effectively often requires specific tools like a plunger, drain snake, baking soda, vinegar, or commercial drain cleaners. Having these tools on hand can help you tackle various clogging issues with ease.
A plunger is a versatile tool that uses suction to dislodge clogs in sinks. It works best for minor blockages caused by organic matter or soap scum. To use a plunger effectively, ensure a tight seal around the drain and use quick, vigorous plunges to create pressure changes that help release the blockage.
A drain snake, also known as a plumber's auger, is ideal for reaching deep clogs or removing hair and debris causing the obstruction. The flexible metal cable of a drain snake can navigate bends in the pipe and hook onto the blockage for removal.
A plunger is a versatile tool for clearing clogs in sink drains by creating pressure to dislodge blockages. Knowing how to use a plunger correctly can save you from calling a plumber for minor drain issues.
There are different types of plungers available, such as cup plungers and flange plungers, each designed for specific drain types. To effectively use a plunger, start by ensuring a tight seal around the drain opening with the plunger cup. Plunging in a smooth, rhythmic motion will help generate enough pressure to push the clog through the pipes. For better results, fill the sink with enough water to cover the plunger cup. Remember to clean the plunger after each use and store it in a dry place to prevent contamination.
A drain snake is a flexible tool that helps remove stubborn clogs deep within sink drains, especially those caused by compacted debris or hair. Using a drain snake requires proper technique to avoid damaging the pipes.
When faced with a clogged sink drain, a drain snake can provide a cost-effective solution before having to call a professional plumber. This tool is designed to navigate through the twists and turns of the pipes to break up blockages and allow water to flow freely again.
To use a drain snake properly, begin by inserting the auger end into the drain and rotating it clockwise while applying gentle pressure. As the snake moves further down the pipe, it will catch onto the clog, allowing you to pull it out slowly.
Baking soda and vinegar offer a natural and effective solution for cleaning sink drains, breaking down organic matter, and eliminating odors. This DIY method is safe for pipes and the environment.
To utilize this eco-friendly cleaning method, start by pouring 1 cup of baking soda down the drain, followed by 1 cup of vinegar. Let the mixture sit for about 30 minutes to fizz and work its magic. After that, flush the drain with hot water to rinse away the residue, leaving your drain clean and fresh.

Commercial drain cleaners are available in chemical-based and enzyme-based formulations, offering quick solutions for stubborn clogs. Understanding the safety and effectiveness of these cleaners is crucial before use.
Chemical-based drain cleaners contain powerful agents like sodium hydroxide or sulfuric acid that can dissolve blockages rapidly. They are effective for clearing severe clogs caused by grease, hair, or paper products. These cleaners can be harsh on pipes and may emit fumes harmful to humans and pets.
On the other hand, enzyme-based cleaners use naturally occurring bacteria to break down organic matter, making them safer for pipes and the environment. While enzyme cleaners require more time to work, they are gentle and eco-friendly options for regular maintenance.

Cleaning a sink drain with a plunger is a straightforward DIY task that can quickly resolve common clogging issues. By following a few simple steps, you can restore proper drainage and prevent further blockages.
Start by removing any visible debris or hair near the drain entrance.
For more stubborn blockages, consider using a drain snake to break up the debris. If despite your efforts the drain remains slow or completely blocked, it may be time to seek professional help from a plumber to address potential deeper issues within the plumbing system.
Using a drain snake to clear clogs in sink drains requires proper technique and caution to avoid causing damage.
You should ensure that the drain snake has the appropriate length to reach the clog.
Safety precautions are crucial during this process; wear gloves and safety goggles to protect yourself from any debris or splashes.
If you encounter a stubborn clog, gently maneuver the snake back and forth to dislodge it without exerting excessive force. It's essential to identify whether the clog is caused by organic matter like hair or grease, which may require a different approach for effective removal.
Cleaning sink drains with baking soda and vinegar is an eco-friendly and cost-effective method that helps eliminate odors and debris. This natural cleaning solution is simple to use and safe for regular maintenance.
Start by pouring 1/2 cup of baking soda down the drain, followed by 1/2 cup of vinegar. The mixture will fizz and bubble, which helps break down any buildup or clogs. Let it sit for about 30 minutes to allow the reaction to work its magic. Afterward, rinse with hot water to wash away the residue and any remaining debris.
One of the key benefits of using this method is that baking soda and vinegar are non-toxic and do not harm the environment or your plumbing system. Unlike chemical drain cleaners, these natural ingredients are gentle yet effective in cleaning and maintaining your sink drains.
To prevent future clogs, consider performing this quick cleaning routine once a month. Avoid disposing of grease, oil, or food scraps down the drain, as these can contribute to blockages over time. Being mindful of what goes into your sink can prolong the efficiency of your plumbing and reduce the need for harsh chemical cleaners.

Understanding the safety considerations of using commercial drain cleaners is essential, especially when dealing with persistent clogs. Both chemical-based and enzyme-based cleaners have their advantages and limitations.
Chemical-based drain cleaners are known for their quick and powerful action in breaking down tough clogs; however, they contain harsh chemicals that can pose health risks if not handled properly. On the other hand, enzyme-based cleaners use natural enzymes to eat away at organic matter, offering a safer alternative without emitting harmful fumes. It's crucial to follow manufacturer instructions meticulously when using any type of drain cleaner to ensure effectiveness and prevent accidental exposure to hazardous substances.
Chemical-based drain cleaners offer a quick solution for tough clogs but may contain harsh ingredients that can be damaging to pipes and harmful if misused. It is essential to follow safety guidelines when using these cleaners.
These cleaners work by dissolving the clogs in your pipes, often consisting of hair, grease, or soap scum. While effective, the strong chemicals in some cleaners can cause corrosion, leading to costly plumbing repairs.
When using chemical cleaners, make sure to wear protective gear like gloves and goggles to prevent skin and eye irritation. It is also important to ventilate the area well to avoid inhaling harmful fumes.
Alternative methods such as using a drain snake or a mixture of baking soda and vinegar can be safer for both your pipes and health.
Enzyme-based drain cleaners utilize biological agents to break down organic matter, offering a safer and eco-friendly alternative to chemical cleaners. These cleaners are effective for regular maintenance and prevention of clogs.
Unlike harsh chemical drain cleaners that can cause damage to pipes and harm the environment, enzyme-based solutions work by introducing enzymes that target and digest organic debris, such as food particles, grease, and hair.
The enzymes in these cleaners break down the clogs gradually, preventing future blockages without the need for aggressive chemicals. Since they are made from natural ingredients, enzyme-based cleaners are gentle on plumbing systems and safe for septic tanks.
To use enzyme-based drain cleaners effectively, it is advisable to pour them down the drain at night to allow a longer contact time for the enzymes to work their magic. Regularly using enzyme cleaners can help maintain clean and clear drains, reducing the risk of costly plumbing issues.

Preventing clogs in sink drains involves simple yet effective practices like using a sink strainer, avoiding pouring grease and oil down the drain, and maintaining regular cleaning routines. These preventive tips can help keep your drains clear and odor-free.
It's important to be mindful of what goes down the drain. Small food scraps, coffee grounds, and pasta can all contribute to clogs over time. You can scrape leftovers into the trash rather than rinsing them down the sink.
Proper waste disposal is key to preventing blockages. Establishing a cleaning schedule for your drains, such as flushing them with hot water and vinegar once a month, can also help break down potential build-up and maintain optimal drainage flow.
Using a sink strainer is an effective way to prevent debris, food particles, and other substances from entering the drain and causing clogs. This simple device can significantly reduce the risk of blockages and plumbing issues.
When water flows through the sink, the strainer catches solid particles, allowing only liquid to pass through. This helps maintain a healthy drainage system and extends the lifespan of your pipes. By preventing larger objects from going down the drain, you also minimize the chances of encountering costly plumbing repairs. Investing in a quality sink strainer can save you time, money, and the hassle of dealing with stubborn clogs in the long run.
To prevent clogs in sink drains, it is crucial to avoid pouring grease and oil down the drain, as these substances can solidify and block the plumbing over time. Proper disposal methods can help maintain a clean and functional drain system.
When grease and oil are poured down the drain, they may seem harmless at first, but as they cool, they harden and adhere to the walls of the pipes, leading to the accumulation of debris and causing blockages. These blockages can result in slow drainage, foul odors, and even expensive repairs. It is essential to adopt alternative disposal solutions such as collecting and storing used cooking oil in a container and then disposing of it in designated receptacles or recycling centers.
Regularly cleaning the drain is an essential maintenance task that helps prevent clogs and maintain optimal drainage. Establishing a cleaning routine can keep your sink drains clear of debris and odors.
Experts recommend cleaning your drains at least once a month to prevent buildup and potential blockages. A simple and effective method is to pour boiling water down the drain followed by a mixture of baking soda and vinegar to break down grease and grime. Another helpful tip is to use a drain snake to physically remove any stubborn clogs. Maintaining clean drains not only promotes good hygiene but also extends the lifespan of your plumbing system, saving you from costly repairs in the long run.
Maintaining clean sink drains is crucial for ensuring proper drainage, preventing clogs, and promoting household hygiene. By following simple cleaning practices and preventive measures, you can extend the longevity of your plumbing system.
Regular cleaning of sink drains not only prevents unpleasant odors and blockages but also reduces the risk of potential water damage and mold growth in your home.
Keeping your drains clean and clear can help maintain the overall efficiency of your plumbing system, saving you from costly repairs in the long run.
To ensure optimal drain health, consider using eco-friendly drain cleaners or simple homemade solutions like vinegar and baking soda.
Remember to avoid pouring grease, coffee grounds, or other solid materials down the drain to prevent buildup and maintain smooth water flow.
Investing in a sink strainer can help trap debris before it enters the drain and causes blockages, making your cleaning routine more effective and hassle-free.
Table Of Contents
Are you wondering how to paint new plaster and achieve a flawless finish?
This article explores everything you need to know about painting new plaster, from the recommended drying time to the types of paint that can be used. We will also discuss the preparation steps and tips for a smooth painting process.
Whether you are a DIY enthusiast or a professional painter, this article will provide you with valuable insights to ensure a successful painting project.
Plaster is a versatile building material used for coating walls and ceilings, providing a smooth and durable finish.
Plaster typically consists of a mixture of gypsum, lime, sand, and water, creating a paste-like substance that hardens when dry. It is applied in layers to create a solid surface that can be painted or decorated further.
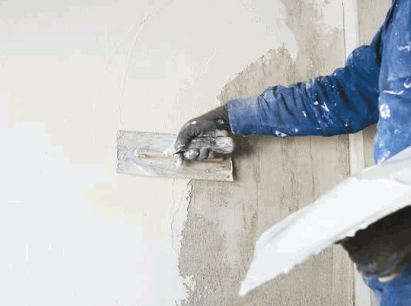
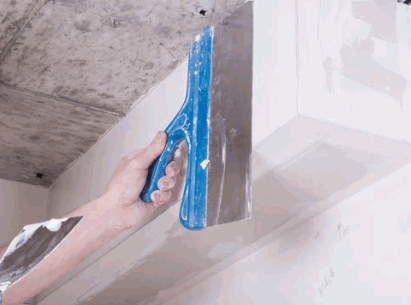
The application of plaster can be done manually using a hawk and trowel or through modern techniques like spray-on plaster. This material is essential in construction for providing a level base for painting and other wall finishes as well as for its fire-resistant and sound-absorbing properties.
Plaster is commonly used in residential and commercial buildings for creating decorative moldings, ornamental designs, and textured finishes on walls and ceilings.
New plaster refers to freshly applied plaster that has not fully dried or cured, requiring specific treatment before painting.
When dealing with new plaster, it is essential to understand its unique characteristics. New plaster is often softer and more absorbent than fully cured plaster, making it crucial to prepare it properly for painting. To do this, make sure to apply a primer specifically designed for fresh plaster. This primer helps seal the surface, preventing excessive absorption of paint and ensuring a smooth finish.
Another important aspect is allowing the new plaster to dry thoroughly before painting. Rushing this process can lead to paint peeling, cracking, or not adhering properly. It is generally recommended to let the plaster cure for at least a couple of weeks before applying any paint.
Find out more: How Much Does Venetian Plastering Cost

Painting new plaster is possible but requires proper preparation and adherence to specific guidelines to ensure a successful finish.
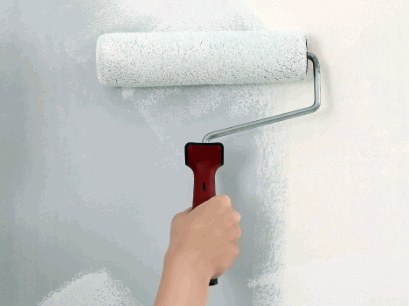
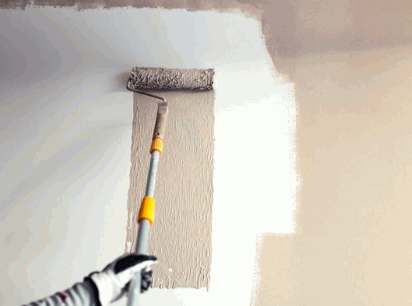
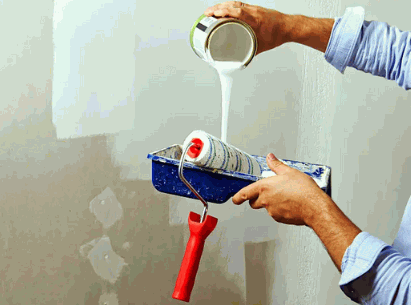
One crucial step in painting fresh plaster is applying a mist coat. This diluted layer of emulsion helps the paint adhere better and prevents it from peeling off. In terms of choosing the right paint for new plaster, opting for a breathable emulsion is key to allowing moisture to escape, and preventing dampness issues. Utilizing a primer specifically designed for fresh plaster can enhance the durability and coverage of the final paint layers.
The recommended drying time for new plaster varies depending on factors such as room temperature, humidity levels, and plaster thickness.
Room temperature plays a crucial role in how fast or slow plaster dries. Lower temperatures can significantly prolong the drying process, while higher temperatures promote quicker drying. Ideally, the room temperature should be around 20-25°C for optimal drying. Additionally, humidity levels also impact drying time; higher humidity can slow down the evaporation of water from the plaster. It's recommended to keep humidity levels below 70% to aid in efficient drying.
Several factors can influence the drying time of new plaster, including ventilation, room temperature, humidity, and the thickness of the plaster application.
Proper ventilation plays a crucial role in expediting the drying process, as fresh air circulation helps in carrying moisture away from the surface. Maintaining an optimal room temperature promotes faster evaporation of water content present in the plaster. High humidity levels can significantly slow down drying time, leading to potential issues such as mold growth and poor adhesion for paint. The thickness of the plaster layer also impacts drying; thicker applications take longer to dry as the inner layers struggle to release trapped moisture.
Various types of paint can be used on new plaster, including emulsion, acrylic, latex, and oil-based paints, each offering unique characteristics and benefits.
Emulsion paint, also known as water-based paint, is a popular choice for new plaster due to its quick drying time, easy application, and low odor. It provides a smooth finish and is available in various finishes such as matt, silk, and satin.
Acrylic paint is another excellent option known for its durability, quick drying, and resistance to fading. It works well on new plaster walls and ceilings and is suitable for high-traffic areas.
Latex paint, a type of water-based paint, is easy to clean up with soap and water, making it ideal for interior surfaces. It offers good coverage and is less likely to crack or peel.
Oil-based paint, while less common nowadays, is known for its durability and high sheen. It provides a hard-wearing finish that is suitable for surfaces like trim, doors, and cabinets.
Emulsion paint is a popular choice for painting walls and ceilings, known for its durability, ease of application, and wide range of available colours.
Its composition typically includes water, binding agents, pigments, and additives that enhance properties like washability and coverage. Emulsion paint is favored for its quick drying time, making it an ideal option for those looking to finish a project efficiently. Its matte finish is great for concealing imperfections on surfaces, especially on new plaster, providing a smooth and elegant look.

Acrylic paint is a versatile and fast-drying paint type that offers excellent adhesion to new plaster surfaces, making it an ideal choice for interior painting projects.
One of the key properties of acrylic paint is its water-based formulation, which not only makes it easy to clean up but also ensures quick drying times, allowing for faster project completion. The wide range of color options available in acrylic paints makes it a favorite among artists and DIY enthusiasts alike. Acrylic paint is known for its durability and resistance to cracking and yellowing over time, providing long-lasting results. When applying acrylic paint on new plaster, it is important to properly prepare the surface by priming it first to ensure optimal adhesion and a smooth finish.
Latex paint, also known as water-based paint, is a popular choice for painting new plaster due to its quick drying time, low odour, and easy cleanup.
Latex paint is preferred for new plaster surfaces as it provides a smooth finish with excellent adhesion, preventing peeling or cracking over time. This type of paint is highly versatile and suitable for various surfaces such as walls, ceilings, and trim. Its durability and resistance to fading make it a practical choice for long-lasting results. Additionally, latex paint comes in a wide range of colors and sheens, offering flexibility for different design preferences. When applying latex paint on new plaster, proper surface preparation is essential to ensure a flawless and lasting paint job.
Oil-based paint offers a durable and high-gloss finish for new plaster surfaces but requires longer drying times and proper ventilation during application.
Despite the longer drying times, oil-based paint is preferred for its strong resistance to wear and tear, making it ideal for high-traffic areas. The glossy finish adds a luxurious touch, enhancing the overall aesthetic of the space. It is crucial to ensure good ventilation when working with oil-based paint, as the fumes can be potent. Applying thin layers with a high-quality brush or roller helps in achieving a smooth and professional-looking result. Be prepared for the added cleanup time, as oil-based paints require mineral spirits or paint thinner for cleaning brushes and spills.
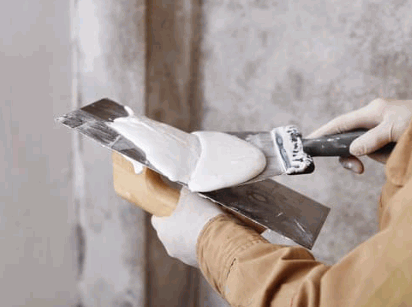
Preparing new plaster for painting involves using specific tools and materials to ensure a smooth and long-lasting finish.
Primarily, prior to painting new plaster surfaces, it is crucial to start by priming the walls or ceilings to promote adhesion and prevent the paint from soaking into the porous surface. This step involves applying a primer that is specifically designed for new plaster to create a suitable base for the paint to adhere to.
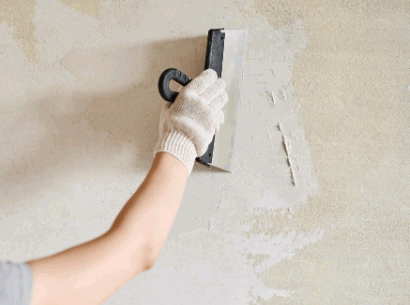
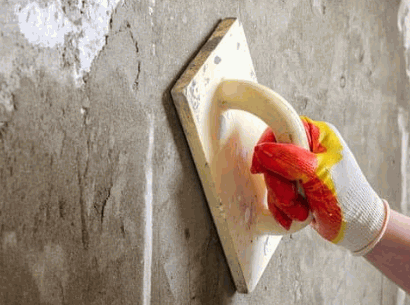
Following this, sanding the plaster is essential to smooth out any imperfections, bumps, or rough areas that may affect the final paint application. Once the surface is primed and sanded, it is important to seal the plaster with a sealant to further enhance its durability and prevent moisture absorption.
By meticulously following these steps, you can ensure a flawless and professional-looking paint finish on your new plaster surfaces.
To prepare new plaster for painting, you will need tools such as brushes, rollers, sandpaper, primers, and sealants to achieve a professional finish.
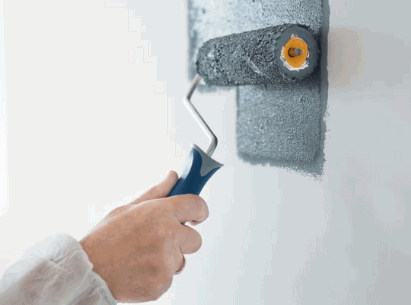
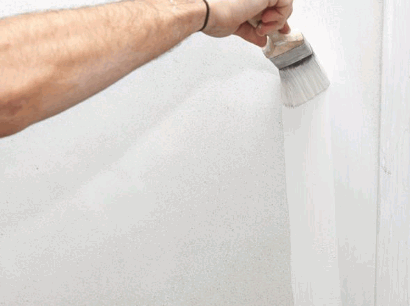
Brushes play a crucial role in applying paint evenly on the plaster surface, ensuring a smooth and flawless result. Rollers are excellent for covering larger areas quickly and efficiently, making them a time-saving tool. Sandpaper is essential for smoothing out imperfections and rough spots on the plaster before painting, creating a uniform surface for better adhesion.
Primers act as a base coat to enhance paint adhesion to the plaster, promoting durability and a more vibrant color payoff. Sealants help seal the porous surface of the plaster, preventing moisture damage and ensuring the longevity of the paint job.

The preparation of new plaster involves steps such as cleaning, priming, applying mist coats, and ensuring proper ventilation to facilitate the painting process.
Achieving a smooth finish when painting new plaster requires attention to detail, proper technique, and adherence to best practices.
When painting new plaster, it's crucial to start with a high-quality primer to ensure proper adhesion of the paint.
Common mistakes to avoid include overloading the brush or roller, skipping the mist coat, and rushing the drying process.
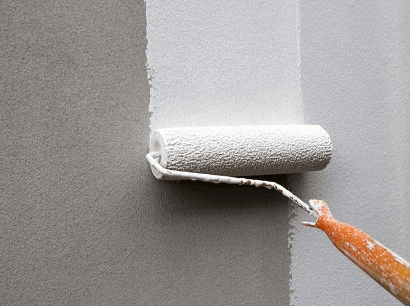
To achieve a smooth finish when painting new plaster, ensure proper surface preparation, use high-quality tools, apply mist coats, and allow sufficient drying time between layers.
Proper surface preparation involves cleaning the plaster surface thoroughly to remove any dust or debris. Fill any imperfections with a suitable filler and sand smooth. Use high-quality tools such as good-quality brushes or rollers for an even application of paint. Applying mist coats before the final coats will help the paint adhere better to the plaster. It is crucial to allow sufficient drying time between each coat to prevent cracking or uneven finish. Patience is key in achieving a professional result when painting new plaster.
Common mistakes when painting new plaster include applying too thick coats, skipping priming, rushing the drying process, and neglecting proper ventilation.
Applying too thick coats can lead to uneven drying, resulting in a patchy finish. To avoid this issue, it's important to use multiple thin coats rather than one thick layer.
Skipping priming can cause the paint to not adhere properly to the plaster surface, leading to peeling or flaking. To prevent this, always prime the plaster before painting to create a smooth and stable base.
Rushing the drying process can cause the paint to not bond well with the plaster, resulting in poor adhesion and potentially causing the paint to peel off over time. Allow each coat to dry completely as per the manufacturer's instructions.
Neglecting proper ventilation can lead to moisture buildup, which may affect the drying time of the paint and result in a less durable finish. Ensure good airflow in the room by opening windows or using fans during and after painting.
Table Of Contents
Venetian plastering is a technique that has been around for centuries, originating in Venice, Italy.
We explore the benefits of Venetian plastering, including its aesthetic appeal, durability, and versatility.
Delve into the factors that can affect the cost of Venetian plastering, such as surface preparation, type of plaster used, and labor costs.
Discuss the average cost of Venetian plastering and provide tips on how to find a reliable and affordable contractor for your project.
If you are considering Venetian plastering for your home or business, this article will provide you with valuable insights to help you make an informed decision.

Venetian plastering is a technique that involves using a mix of plaster and natural materials to create a smooth, elegant finish on walls and surfaces.
This process typically begins with prepping the surface by ensuring it is clean and smooth. The key ingredient in Venetian plaster is lime plaster, which gives it durability and a unique texture. The application of plaster involves carefully layering the mixture onto the walls with a trowel, creating a seamless look. The art of Venetian plastering lies in the applying and polishing stages, where skilled craftsmen enhance the finish, bringing out the depth and richness of the surface.

Venetian plastering offers numerous benefits, including durability, versatility, and easy maintenance for walls and surfaces.
Its durability is unmatched, as it can withstand wear and tear over time without losing its charm. The versatility of Venetian plaster allows for endless design options, from creating a polished marble-like finish to adding textured effects for a more rustic look. Its low maintenance requirements make it a practical choice for homeowners looking for long-lasting beauty without the hassle of frequent upkeep.
One of the key advantages of Venetian plastering is its ability to create visually stunning walls that appeal to plaster-loving designers like Leigh Herzig and Axel Vervoordt.
The finish achieved through Venetian plastering is renowned for its luxurious and sophisticated appearance, often mimicking the depth and texture of marble or stone.
Designers such as Herzig and Vervoordt have incorporated this technique into their projects, elevating the aesthetic appeal of spaces with its Old World charm.
This method of wall finishing has gained immense popularity in the design world due to its versatility in creating unique and customized surfaces that add a touch of elegance to any interior.
Venetian plastering is known for its durability and longevity, as it utilizes the strength of lime and advanced plastering technology to ensure walls remain pristine for years.
Lime plaster has been used for centuries in construction due to its remarkable durability and natural properties. When combined with modern techniques, such as multiple layers and fine sanding, it creates a strong bond that resists cracks and wear. The interaction between the lime and minerals in the plaster results in walls that are not just visually stunning but also incredibly sturdy. This unique combination of traditional materials and innovative processes sets Venetian plastering apart in terms of creating long-lasting and resilient walls.
Venetian plastering stands out for its versatility and customizability, allowing for a range of design options to suit different preferences, making it a favorite among interior designers looking for a Venetian touch.
Whether you prefer a sleek and modern finish or a more traditional and textured look, Venetian plastering can be tailored to meet your specific design vision. Its ability to mimic the luxurious appearance of polished marble or create a rustic, old-world charm makes it a go-to choice for those seeking to infuse their interiors with a touch of Venetian elegance.
Interior designers often turn to Venetian plastering to add depth and character to walls, ceilings, or even furniture pieces. The versatility of this technique extends beyond just walls, allowing for creative applications that can transform any space into a work of art.
Beyond its beauty, Venetian plastering is praised for being easy to maintain, requiring minimal upkeep to preserve the smooth surface of walls and surfaces.
Unlike other wall finishes that demand frequent attention, maintaining Venetian plaster is a breeze. A simple dusting or occasional wipe down with a damp cloth is usually all that's needed to keep it looking fresh. Regular cleaning helps prevent dirt and grime from accumulating, ensuring that your Venetian plaster retains its luxurious appearance for years to come. This makes it a popular choice for homeowners and designers looking for a low-maintenance yet sophisticated wall treatment.

The cost of Venetian plastering can vary based on factors such as the size of the project, the hourly rates of labor, the complexity of the design, and the materials used for walls.
Labor rates play a crucial role in determining the overall cost, as experienced artisans may charge higher than those with less expertise. The quality and type of materials chosen for the walls can significantly impact the expenses involved.
Project size is also a key determinant, with larger surfaces necessitating more materials and labor hours, thus increasing the total cost of the Venetian plaster installation. The intricacy and design complexity further add to the pricing, as intricate patterns or custom finishes may require more skill and time.
Surface preparation plays a crucial role in the cost of Venetian plastering, as intricate designs and uneven walls may require additional work, impacting the overall project expenses.
Properly preparing the surface before applying Venetian plaster is vital, as it ensures a smooth and durable finish. The complexity of the design can significantly affect the amount of preparation needed, with intricate patterns demanding more attention to detail. Similarly, the condition of the walls plays a crucial role; the smoother and more even the walls, the less extensive the preparation work required.
The choice of plaster material significantly impacts the cost of Venetian plastering, with options like lime plaster offering both aesthetic appeal and durability for walls.
When considering different materials for Venetian plaster, it's essential to understand the long-term implications on both the overall look and sustainability of the walls. Lime plaster stands out as a preferred choice due to its ability to create a smooth, polished finish that exudes a sense of elegance and sophistication.
Moreover, lime plaster has been known to withstand the test of time, maintaining its beauty and structural integrity over the years. This durability not only ensures a timeless appeal for your walls but also reduces the need for frequent repairs or reapplications, ultimately saving you costs in the long run.
The intricacy of the design chosen for Venetian plastering directly correlates with the overall cost, as more complex patterns or textures require additional labor and materials for walls.
When opting for intricate patterns or elaborate textures, the process of applying Venetian plaster becomes more time-consuming and meticulous.
Intricate designs demand skilled craftsmanship and attention to detail, leading to an increase in labor costs. Moreover, specialized tools and a higher quantity of materials may be necessary to achieve the desired aesthetic, further elevating the overall expenses. As a result, the complexity of design significantly impacts the final cost of Venetian plastering projects.
Dig deeper: What Are The Tools Used In Plastering
The size of the area to be plastered is a key determinant of Venetian plastering costs, with larger projects naturally requiring more materials, labor, and time for walls.
When undertaking a Venetian plaster project, whether it's for a small accent wall or an entire room, the scale of the area plays a crucial role in estimating the overall expenses. For sizable spaces, the cost tends to escalate due to the need for additional supplies such as plaster, pigments, and sealers. Larger areas often demand greater labor effort, as the application process becomes more intricate and time-consuming.
Labor costs are a significant component of Venetian plastering expenses, with hourly rates and daily rates impacting the overall cost of a project based on the amount of work required.
When planning a Venetian plastering project, it is crucial to carefully assess the labor costs, as they can heavily influence the budget and timeline. Skilled laborers with expertise in applying Venetian plaster may charge higher hourly rates, reflecting their experience and craftsmanship. The intricacy of the design and the surface area to be covered play a key role in determining the labor intensity and hence the total labor costs involved.

The average cost of Venetian plastering is typically calculated per square foot, factoring in the project scope and the intricacy of Venetian plaster installation.
When estimating the cost of Venetian plastering per square foot, various factors come into play. The size of the project area is a significant consideration; larger spaces usually incur lower costs per square foot due to economies of scale. The level of detail required in the plasterwork can impact the overall price. Intricate designs or custom patterns may raise the cost per square foot. It's essential to consider the material quality as well, as premium Venetian plaster materials can increase the price. Professional labor costs are another contributing factor to the total cost of the project.
The cost per square foot for Venetian plastering varies based on factors like material quality, design complexity, and the desired finish, influencing the overall Venetian plaster price for walls.
Regarding material choices, Venetian plaster costs can fluctuate significantly. Opting for high-quality materials like authentic lime-based plaster can escalate the cost per square foot, but offers durability and a luxurious finish. Conversely, selecting synthetic alternatives may lower the cost per square foot, but could compromise the authenticity and longevity of the plaster.
Design intricacy plays a crucial role as well; intricate patterns or custom designs can raise the cost per square foot due to the skilled labor and time required.
The desired finish greatly impacts the overall Venetian plaster price. A polished glossy finish typically costs more compared to a matte or textured finish. Factors like multiple layers, special techniques, or specific color blends can also drive up the cost per square foot.
The cost per hour in Venetian plastering accounts for labor expenses, material usage, and the efficiency of the workforce, influencing the overall project cost.
Hourly rates play a crucial role in determining the cost structure of Venetian plastering projects. As the hourly rates directly impact the labor costs, material consumption, and workforce productivity, they significantly affect the total expenses involved in the project.
Higher hourly rates lead to increased labor expenses, ultimately raising the project cost. Efficient workforce management coupled with reasonable hourly rates can contribute to cost savings, optimizing the overall financial aspect of Venetian plastering.
Estimating the cost for a standard room in Venetian plastering involves assessing the room size, the complexity of the design, and the scope of Venetian plaster work required for a comprehensive budget calculation.
Room size plays a crucial role in determining the quantity of materials needed for the Venetian plastering project. Larger rooms typically require more plaster material, affecting the overall cost. The intricacy of the design influences the labor hours required to achieve the desired finish, impacting the total expenses. Calculating the cost for a standard room in Venetian plastering also involves considering the extent of work needed to cover the walls evenly and achieve the desired smooth texture.

Finding a trustworthy and cost-effective Venetian plastering contractor involves conducting research, seeking referrals, verifying licensing and insurance credentials, and securing a detailed written contract for peace of mind.
An essential aspect of the research process is to thoroughly compare multiple contractors to evaluate their experience, pricing, and previous projects. Referrals play a crucial role in gauging the quality of work and professionalism of potential candidates; reaching out to friends, family, or online reviews can provide valuable insights.
It is imperative to validate the licensing and insurance status of the contractor to ensure compliance with industry standards and protect yourself from any liability. Once you have narrowed down your options, request each contractor to provide a detailed written contract outlining the project scope, timeline, costs, and warranties.
Prioritize the research and comparison of quotes when searching for a Venetian plastering contractor, as this helps evaluate costs, services, and reputations to make an informed decision.
Thorough research is the backbone of finding the right Venetian plastering contractor. By gathering multiple quotes, individuals can delve into the different cost structures and services offered by various contractors. These quotes offer a snapshot of what each contractor brings to the table, allowing for a clear comparison of what is included in their services and the overall costs involved.
This meticulous examination of quotes and research serves as a foundation for selecting a trustworthy contractor who can bring the vision of a beautifully plastered space to life.
Leverage referrals and reviews from past clients to gauge the reputation and quality of Venetian plastering contractors, ensuring you choose a reliable professional for your project.
Referrals play a crucial role in the selection process as they offer insights into the contractor's work ethic, timeliness, and overall performance. By tapping into the experience of others who have already worked with these professionals, you can gain a better understanding of what to expect.
Similarly, reviews provide a platform for clients to openly share their experiences, highlighting strengths and areas for improvement. An accumulation of positive reviews serves as a testament to the contractor's consistent delivery of quality workmanship.
Verify the licensing and insurance credentials of Venetian plastering contractors to ensure they meet industry standards and have the necessary coverage for your project's protection.
Validating the licensing and insurance of contractors is crucial when embarking on a Venetian plastering project. Contractors who possess the required licenses demonstrate their commitment to professionalism and quality workmanship.
Ensuring compliance with regulations not only guarantees project security but also reflects the contractor's credibility and reliability.
Obtain a comprehensive written contract from Venetian plastering contractors, outlining project details, costs, timelines, and warranties to establish clear expectations and protect both parties involved.
Having a detailed contract in place is crucial when dealing with Venetian plastering contractors. It ensures that both the contractor and the client are on the same page regarding the project scope, budget, and timeline. A well-drafted contract serves as a safeguard, providing a roadmap for the execution of the project and setting clear boundaries and responsibilities for all involved entities. It is a tool that promotes transparency, accountability, and trust throughout the entire plastering process.
Table Of Contents
Are you interested in learning more about plastering and the tools used in this essential construction technique?
We will explore the different types of plastering, including traditional, gypsum, cement, lime, and polymer-modified plastering.
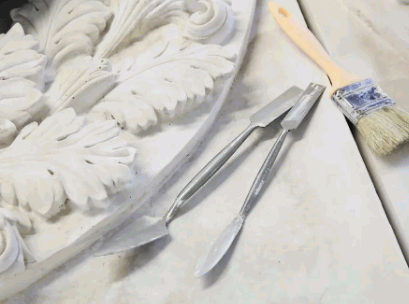
Discover the essential tools needed for plastering such as trowels, hawks, darbies, and more, along with optional tools that can make your plastering project easier!

Plastering is a skilled craft that involves applying a smooth, durable finish to walls and ceilings using materials such as plaster and tools like trowels and floats.
Plastering is an ancient art that dates back to civilizations like ancient Egypt and Greece, where it was used not only for aesthetic purposes but also for practical reasons.
One of the primary purposes of plastering
is to protect walls and ceilings from moisture damage, cracks, and other wear and tear. It provides a smooth surface for painting or wallpapering and contributes to the overall aesthetic appeal of a space. Various techniques such as skim coating, floating, and stucco application are employed in the plastering process, each serving a specific purpose in achieving the desired finish. Plastering plays a significant role in the construction industry, ensuring the structural integrity and visual appeal of buildings.
Gain insights: Can You Paint New Plaster
There are several types of plastering methods, including traditional, gypsum, cement, lime, and polymer-modified plastering, each with unique characteristics and applications.
Traditional plastering, also known as mud plastering, is the oldest form of plastering dating back to ancient civilizations. It involves using a mixture of clay, sand, and straw that is applied to the walls in layers. This type of plastering is known for its durability but requires skill and experience to apply correctly.
Gypsum plastering, on the other hand, is a modern method that uses gypsum powder and water to create a smooth finish. It is commonly used in indoor spaces due to its quick drying time and fire-resistant properties.
Traditional plastering is a time-honored technique used for creating smooth and durable surfaces on walls and ceilings, often involving hand tools like hammers and spackle knives.
This method typically begins with applying a base coat of lime plaster to the surface, followed by a finish coat for a polished appearance. The materials used in traditional plastering often include sand, water, and lime, which are mixed to the desired consistency. This process allows for intricate detailing and custom designs to be added to the surface, enhancing the overall aesthetic of the space. Common applications of traditional plastering can be seen in historical buildings, churches, and traditional homes where the craftsmanship and durability of plaster are highly valued.
Gypsum plastering is a popular method that utilizes gypsum-based materials mixed with water to create a smooth finish, requiring tools like buckets, utility knives, and paddle mixers for application.
Once the gypsum plaster mix is prepared, it is applied to walls, ceilings, and other surfaces to provide a durable and aesthetic coating. The material sets quickly, making it a time-efficient option for projects. Plus its quick setting time, gypsum plaster offers excellent fire resistance, sound insulation, and moisture control properties, making it ideal for use in buildings where these features are essential. Interior spaces such as homes, offices, and commercial establishments benefit greatly from the versatility and quality finish that gypsum plastering provides.
Cement plastering involves the application of a cement-based mix to create a strong, durable surface, utilizing tools like bucket trowels, hawks, and traditional trowels for precise finishing.
One of the key advantages of using cement plaster is its high durability and strength, making it an ideal choice for both interior and exterior surfaces. The process begins with preparing the surface by cleaning it thoroughly and applying a bonding agent to ensure proper adhesion.
Once the surface is ready, the cement mix is prepared by mixing cement, sand, and water in the correct ratios to achieve the desired consistency. The mix is then applied using a hawk and trowel, with skilled workers ensuring an even and smooth finish.
Efficiency is crucial in cement plastering, and using the right tools such as corner trowels, float blades, and darbies can significantly improve the application process, resulting in a professional-looking finish.
Lime plastering involves the use of lime-based materials to create a breathable and flexible finish, often requiring specialized tools like window trowels, corner trowels, and mortar stands.
One of the key characteristics of lime plastering is its ability to regulate moisture levels within a building, preventing issues such as dampness and mold growth.
The use of lime plaster is a preferred choice for historic buildings due to its compatibility with traditional construction methods and its natural aesthetic appeal that enhances the authenticity of the structure.
Tools like window trowels and corner trowels play a crucial role in achieving a smooth and uniform finish on curved surfaces and corners, ensuring precision in the application of lime plaster.
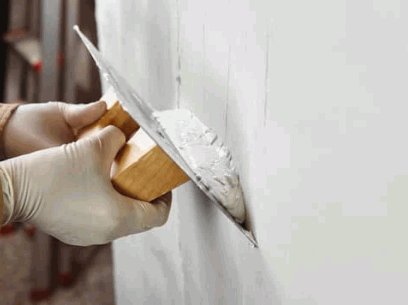
Polymer-modified plastering involves the use of polymer-enhanced materials for increased strength and flexibility, often requiring tools like sponge/sandpaper, plasterers' floats, jointing knives, and scarifiers for optimal application.
One of the key advantages of using polymer-modified plastering techniques is the ability to create a more durable and resilient finish compared to traditional methods. The polymer additives improve adhesion, reduce cracking, and enhance overall performance over time, making the plaster more resistant to weathering and wear. This results in a longer-lasting and low-maintenance surface, ideal for both indoor and outdoor applications.
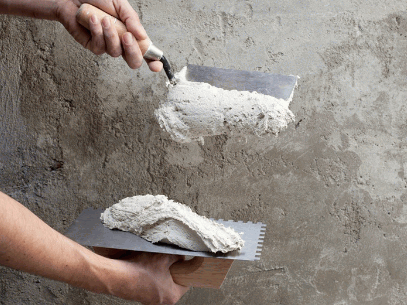
The essential tools used in plastering include trowels, hawks, darbies, floats, jointing knives, brushes, buckets, mixing paddles, machines, and levels, each serving a specific purpose in the plastering process.
Trowels, for instance, are used for applying and smoothing plaster onto surfaces with precision, while hawks provide a convenient platform for holding the plaster mixture. Darbies are essential for achieving a straight and smooth finish, ensuring an even distribution of plaster. Floats, on the other hand, help in compacting and smoothing the plaster surface, creating an even texture. Jointing knives aid in shaping and detailing corners and edges, enhancing the overall aesthetics of the plastered area.
A trowel is a handheld tool with a flat, pointed blade used for spreading and smoothing plaster or other materials on surfaces, making it essential for achieving a uniform finish in plastering projects.
There are various types of trowels available, each designed for specific plastering techniques. The most common types include pointing trowels, margin trowels, and gauging trowels, each with their unique blade shapes and sizes.
Depending on the project requirements, selecting the right trowel size and type is crucial for achieving a seamless and professional finish.
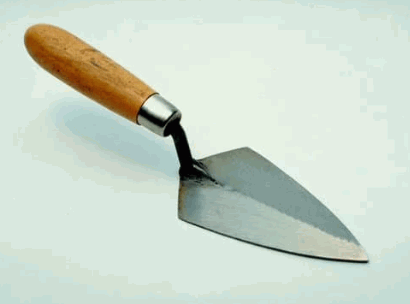
A plasterer's hawk is a flat, square board with a handle underneath that allows plasterers to hold and transport plaster conveniently while working on walls or ceilings, providing a portable platform for easy access to the plaster.
Plasterers use the hawk to scoop up plaster from a larger bucket or tray, placing it on the board for quick application. The design of the hawk ensures that the plaster remains flat and accessible, preventing it from drying out too quickly. This tool enhances efficiency by eliminating the need to constantly return to the main source of plaster. The flat surface of the hawk enables precise spreading and smoothing of the plaster onto the surface being worked on, resulting in a more even and professional finish.

A plasterer's darby is a straight-edged tool used to level and straighten plaster or render surfaces, ensuring a smooth and even finish across walls or ceilings in plastering projects.
When applying plaster or render, it's crucial to achieve a flat and uniform surface for a professional result. This is where the plasterer's darby comes into play. By running the darby over the freshly applied material, excess material is scraped off, while simultaneously leveling the surface. This technique helps in removing imperfections, creating a seamless finish. The straight edge of the darby ensures that the surface is nice and level, ready for further finishing touches. Its use is essential for achieving that desired smoothness and consistency in plastering work.
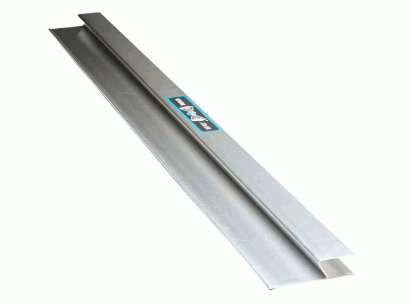
A float is a rectangular tool with a flat base and handle, used for smoothing and finishing plaster or stucco surfaces by pressing and leveling the material evenly, contributing to a polished and professional look in plastering applications.
Floats come in various sizes and shapes to cater to different needs and surface areas. A wooden float is commonly used for initial applications, while a steel float provides a smoother finish. Hawk is used to hold the plaster or stucco mix for easy access during application. Mastering the technique of floating is essential for achieving a seamless and flawless surface, avoiding uneven patches or rough textures in the final result.
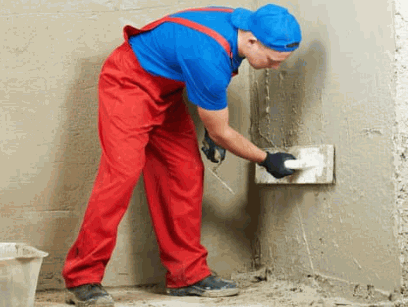
A jointing knife is a flexible blade tool used for applying and smoothing joint compound or plaster along joints, corners, or edges, allowing for precise and clean finishes in plastering and drywall applications.
One of the primary functions of a jointing knife is to help achieve seamless joints and polished edges by spreading the compound evenly and smoothing it out for a professional-looking finish. The flexibility of the blade makes it easy to work with various angles and curves, ensuring that every joint is properly filled and leveled. This tool plays a crucial role in ensuring that the final surface is smooth and ready for painting or wallpapering, saving time and effort in the overall plastering process.
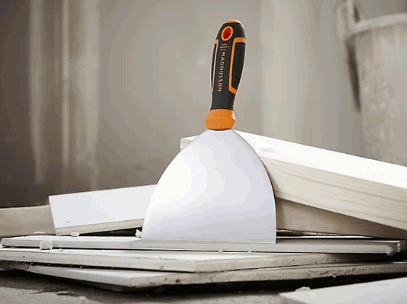
A plasterer's brush is a specialized tool with soft bristles used for smoothing and blending plaster or stucco surfaces, allowing for delicate and precise finishing touches in plastering projects.
When applying plaster or stucco to walls or ceilings, the plasterer's brush comes in handy by providing the perfect tool for achieving a seamless and uniform texture. The soft bristles enable a smooth application, ensuring that the surface is free from any unevenness or imperfections. This brush plays a crucial role in refining the plaster surface, allowing the plasterer to create unique and visually appealing textures that enhance the overall aesthetics of the space.
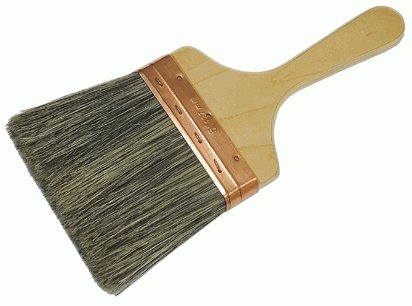
A bucket is a versatile container used for mixing, carrying, and storing plaster, water, or other materials in plastering projects, providing a convenient and portable solution for preparing and transporting materials on-site.
For plastering tasks, having buckets on hand is essential for ensuring a smooth workflow. These unassuming containers play a crucial role in material management, allowing workers to neatly organize different components required for the job. Buckets contribute to the efficiency of the project by providing a designated space for mixing the plaster to the required consistency. With their sturdy handles and durable construction, buckets make it easier to move materials around the job site, minimizing disruptions and delays, and enabling a more streamlined plastering process.
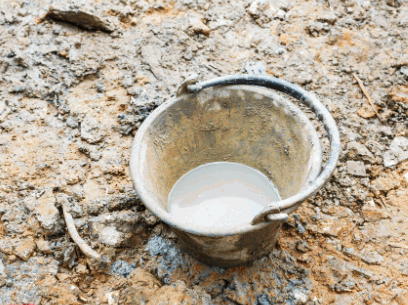
A mixing paddle is a specialized tool attached to a drill or mixer for blending plaster, mortar, or other construction materials quickly and efficiently, ensuring uniform consistency and smooth application in plastering projects.
When using a mixing paddle, the rotating motion created by the attached drill or mixer helps in breaking down lumps and evenly distributing the ingredients, resulting in a homogenous mixture. This process not only saves time by speeding up the blending process but also ensures that the materials are properly mixed for optimal performance on the project. Consistency in the mixture is crucial for achieving a professional finish, and reducing the risk of cracks, unevenness, or other application issues.
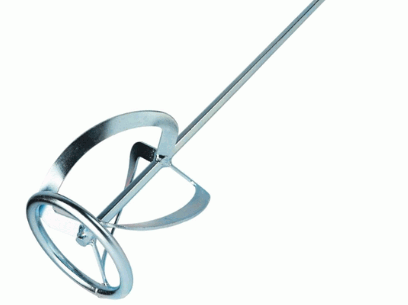
A plastering machine is a mechanical device that automates the process of applying plaster or render to surfaces, increasing efficiency and productivity in large-scale plastering projects by reducing manual labor and ensuring consistent results.
These machines are equipped with advanced technology, such as adjustable nozzle settings, which allow for precise application of plaster on various surfaces.
The use of plastering machines significantly speeds up the construction process, enabling builders to complete projects in a shorter timeframe while maintaining high-quality standards.
Plastering machines are versatile tools that can handle different types of plasters and finishes, offering flexibility in construction projects of varying complexities.
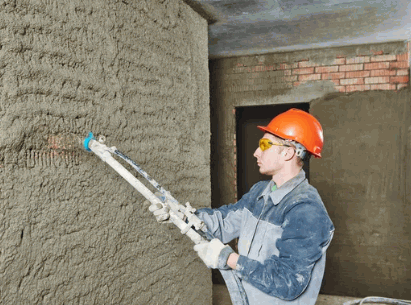
A plastering level is a tool used to check and maintain the horizontal and vertical alignment of plastered surfaces, ensuring uniform thickness and smooth finishes in plastering applications, and aiding in achieving professional results.
These levels are essential in the construction industry, especially for projects that demand precision and high-quality finishes. By using a plastering level correctly, contractors can ensure that walls and ceilings are perfectly straight and level, without any bumps or imperfections.

Plus essential tools, optional tools like trowel sets, corner trowels, feather edges, rasps, and straightedges are used in plastering projects to enhance precision, detailing, and specialized finishes based on specific requirements.
One of the versatile optional tools used in plastering projects is the trowel set, which includes different types of trowels for various purposes such as smoothing, shaping, and spreading plaster efficiently. Corner trowels are specifically designed to create crisp, sharp corners with ease, ensuring clean and professional-looking edges. Feather edges help in feathering out plaster edges seamlessly, while rasps are handy for refining and shaping rough surfaces before the final finish. Straightedges play a crucial role in achieving flat and even surfaces by guiding the plaster application uniformly across the area.
A plastering trowel set includes a variety of trowels with different shapes and sizes, offering versatility and precision in applying, shaping, and finishing plaster on surfaces in complex or detailed areas of a project.
These sets typically consist of pointed trowels for intricate detailing, margin trowels for tight corners, and gauging trowels for mixing and measuring the plaster mixture accurately. Additionally, trowel sets may include finishing trowels for achieving a smooth surface and plastering hawks for convenient plaster transportation. The specialized designs cater to specific needs in plastering work, like textured finishes or fine detailing on ornate surfaces.
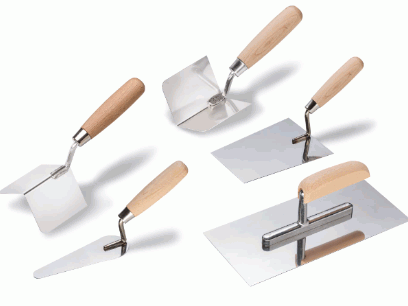
A plastering corner trowel is a specialized tool designed to facilitate the precise application and smoothing of plaster in tight corners, edges, or junctions, ensuring seamless and professional finishes in challenging areas of a project.
This tool plays a crucial role in achieving sharp angles and clean lines, ensuring that corners are perfectly formed without any plaster buildup. Plastering corner trowels are particularly useful when working on intricate work such as coving, and skirting, or when finishing off around window frames. They help in keeping the plaster level and consistent within corners, preventing any unevenness or rough edges.
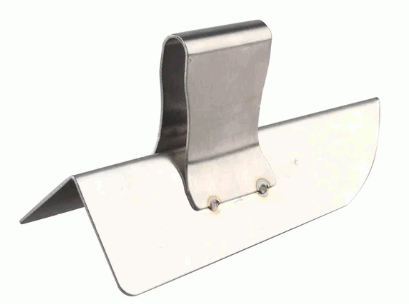
A plastering feather edge is a thin, straight tool used for creating sharp and clean edges on plastered surfaces, allowing for precise shaping, leveling, and smoothing of edges in plastering applications.
It is an essential instrument in the toolkit of skilled plasterers, enabling them to achieve professional-quality finishes on walls and ceilings. When using a plastering feather edge, craftsmen can ensure that corners and edges are perfectly straight and uniform, giving a polished look to the overall surface. This tool is particularly handy for achieving crisp corners and defined edges, which are crucial for a visually appealing plastered surface.
A plastering rasp is a rough, abrasive tool used for shaping, sculpting, or texturing plaster surfaces by removing excess material, smoothing rough areas, or adding texture for decorative effects in plastering designs.
Plastering rasps are versatile instruments commonly utilized by skilled craftsmen to achieve intricate and customized plaster finishes. These rasps come in various shapes and sizes, offering a wide range of possibilities for creating unique textures and patterns. Using a plastering rasp allows artisans to unleash their creativity, transforming plain plaster surfaces into works of art with depth and visual interest. The precision and control provided by the rasp enable artisans to achieve smooth, seamless finishes or add interesting contours and details to their plaster creations.
A plastering straightedge is a long, flat tool used for checking and leveling plaster surfaces, ensuring uniform thickness, straight lines, and smooth finishes in large-scale plastering projects for consistent and professional results.
This essential tool is meticulously designed to provide accuracy and efficiency throughout the plastering process. By utilizing a plastering straightedge, craftsmen can verify the flatness of walls and ceilings, guaranteeing optimal adhesion of the plaster for a flawless application.
The straightedge aids in identifying imperfections and deviations in the surface, allowing for timely corrections to maintain the desired quality standards. Its versatility enables contractors to achieve a seamless transition between different sections, ensuring a cohesive and polished outcome.
Table Of Contents
Are you considering adding a touch of elegance and safety to your pool area with glass pool fencing? In this article, we'll explore the benefits of glass pool fencing, including its aesthetic appeal, safety features, durability, and low maintenance.
We'll also discuss the different types of glass pool fencing available, such as frameless, semi-frameless, and framed options. We'll dive into the cost of glass pool fencing, factors affecting pricing, average costs, and maintenance expenses.
Stay tuned to learn how to choose the right glass pool fencing for your budget and whether DIY installation can save you money.
Glass pool fencing is a transparent and stylish barrier designed to enhance the safety and aesthetics of residential or commercial pools, meeting strict safety regulations and providing a secure boundary around the pool area.
It offers an unobstructed view of the pool area while effectively preventing unauthorized access, making it an ideal choice for individuals seeking a modern and sleek fencing solution. Glass pool fencing not only enhances the visual appeal of the pool but also ensures the safety of children and pets by creating a secure perimeter.
Compliance with existing safety standards and regulations is crucial to prevent accidents and maintain a safe environment. Professional installation of glass pool fencing is recommended to ensure proper alignment, stability, and durability, enhancing the overall security measures.
Check out: What Is Composite Fencing
Glass pool fencing offers a blend of modern aesthetics, safety, durability, and low maintenance requirements, making it a popular choice for enhancing the overall appeal and security of pool areas.
The transparency of glass fencing creates an unobtrusive barrier that allows for uninterrupted views of the surrounding landscape, maintaining a spacious and open feeling around the pool area.
Safety features such as tempered glass panels and self-closing gates provide peace of mind for families with children or pets.
The durability of glass fencing ensures long-term protection against harsh weather conditions and wear, without the need for frequent repairs or replacements.
Its smooth surface makes cleaning a breeze, requiring only occasional wiping down to maintain its pristine appearance.
One of the key advantages of glass pool fencing is its ability to provide a contemporary and sleek look to the pool area, offering an unobstructed view of the surroundings and creating a visually appealing space.
This transparency of glass fencing not only adds a sense of openness and lightness but also blends seamlessly with various architectural styles. The clean lines and minimalistic structure of glass panels contribute to a modern aesthetic, making the pool area appear more spacious and stylish. By allowing natural light to penetrate through, glass fencing can enhance the colors of the pool water, surrounding landscapes, and outdoor decor elements, elevating the overall visual charm of the space.
Glass pool fencing prioritizes safety by providing a secure barrier around the pool, meeting strict regulations, and incorporating advanced security features to prevent accidents and ensure a safe pool environment.
The tempered glass panels used in these fences are toughened to enhance durability and shatter resistance, adding an extra layer of protection. In addition, the smooth, frameless design not only enhances the aesthetic appeal of the pool area but also eliminates potential climbing points for children, further enhancing safety measures. The self-closing and self-latching gates, equipped with child-proof locks, ensure that the entry points to the pool are always secure, meeting the highest safety standards.
Glass pool fencing is known for its durability and longevity, with high-quality materials and weather-resistant properties that ensure minimal maintenance and long-term performance in various weather conditions.
The robust nature of glass pool fencing makes it a popular choice for pool owners looking for a stylish yet long-lasting solution. Unlike other fencing materials, such as wood or metal, glass requires little upkeep to maintain its pristine appearance. It is resistant to rust, corrosion, and fading, ensuring that it retains its clarity and structural integrity over many years. This low-maintenance aspect of glass fencing not only saves time and effort for homeowners but also provides a lasting investment that adds value to the property.
Glass pool fencing requires minimal maintenance due to its easy-to-clean surface and weather-resistant properties, reducing the need for frequent upkeep while retaining its aesthetic appeal and functionality.
Dirt and grime can be easily wiped off the smooth glass panels using mild detergent and water, keeping the fencing looking pristine with minimal effort. The weather-resistant nature of the glass ensures that it can withstand harsh climatic conditions without deteriorating, making it a durable choice for outdoor spaces. These low maintenance requirements not only contribute to the longevity of the glass pool fencing but also help enhance the overall visual appeal of the pool area, creating a sleek and modern look.
There are several types of glass pool fencing available, including frameless, semi-frameless, and framed options, each offering unique design characteristics and installation requirements to suit different preferences and budgets.
Frameless glass pool fencing is a popular choice for those seeking a seamless and unobstructed view of their pool area, providing a modern and elegant aesthetic. This type of fencing typically utilizes thicker glass panels that are installed using spigots or channel fixings, creating a sleek and minimalist look.
On the other hand, semi-frameless glass fencing combines the benefits of both frameless and framed styles, incorporating some framing elements for added sturdiness while still maintaining a contemporary appeal.
Framed glass pool fencing, with its visible metal or timber frames surrounding the glass panels, offers a more traditional and cost-effective option that can blend well with various architectural styles.
Frameless glass pool fencing offers a seamless and transparent barrier around the pool, providing a modern and customizable design that enhances the visual appeal and openness of the pool area.
Its transparency allows for unobstructed views of the pool, creating a sense of space and elegance. The customization options in frameless glass pool fencing enable homeowners to choose the perfect style and dimensions that suit their outdoor space seamlessly. This type of fencing blends harmoniously with various architectural styles, making it a versatile choice for those seeking a sleek and contemporary look. The sleek lines and clean edges of frameless glass fencing add a touch of sophistication while maintaining safety and security around the pool area.
Semi-frameless glass pool fencing combines style and security by featuring a sleek design with fewer posts, offering a balance between aesthetics and safety to create an elegant pool enclosure.
The transparent panels of semi-frameless glass fencing provide an unobstructed view of the pool area, enhancing the overall visual appeal of the space. The minimalistic structure of this type of fencing creates a modern and sophisticated look that complements various architectural styles.
In addition to its stylish appearance, the tempered glass panels used in semi-frameless fencing are highly durable and provide a secure barrier around the pool, ensuring the safety of both children and pets. The combination of these design elements makes semi-frameless glass pool fencing a popular choice for homeowners looking to enhance the beauty and security of their outdoor living spaces.

Framed glass pool fencing provides a cost-effective solution that utilizes sturdy frames and glass panels, offering a durable and budget-friendly option for property owners seeking a balance between affordability and functionality.
The use of materials such as aluminum or stainless steel in the frames ensures strength and longevity, making it a sensible choice for those looking to invest in a reliable pool fencing solution without breaking the bank. This type of fencing not only enhances the aesthetic appeal of the pool area but also provides a secure barrier for families with children or pets, adding an extra layer of safety without compromising on style.
The cost of glass pool fencing varies depending on factors such as materials, installation, customization, and panel sizes, with average prices ranging from a few hundred to several thousand dollars, making it essential to obtain accurate estimates and compare quotes from different contractors.
Factors that can influence the pricing of glass pool fencing include the type of glass used, the complexity of the design, additional features like gates or self-closing mechanisms, and whether the installation requires any special tools or techniques.
It's crucial to get a detailed breakdown of costs to avoid any unexpected expenses later on. By obtaining multiple quotes, you can not only ensure that you find a fencing solution that fits your budget but also potentially negotiate for better deals or discounts with different providers.

Several factors impact the cost of glass pool fencing, including the type of glass, customization options, gate features, installation complexity, and any additional enhancements or security measures required for the specific property.
Ultimately, the cost of glass pool fencing is a result of balancing these variables to suit both budget and design preferences.
In addition to the initial cost of glass pool fencing, property owners should consider budgeting for permits, ongoing maintenance, cleaning supplies, repairs, and any landscaping enhancements needed to complement the fencing and ensure its long-term durability.
Permits are crucial as they regulate the installation of the fencing and may be required by local authorities. Without the proper permits, property owners could face fines or delays in their projects.
When it comes to maintenance, regular cleaning and upkeep are necessary to prevent issues like glass deterioration. Repair costs should also be factored in, as accidents or wear and tear may occur.
Landscaping improvements around the fencing can enhance the overall aesthetic appeal of the area and contribute to a cohesive design.
The maintenance costs for glass pool fencing typically involve routine cleaning with mild detergent and water, occasional inspections for damage or wear, and potential repairs covered under warranty agreements, ensuring that the fencing retains its quality and appearance over time.
Regular cleaning of the glass panels is essential to prevent the build-up of dirt and grime, which can impact both the aesthetics and structural integrity of the fencing.
Homeowners should schedule periodic inspections to check for any chips, cracks, or loose fittings that may arise. These inspections not only ensure the safety of the pool area but also help in identifying any issues that can be addressed under the warranty.
Adhering to these maintenance practices not only extends the lifespan of the glass pool fencing but also safeguards the investment made in enhancing the property's appeal.
When selecting glass pool fencing within a specific budget, consider factors such as material quality, customization options, installation costs, and warranty coverage, ensuring that the chosen fencing meets both aesthetic preferences and financial constraints.
It is essential to strike a balance between quality and cost-effectiveness. Opt for durable glass panels that offer a blend of safety and elegance without exceeding your budgetary limits. Explore various customization features like frameless designs or tinted glass that can enhance the overall appearance of your pool area. Inquire about installation expenses upfront to avoid any unexpected charges. Don't overlook the importance of warranty benefits, as they provide added peace of mind regarding the longevity and maintenance of your glass pool fencing.
While DIY installation of glass pool fencing may seem cost-effective initially, it can pose safety risks, installation challenges, and potential compliance issues with local regulations, making it advisable to enlist the expertise of professional contractors for a secure and compliant installation process.
When considering DIY projects, especially those involving safety features like pool fencing, one must take into account the specialized skills and tools required for proper installation.
Glass pool fencing, in particular, demands precision and knowledge to ensure it meets safety standards and complies with local codes.
Without the expertise of professional contractors, there is a higher likelihood of installation errors, which could compromise the effectiveness of the fencing and pose risks to users.
Investing in professional installation not only provides peace of mind but also adds value to your property by ensuring a secure and aesthetically pleasing pool area.
Table Of Contents
Are you considering installing a new fence around your property but unsure of which material to choose? Composite fencing may be the perfect option for you. In this article, we will explore what composite fencing is, the materials used in its construction, the numerous benefits it offers, the installation process, and how it compares to other fencing materials such as wood, vinyl, and metal. We will also discuss the cost considerations associated with composite fencing. Whether you are looking for durability, low maintenance, or eco-friendliness, composite fencing may be the ideal choice for your property.
Composite fencing is a sustainable and eco-friendly alternative to traditional wood fencing materials.
It is designed to mimic the look and feel of natural wood but with the added benefits of being extremely durable and resistant to rotting, warping, and insect damage. By utilizing recycled materials, composite fencing helps reduce the demand for virgin timber and minimizes the impact on forests.
The low maintenance requirements of composite fencing make it a practical choice for homeowners looking to enhance their property with a long-lasting and environmentally conscious fencing solution.
Composite fencing utilizes a blend of composite wood and recycled materials to create durable fencing panels and structures.
These innovative fencing materials often consist of a mixture of wood fibers, plastic, and sometimes even bamboo, all of which are sustainable resources. The recycled components, such as reclaimed wood fibers and plastic, are combined with binding agents to produce strong and weather-resistant composite boards. Through advanced manufacturing techniques, these composite boards can be molded and textured to mimic the look and feel of natural wood, offering a more environmentally friendly alternative to traditional wood fencing. The result is a sturdy and long-lasting fencing solution that requires minimal maintenance and contributes to a greener planet.
Composite fencing offers a range of benefits, including exceptional durability, low maintenance requirements, eco-friendly attributes, and a wide selection of styles and colors.
The durability of composite fencing makes it a long-lasting investment for homeowners, as it is resistant to rotting, warping, and insect damage. Its eco-conscious design is appealing to those seeking sustainable options, as it is often made from recycled materials. Its aesthetic versatility allows for customization to complement various architectural styles and landscaping designs, enhancing the overall look of a property. With its low-maintenance nature, composite fencing saves both time and money for property owners, requiring minimal upkeep while maintaining its visual appeal.

Composite fencing is renowned for its exceptional durability, weather-resistant properties, and long-lasting construction that ensures enduring quality.
Its resilience to various weather conditions makes it a popular choice for outdoor use, able to withstand harsh sunlight, heavy rain, and even snow without warping or rotting. The composite construction techniques used in manufacturing these fences contribute to their remarkable longevity, as they are designed to resist fading, cracking, and peeling over time. This long-term structural integrity helps maintain the fence's appearance and functionality, providing homeowners with a reliable and low-maintenance fencing solution for years to come.
One of the key benefits of composite fencing is its low maintenance requirements, thanks to the durable nature of composite materials that require minimal upkeep for long-lasting performance.
This makes composite fencing an ideal choice for homeowners looking to add aesthetic appeal to their property without the hassle of frequent maintenance.
Unlike traditional wood fencing, composite fencing does not require staining, painting, or sealing to keep it looking pristine. Regular cleaning with mild soap and water is usually all that's needed to maintain its appearance, saving both time and money in the long run.
The longevity of composite materials ensures that your fence will remain structurally sound and visually appealing for many years to come.
Composite fencing stands out as an eco-friendly fencing option due to its sustainable manufacturing processes, use of recycled materials, and minimal environmental impact compared to traditional fencing materials.
By utilizing recycled components such as plastic and wood fibers, composite fencing reduces the demand for natural resources. The production of composite fencing involves innovative manufacturing techniques that significantly decrease energy consumption and emissions, contributing to a lower carbon footprint. The durability and longevity of composite fencing contribute to its sustainability by reducing the need for frequent replacements, thus further reducing waste in landfills. These aspects showcase how composite fencing exemplifies a greener alternative in the fencing industry.
Composite fencing offers a diverse range of styles and colors, allowing homeowners to choose contemporary designs that perfectly complement their outdoor spaces and preferences.
With modern composite fencing options, individuals can explore sleek and clean lines for a sophisticated look or opt for more intricate patterns for added visual interest. The customization possibilities in composite fencing are endless, enabling one to create a unique and personalized outdoor oasis.
From earthy tones like brown and grey to vibrant hues like red and blue, the array of colors offered in composite fencing opens up a world of possibilities for creating a modern and stylish outdoor environment.
The installation process of composite fencing involves setting up fence posts, installing panels, and adding finishing touches with the help of specialized composite hardware for ease of assembly.
Prior to installing composite fencing, thorough preparation is essential, including assessing the layout, dimensions, and design considerations to ensure a successful installation process.
Setting sturdy fence posts is a crucial step in the installation of composite fencing, leveraging advanced composite technology for secure and long-lasting post placements.
Using composite materials for fence posts offers numerous benefits, such as resistance to rot, decay, and insect damage, ensuring that the posts maintain their structural integrity over time. The process of setting composite fence posts involves digging deep holes, inserting the posts, and securing them with concrete or gravel for added stability.
Composite technology also provides the flexibility to customize the posts to desired shapes and sizes, making it easier to achieve a seamless and visually appealing fencing installation.
Installing the fencing panels is a pivotal stage in composite fencing installation, where composite slats are securely attached to create a cohesive and visually appealing fence structure.
Adding finishing touches to the composite fencing involves refining the appearance, texture, and overall finish of the fence to achieve a polished and aesthetically pleasing outcome.
This finalization process plays a crucial role in elevating the visual appeal of the fencing, making it more attractive and durable. One key step is to apply a protective sealant or coating to enhance the longevity of the composite material and maintain its color vibrancy over time. Adjusting the texture can involve sanding rough areas or adding a weathered effect for a more natural look. Incorporating decorative elements like post caps, lattice panels, or engraved designs can further personalize the fence and complement the surrounding landscape.
Uncover more: What Fence For Landscaping
When compared to traditional fencing materials like wood and metal, composite fencing stands out for its security features, durability, and eco-conscious benefits, making it a compelling alternative for residential and commercial properties.
Composite fencing offers enhanced security advantages such as its resistance to rot, insects, and weathering, which are common issues faced by wood and metal fencing. This durability not only ensures a longer lifespan but also reduces maintenance costs over time.
Composite fencing is eco-friendly, as it is often made from recycled materials, contributing to sustainability efforts. Compared to wood, composite fencing requires minimal upkeep, avoiding issues of warping, splintering, or painting. The versatility and modern aesthetic of composite fencing further add to its appeal in the fencing market.
In comparison to wood fencing, composite fencing boasts a longer lifespan and minimal maintenance requirements and often comes with extended warranties for added peace of mind.
These advantages make composite fencing a highly attractive option for homeowners looking to invest in a fencing solution that offers both durability and longevity. With composite materials, there is no need for regular staining or painting, saving homeowners time and money on maintenance costs in the long run. The extended warranties provided by many composite fencing manufacturers give consumers the assurance that their investment is protected for years to come, offering a level of security and confidence that traditional wood fencing may not provide.

When compared to vinyl fencing, composite fencing offers a compelling blend of benefits, including enhanced durability, eco-conscious features, and a more natural appearance, while overcoming certain drawbacks associated with vinyl materials.
Composite fencing is renowned for its long-lasting nature, ensuring a sturdy barrier that requires minimal maintenance over time. Composite materials are created using a mix of recycled plastics and wood fibers, making them a more sustainable and eco-friendly option compared to vinyl. The aesthetic appeal of composite fencing is another key advantage, as it can mimic the look of natural wood without the maintenance requirements. On the other hand, vinyl fencing is prone to cracking and fading over time, diminishing its overall lifespan and visual appeal.
In contrast to metal fencing, composite fencing offers lower maintenance requirements, minimal repair needs, and a cost-effective solution for long-lasting and visually appealing fencing solutions.
Composite fencing stands out due to its remarkable durability and resistance to rot, decay, and insect damage, ensuring a longer lifespan without the need for frequent repairs or replacements. These low-maintenance features make composite fencing a popular choice for homeowners looking to enhance their outdoor spaces without the ongoing upkeep associated with traditional fencing materials.
The initial investment in composite fencing may be higher than metal options, but the long-term cost savings from reduced maintenance and repair expenses often make it a more economical choice over time.
The cost of composite fencing includes both the initial investment and long-term maintenance expenses, with composite fencing often considered a cost-effective solution due to its durability and minimal upkeep requirements.
Homeowners choosing composite fencing can benefit from its longevity and resistance to rotting, warping, and insect damage, which can contribute to significant savings over time compared to traditional wood fencing. While initial costs may be higher for composite fencing materials, the reduced need for staining, painting, or repairs can lead to lower overall expenses in the long run. Composite fencing's superior durability means fewer replacements and repairs, making it a financially sound choice for those looking for a sturdy and cost-effective fencing option.
The initial cost of composite fencing installation varies based on factors such as fence height, design complexity, and the selected composite brand, with composite fencing generally offering a cost-effective solution in the long run.
When considering different composite brands, it's essential to evaluate not only the upfront costs but also the quality and durability offered, as higher-quality composites may result in lower maintenance expenses over time.
The maintenance costs of composite fencing are significantly lower compared to traditional wood fencing, as composite materials require minimal cleaning and upkeep for long-lasting performance and aesthetic appeal.
Composite fencing stands out for its durability and resistance to weathering, eliminating the need for frequent staining or painting. With composite materials, you won't have to worry about issues like rotting, warping, or insect damage that are common with wood fences.
This leads to substantial long-term cost savings as you avoid the expenses associated with regular maintenance tasks. Simplifying your maintenance routine, composite fencing can be easily cleaned with just soap and water, helping you maintain its pristine appearance effortlessly.
In a long-term cost comparison, composite fencing proves to be a cost-effective option due to its exceptional durability, reduced maintenance costs, and longevity, offering a compelling value proposition for property owners seeking sustainable fencing solutions.
The durability of composite fencing sets it apart from traditional materials like wood or vinyl, as it is resistant to rot, decay, and insect damage, thereby reducing the need for costly repairs and replacements over time. This translates into significant savings for homeowners in terms of both material expenses and labor costs. When considering the overall value proposition, composite fencing emerges as a smart investment that not only enhances the aesthetics of a property but also pays off in terms of long-lasting performance and cost efficiency.
Table Of Contents
Are you considering adding a fence to your landscaping but unsure where to start?
In this guide, Usual House explores the reasons why using fences in landscaping is beneficial, such as providing privacy, security, and protection from wildlife.
We also discuss different types of fences to consider, including wooden, vinyl, metal, and wire options.
We cover important factors to consider when choosing a fence, installation tips, and maintenance and care advice to keep your landscaping fences looking their best. Whether you're looking to enhance your property's aesthetics or create a safe and secure outdoor space, this article has got you covered.

Fences play a pivotal role in landscaping, offering a blend of privacy, security, and aesthetic enhancement to outdoor spaces like backyards and gardens.
They serve as physical barriers that not only keep unwanted intruders out but also provide a sense of seclusion and peace within the outdoor sanctuary.
By defining the property boundaries, fences help create a structured layout for landscaping while adding a layer of elegance to the overall decor.
The sight of lush greenery intertwined with the backdrop of a well-designed fence can evoke a feeling of harmony and relaxation, making the outdoor area a true haven for unwinding and enjoying nature's beauty.
Fences are essential for ensuring privacy, security, and safety by clearly delineating property boundaries, containing pets, and creating a secure environment.
By establishing physical boundaries, fences play a crucial role in defining personal space and preventing unauthorized access to one's property. In addition to keeping pets safely contained within the confines of the yard, fences act as a barrier to deter intruders and trespassers, thereby boosting the overall safety of the premises. For families with children, fences serve as a protective shield, granting parents peace of mind by creating a secure outdoor space where kids can play freely without the risk of wandering off or encountering potential hazards.
Fences significantly enhance the aesthetics and curb appeal of a property, serving as decorative features that blend seamlessly with outdoor decor and natural elements.
They not only provide a sense of structure and privacy but also contribute to the overall design harmony of the outdoor space. By choosing the right style and material for a fence, homeowners can create a unified look that complements the existing landscaping and exterior features. Incorporating elements like climbing vines or colorful flowers along the fence can further elevate the visual appeal of the property, adding a touch of natural beauty and charm to the surroundings. Well-designed fences can define boundaries while also enhancing the overall ambiance of the outdoor area.
Fences act as protective barriers, safeguarding gardens and outdoor spaces from wildlife intrusion, and ensuring the safety of plants and landscapes such as hedges, shrubs, and flowers.
These structures play a crucial role in deterring animals like rabbits, deer, and rodents from causing extensive damage to cherished plantings. By creating a physical boundary, fences help maintain the integrity of outdoor areas, providing a sense of security and peace of mind for garden enthusiasts. They serve as a visual boundary, enhancing the aesthetic appeal of the landscape by defining distinct areas and highlighting the beauty of the surrounding greenery.

Various types of fences are available for landscaping, including wooden fences, vinyl fences, metal fences, and wire fences, each offering unique benefits and design options.
Wooden fences are favored for their classic and natural appearance, enhancing the rustic charm of a garden or property. They can be stained or painted to match different styles, offering versatility in design.
Vinyl fences, on the other hand, are low maintenance and durable, available in various colors and styles to complement modern or traditional settings.
Metal fences are known for their strength and security, coming in ornate designs for a sophisticated look.
Wire fences, such as chain-link or mesh, provide a cost-effective option for boundary marking and are easily customizable.
Wooden fences are popular for their durability and natural appeal, complementing outdoor spaces with a classic look that can be enhanced through staining and regular maintenance.
Their longevity is one of the key features that make them a preferred choice for many homeowners who seek a fence that can withstand the test of time. With proper care, such as regular staining to protect against weathering and repairs to address any damage, wooden fences can last for decades. Beyond their practicality, these fences also offer a timeless aesthetic that effortlessly blends with various outdoor landscapes, adding a touch of warmth and traditional charm to any property.

Vinyl fences are a popular choice for landscaping due to their easy installation, maintenance-free nature, and eco-friendly composition that offers a sustainable fencing solution.
Their low maintenance requirements make them an ideal solution for homeowners looking to enhance their outdoor space without the hassle of constant upkeep. Vinyl fences are known for their durability, ability to withstand harsh weather conditions and resist fading, rotting, or warping. Their environmental friendliness makes them a standout choice for those wanting to prioritize sustainability in their landscaping projects.
What sets vinyl fences apart is the ease of installation, allowing for a quick and efficient set-up that minimizes disruptions. Replacement options for vinyl fences are also readily available, providing flexibility for homeowners to refresh or change their fencing without significant hassle, contributing to sustainable landscaping practices.

Metal fences provide a blend of style and functionality, offering weather-resistant properties, security features, and customizable design options such as gates for enhanced accessibility.
In landscaping, the versatility of metal fences shines through, their durability and strength making them a popular choice for homeowners and commercial properties alike. With various styles available, from classic wrought iron to modern sleek designs, these fences can complement any architectural style.
One of the key benefits is the low maintenance required, as metal fences only need occasional cleaning to maintain their appearance. The inclusion of gates not only adds a decorative element but also serves a practical purpose, providing added security and privacy to the property."
Wire fences offer practical solutions for landscaping, serving as effective barriers that can provide privacy, windbreak, noise reduction, and customizable height options based on the desired functionality.
These versatile wire fences are commonly used to create privacy screens in outdoor spaces, such as garden boundaries or around swimming pools, allowing individuals to enjoy their personal spaces without unwanted intrusion. Wire fences can serve as efficient windbreaks, helping to protect plants and structures from strong winds, thereby promoting a healthier and more stable environment. By carefully selecting the appropriate fence heights, these structures can effectively block unwanted views, reduce noise levels, and enhance the overall aesthetics of a landscape.
Several critical factors should be considered when selecting a fence for landscaping, including budget constraints, intended purpose, maintenance needs, and compliance with local regulations and restrictions.
Budget constraints play a significant role in choosing the right fence for your landscaping needs. It's essential to determine how much you are willing to invest in your fence project, as this will guide your options.
From there, you must evaluate the intended purpose of the fence - whether it is for security, privacy, aesthetic appeal, or a combination of these. Maintenance preferences also matter; some materials may require more upkeep than others.
Local regulations regarding fence height, material, and location should not be overlooked to avoid any future issues.
Budget considerations play a crucial role in selecting a fence for landscaping, as they impact the overall cost, long-term maintenance, and the choice of budget-friendly yet durable solutions.
It is essential to find a balance between initial expenses and future upkeep when deciding on a fence that fits within your financial constraints.
Opting for cost-effective materials like vinyl or chain-link fences can offer a durable and low-maintenance solution that is both affordable and long-lasting.
By carefully evaluating the upfront investment against the potential savings in maintenance and repair costs over time, homeowners can make a smart choice that not only enhances their property but also aligns with their budgetary considerations.
Discover: How Much Does Glass Pool Fencing Cost
Determining the purpose of the fence is essential when landscaping, as it can add value to the property, enhance aesthetics, improve safety, and serve functional roles like pet containment.
When strategically aligned with landscaping goals, a fence can truly transform the outdoor space. A well-designed fence not only delineates boundaries but also complements the overall design of the landscape. By integrating the right materials and style, a fence can become a focal point, enhancing the visual appeal of the property. Fences provide a sense of security and privacy, creating a safe environment for families and pets to enjoy.
For pet owners, a properly installed fence offers peace of mind by containing their furry companions within the designated area.
Understanding the maintenance needs of a fence is crucial for its longevity and appearance, involving tasks like staining, painting, and protection against weather elements and pests.
Investing time and effort in proper maintenance can significantly prolong the lifespan and enhance the curb appeal of your fencing.
Compliance with local regulations and restrictions is paramount when installing a fence for landscaping, necessitating adherence to fence permit requirements, height regulations, and neighborhood guidelines.
This approach ensures that your fence project not only aligns with legal standards but also respects the aesthetics and rules of your community. Obtaining the necessary permits helps streamline the process, avoiding potential fines, delays, or issues in the future. By following height restrictions, you maintain the safety and privacy aspects of the fence while blending harmoniously with the surroundings. Conforming to neighborhood guidelines fosters good relationships with neighbors and upholds the overall visual appeal of the area.
Proper installation is key to the success of landscaping fences, requiring careful consideration of DIY options, professional installation services, and adherence to a systematic installation process.
Professionals say that one of the primary benefits of opting for a professional installation service for your landscaping fence is the expertise and precision that professionals bring to the project. Professional installers have the knowledge and experience to assess the specific needs of your landscape, recommend the most suitable fence materials, and ensure that the fence is erected with structural stability.
On the other hand, DIY installations can be a cost-effective option, allowing homeowners to save on labor costs. It's important to note that DIY installations may require more time and effort, as well as a steep learning curve for those unfamiliar with fence construction.
Regardless of the approach chosen, ensuring proper measurements, secure anchoring, and regular maintenance are essential to the long-term success of your landscaping fence.
Accurate measurement and marking of the fence line are crucial steps in landscaping projects, ensuring precise alignment with the property boundary and customization based on landscaping needs.
Selecting the right materials and tools is essential for landscaping fences, ensuring durability, customization options, and a personalized touch that enhances the overall design.
Durability is a key factor to consider when constructing a fence as it directly impacts the longevity of the structure. Choosing sturdy materials such as treated wood, vinyl, or metal can ensure that the fence withstands environmental elements and regular wear and tear.
The customization features available with different materials allow homeowners to tailor the fence to their specific needs and style preferences, whether opting for a traditional look or a more modern aesthetic. By selecting the appropriate materials, individuals can create a fence that not only serves its practical function but also adds to the overall beauty and curb appeal of their property.
Prioritizing safety precautions during fence installations is paramount, especially in DIY projects, where adherence to safety measures and the use of protective gear are crucial for injury prevention.
One of the key safety hazards to be mindful of when embarking on a fence installation project is the risk of cuts and punctures from sharp tools and materials. Wearing appropriate protective gear such as heavy-duty gloves, safety goggles, and sturdy footwear can significantly reduce the likelihood of such injuries.
Ensuring that the work area is clear of obstacles and debris can help prevent trips and falls, which are common risks during construction projects. Taking the time to plan out the installation process step by step and double-checking measurements can also minimize errors and the need for risky improvisations.
Routine maintenance and care are essential for preserving the integrity and appearance of landscaping fences, involving regular cleaning, inspections, and timely repairs to combat weather-related wear and tear.
Ongoing maintenance practices play a crucial role in not only enhancing the aesthetics of your outdoor space but also in ensuring the longevity and functionality of your fencing.
By conducting regular cleaning sessions, you can prevent the buildup of dirt, mold, and grime that can damage the material and compromise its strength.
Inspections help in identifying any weak spots or signs of deterioration early on, allowing you to take immediate action to address them before they escalate.
Timely repairs are imperative to combat weather-related damage, such as rotting due to excessive moisture or warping caused by prolonged exposure to the sun.
Regular cleaning and inspection routines are crucial for maintaining the appearance and functionality of landscaping fences, promoting a well-kept outdoor space and optimal performance with low maintenance options.
By incorporating regular cleaning and inspections into your routine, you can prevent the build-up of dirt, grime, and other debris that can detract from the beauty of your landscaping. These tasks are not solely about aesthetics; they play a vital role in ensuring that your fence remains structurally sound over time. Opting for low-maintenance solutions such as using durable materials or applying protective coatings can simplify upkeep tasks and enhance the longevity of your fence. Consistent care will not only preserve the charm of your outdoor area but also contribute to the overall value of your property.
Timely repairs and replacements are essential for addressing wear and tear issues in landscaping fences, requiring attention to fence repair techniques and the selection of durable materials for long-lasting solutions.
Safeguarding landscaping fences against weather elements and pests is essential for their longevity and performance, involving protective measures like staining for weather resistance and garden protection against pests.
Applying weather-resistant treatments such as sealants can create a barrier against moisture infiltration, preventing rot and decay in the fence materials.
Regular inspections and maintenance, including replacing damaged boards promptly, can deter pest nesting and infestations that may compromise the structural integrity of the fence.
Employing natural pest control methods like planting pest-repelling plants around the perimeter of the garden can act as a preventive measure, reducing the likelihood of invasive insects damaging the fence or surrounding greenery.
Table Of Contents
Leather car seats are a luxurious and stylish addition to any vehicle, but they require regular maintenance to keep them looking their best. Proper cleaning not only enhances the appearance of your car's interior but also helps to prolong the life of the leather.
In this comprehensive guide, we will cover everything you need to know about cleaning and maintaining leather car seats, including the tools and materials required, the best cleaning products to use, and step-by-step instructions for deep cleaning. We'll discuss how often you should clean your leather car seats and provide valuable tips for maintaining their pristine condition. Whether you're a car enthusiast or simply want to preserve the investment in your vehicle, this article will equip you with the knowledge to effectively care for your leather car seats.
Regular cleaning of leather car seats is crucial to maintain their quality and prolong their lifespan. Proper maintenance and care help protect the leather from stains, dirt, and grime, ensuring that the interior upholstery remains in top condition.
It also contributes to the overall aesthetics of the car's interior, enhancing its appeal and value. Regular cleaning prevents the accumulation of debris and oils that can lead to deterioration and cracking of the leather over time.
By investing a little time and effort into cleaning and conditioning leather car seats, you can significantly extend their longevity and keep them looking fresh and inviting for years to come.

Cleaning leather car seats requires a specific set of tools and materials to ensure effective maintenance and care. Key items include a vacuum, soft brush, mild soap, water, and a quality leather conditioner or protectant.
Selecting the right leather cleaner for car seats is essential to protect the interior upholstery and ensure effective maintenance. Professional cleaning products or recommended conditioners can provide optimal care for different types of leather.
They help in preserving the natural suppleness and luster of the leather, preventing it from drying out and cracking. Regular cleaning with suitable products also removes dirt, grime, and oils from the seats, thus maintaining a fresh and inviting interior.
The right cleaner can protect against UV damage and other environmental factors, prolonging the lifespan of the leather upholstery. Investing in the appropriate leather cleaner not only enhances the appearance of car seats but also ensures their durability and longevity.
Delve into: How To Clean Leather Stains On Purse
In addition to dedicated leather cleaners, mild soap, water, and specialized protectants can also be used for cleaning and maintaining leather car seats. These products are effective in addressing stains, dirt, and grime while providing essential care and protection.
Mild soap and water are gentle yet effective for removing surface dirt and light stains on leather car seats. They offer a budget-friendly alternative to dedicated leather cleaners.
Specialized protectants, such as leather conditioners and UV protectants, play a crucial role in maintaining the suppleness and appearance of the leather while safeguarding it from sun damage and aging. When used in combination, these alternative cleaning products can extend the lifespan and luster of leather upholstery in cars.
Deep cleaning of leather car seats requires specialized tools such as a vacuum, soft brush, and quality conditioner or protectant. These tools ensure thorough removal of dirt and grime while providing essential care to maintain the leather's quality.
A vacuum with a soft brush attachment effectively sucks up dirt and debris from the leather's crevices, ensuring a meticulous clean. Applying a quality conditioner or protectant not only restores moisture and suppleness to the leather but also forms a protective barrier against stains and UV damage. This comprehensive approach not only cleans the seats but also safeguards the leather, prolonging its lifespan and maintaining its luxurious appearance.

Cleaning leather car seats involves a systematic process that includes specific steps and techniques to ensure optimal care. Utilizing quality conditioner and protectant, while adhering to practical tips and do's and don'ts, is essential for effective leather maintenance.
This starts with gently vacuuming the seats to remove any surface dirt and debris. Then, a mild leather cleaner should be applied using a soft-bristled brush to prevent scratching. After wiping away the cleaner with a damp cloth, it's crucial to thoroughly dry the seats. Once the leather is dry, applying a high-quality conditioner helps to keep it supple and prevent cracking. Regularly using a protectant can safeguard the leather from UV damage and stains, prolonging its lifespan. By following these steps and integrating effective techniques, one can maintain pristine leather car seats for years to come.
The initial step in cleaning leather car seats involves thorough vacuuming to remove any surface debris, stains, dirt, or grime. This process is essential for effective maintenance and care of the upholstery.
Vacuuming is crucial as it helps in getting rid of loose particles that can scratch and damage the leather surface over time. By removing these particles, you not only improve the appearance of the seats but also prevent potential wear and tear. Vacuuming prepares the leather for deeper cleaning and conditioning, ensuring that any further cleaning products can penetrate the material effectively. It sets the stage for a more thorough and successful cleaning process, ultimately extending the lifespan of your leather car seats.

Before proceeding with cleaning, it is important to test the selected cleaner on a small, inconspicuous area of the leather car seats. This precaution ensures that the cleaner is suitable for maintaining the upholstery and effectively addressing stains, dirt, and grime.
It is crucial to understand that different cleaners and products may have varying effects on leather upholstery. By conducting a small area test, you can assess the cleaner's impact on colorfastness and texture. This process also enables you to confirm that the cleaner does not cause any adverse reactions such as discoloration or damage. Ultimately, this simple step can prevent potential mishaps and ensure that the chosen cleaner is compatible with the car seats, promoting effective care, protection, and maintenance of the upholstery.
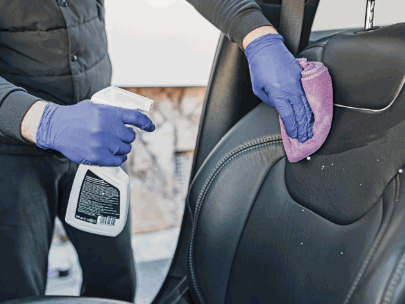
Applying the selected cleaner to the leather car seats is a critical step in addressing stains, dirt, and grime while ensuring essential care and protection for the upholstery. Proper application techniques contribute to maintaining the quality of the leather.
This process not only removes surface dirt but also penetrates the leather to eliminate embedded particles. Regular cleaning prevents the buildup of oils and debris, preserving the supple texture of the leather and extending its lifespan.
Beyond aesthetics, a clean and well-maintained interior also contributes to a more hygienic driving environment, reducing the risk of allergens and bacteria accumulation. Using specialized leather conditioners after cleaning helps to keep the upholstery supple and prevents cracking or drying out over time.

Gently scrubbing the seats with the appropriate tools and products is essential for effectively removing stains, dirt, and grime from the leather. This process contributes to maintaining the upholstery's quality and applying essential care and protection.
Regularly cleaning and treating the leather seats can help prevent premature wear and tear while preserving their luxurious appearance. By gently removing accumulated debris and stains, you not only restore the luster of the leather but also ensure that it remains supple and resistant to cracking. Using specialized leather conditioners and protectants after cleaning can further shield the seats from damage caused by sunlight, spills, and natural oils on the skin, thereby prolonging their lifespan and enhancing your driving experience.

Using a damp cloth to wipe down the leather car seats is crucial for removing excess cleaner and residual stains, dirt, or grime. This step contributes to providing essential care and protection for the upholstery.
The damp cloth not only helps in lifting off any remaining cleaning product but also ensures that any stubborn stains or dirt are properly addressed. Regularly wiping down the seats with a damp cloth can also prevent the buildup of grime and protect the leather from premature wear and tear. This process not only cleans the seats but also helps in maintaining the natural shine and texture of the leather, ultimately extending the life of your car's upholstery.

Thoroughly drying the leather car seats after cleaning is essential to ensure that the upholstery remains in optimal condition. Proper drying techniques contribute to providing essential care and protection for the leather.
Without proper drying, residual moisture can lead to the growth of mold and mildew, causing damage to the leather. Dampness can weaken the material, leading to cracks and discoloration over time. By ensuring thorough drying, the leather can maintain its softness, suppleness, and luxurious appearance, prolonging the lifespan of the car seats.
Proper drying helps to prevent water stains and water spots, preserving the aesthetic appeal of the upholstery. This crucial step in car seat maintenance is often overlooked, but it plays a significant role in upholding the quality of the leather and ensuring its longevity.

Establishing a regular maintenance schedule for cleaning leather car seats is crucial to prolong their lifespan, preserve quality, and ensure optimal care. The frequency of cleaning depends on usage and environmental factors.
Regular cleaning helps to prevent dirt, oils, and debris from accumulating and causing damage to the leather. For cars used daily or in dusty or humid environments, cleaning every two weeks is advisable. For lighter usage or more controlled environments, a monthly cleaning routine might suffice.
Using specialized leather cleaners and conditioners as recommended by the manufacturer can help maintain the leather's natural oils and prevent drying and cracking. Regularly vacuuming the seats and wiping them down with a damp microfiber cloth can remove surface dust and grime, contributing to the longevity of the upholstery."
Implementing practical tips and best practices is essential for maintaining clean leather car seats and ensuring their longevity. From avoiding food and drink spills to using quality conditioners, incorporating effective techniques contributes to preserving the upholstery.
Regularly vacuuming the seats and using a soft brush attachment on the leather can help remove dust and debris, preventing them from settling into the creases. It's also important to promptly address any spills or stains by blotting them with a clean, dry cloth to prevent them from setting into the leather.
Using a specialized leather conditioner designed for automotive use can help keep the seats supple and prevent cracking or fading over time.
A key best practice for maintaining clean leather car seats is to avoid eating or drinking in the car to prevent spills and stains on the upholstery. This proactive measure contributes to preserving the seats' quality.
It's important to be mindful of what is brought into the car and consumed to prevent potential accidents and damage to the leather. Even the smallest spills or stains can detract from the overall appearance and longevity of the upholstery. By refraining from eating and drinking in the car, you can ensure that your leather seats remain in pristine condition, ultimately extending their lifespan and enhancing the overall aesthetic of your vehicle interior.
Protecting leather car seats from direct sunlight is essential for preventing fading, aging, and potential cracking. Implementing this best practice contributes to maintaining the upholstery's quality and appearance.
This preventive measure not only safeguards the seats from sun-induced damage but also prolongs their lifespan. By using UV-protective products and regularly conditioning the leather, you can strengthen its resistance to sunlight exposure. Parking in shaded areas or utilizing car window sunshades can significantly reduce the harmful effects of UV rays. Consistently following these protective measures is crucial for preserving the luxurious look and feel of your leather car seats.
Regularly using a quality leather conditioner is crucial for protecting and maintaining car seats, as it helps prevent cracking, fading, and aging. This maintenance practice contributes to preserving the upholstery's integrity.
It's important to understand that car seats are subject to various environmental factors and regular use, which can lead to wear and tear over time. By applying a leather conditioner, you create a protective barrier that shields the material from harmful UV rays, moisture, and other sources of damage. In addition to protection, the conditioner moisturizes the leather, keeping it supple and preventing it from becoming brittle. This consistent care not only maintains the aesthetic appeal of the seats but also extends their lifespan, ultimately saving you from expensive repairs or replacements.